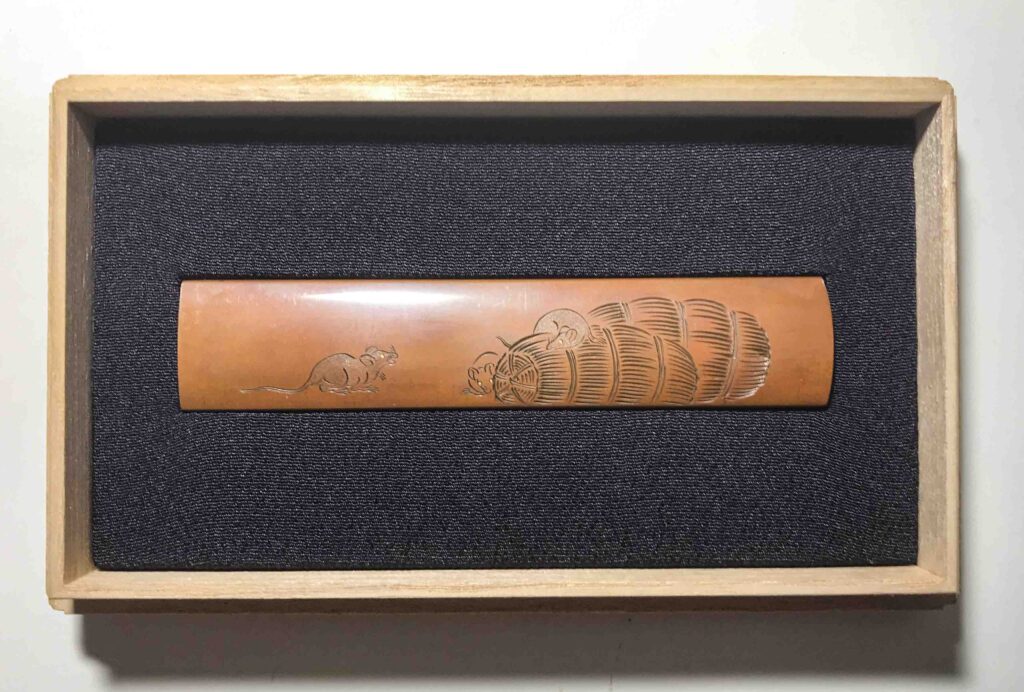
Traditionally Tsuba and Kodogu are stored in wooden boxes made from Kiri (Paulownia). Ordering a nice box together with the Dai (silk covered sheet) and cushion would cost something around 150 US Dollars at certain sword dealers. This seems quite reasonable compared to the work one has to put in to achieve the same result. However, it is quite a nice hobby to foster on long winter evenings and a very rewarding feeling when your item finally slips into the fitted slot or on the custom made Hesso in case of a Tsuba.
To avoid any discoloration of your item due to longterm storage, you want to use natural and acid free material, such as real silk cloth, acid free paper or cardboard and a glue which will bond well with the silk and wood. Furthermore, during the process of pressing the silk onto the glue you will have to have the utmost patience or else will you soak your beautiful Japanese silk in glue which will look horrible and ruin the process. At least this precious material allows you to have it washed gently, but you will have to start over from the beginning, more or less!
Always keep your piece of silk as far away from the glue as possible. I have made the experience that for some reason these two materials love each other and always find a chance to stick together.
I usually like it when the Kozuka sinks a bit into the slot and is held firmly. If you prefer a more loose Dai, you should reduce the cardboard thickness to 2 mm.
Materials
The following provides a rough breakdown of materials you will need. If you have any special questions about them, feel free to contact us.
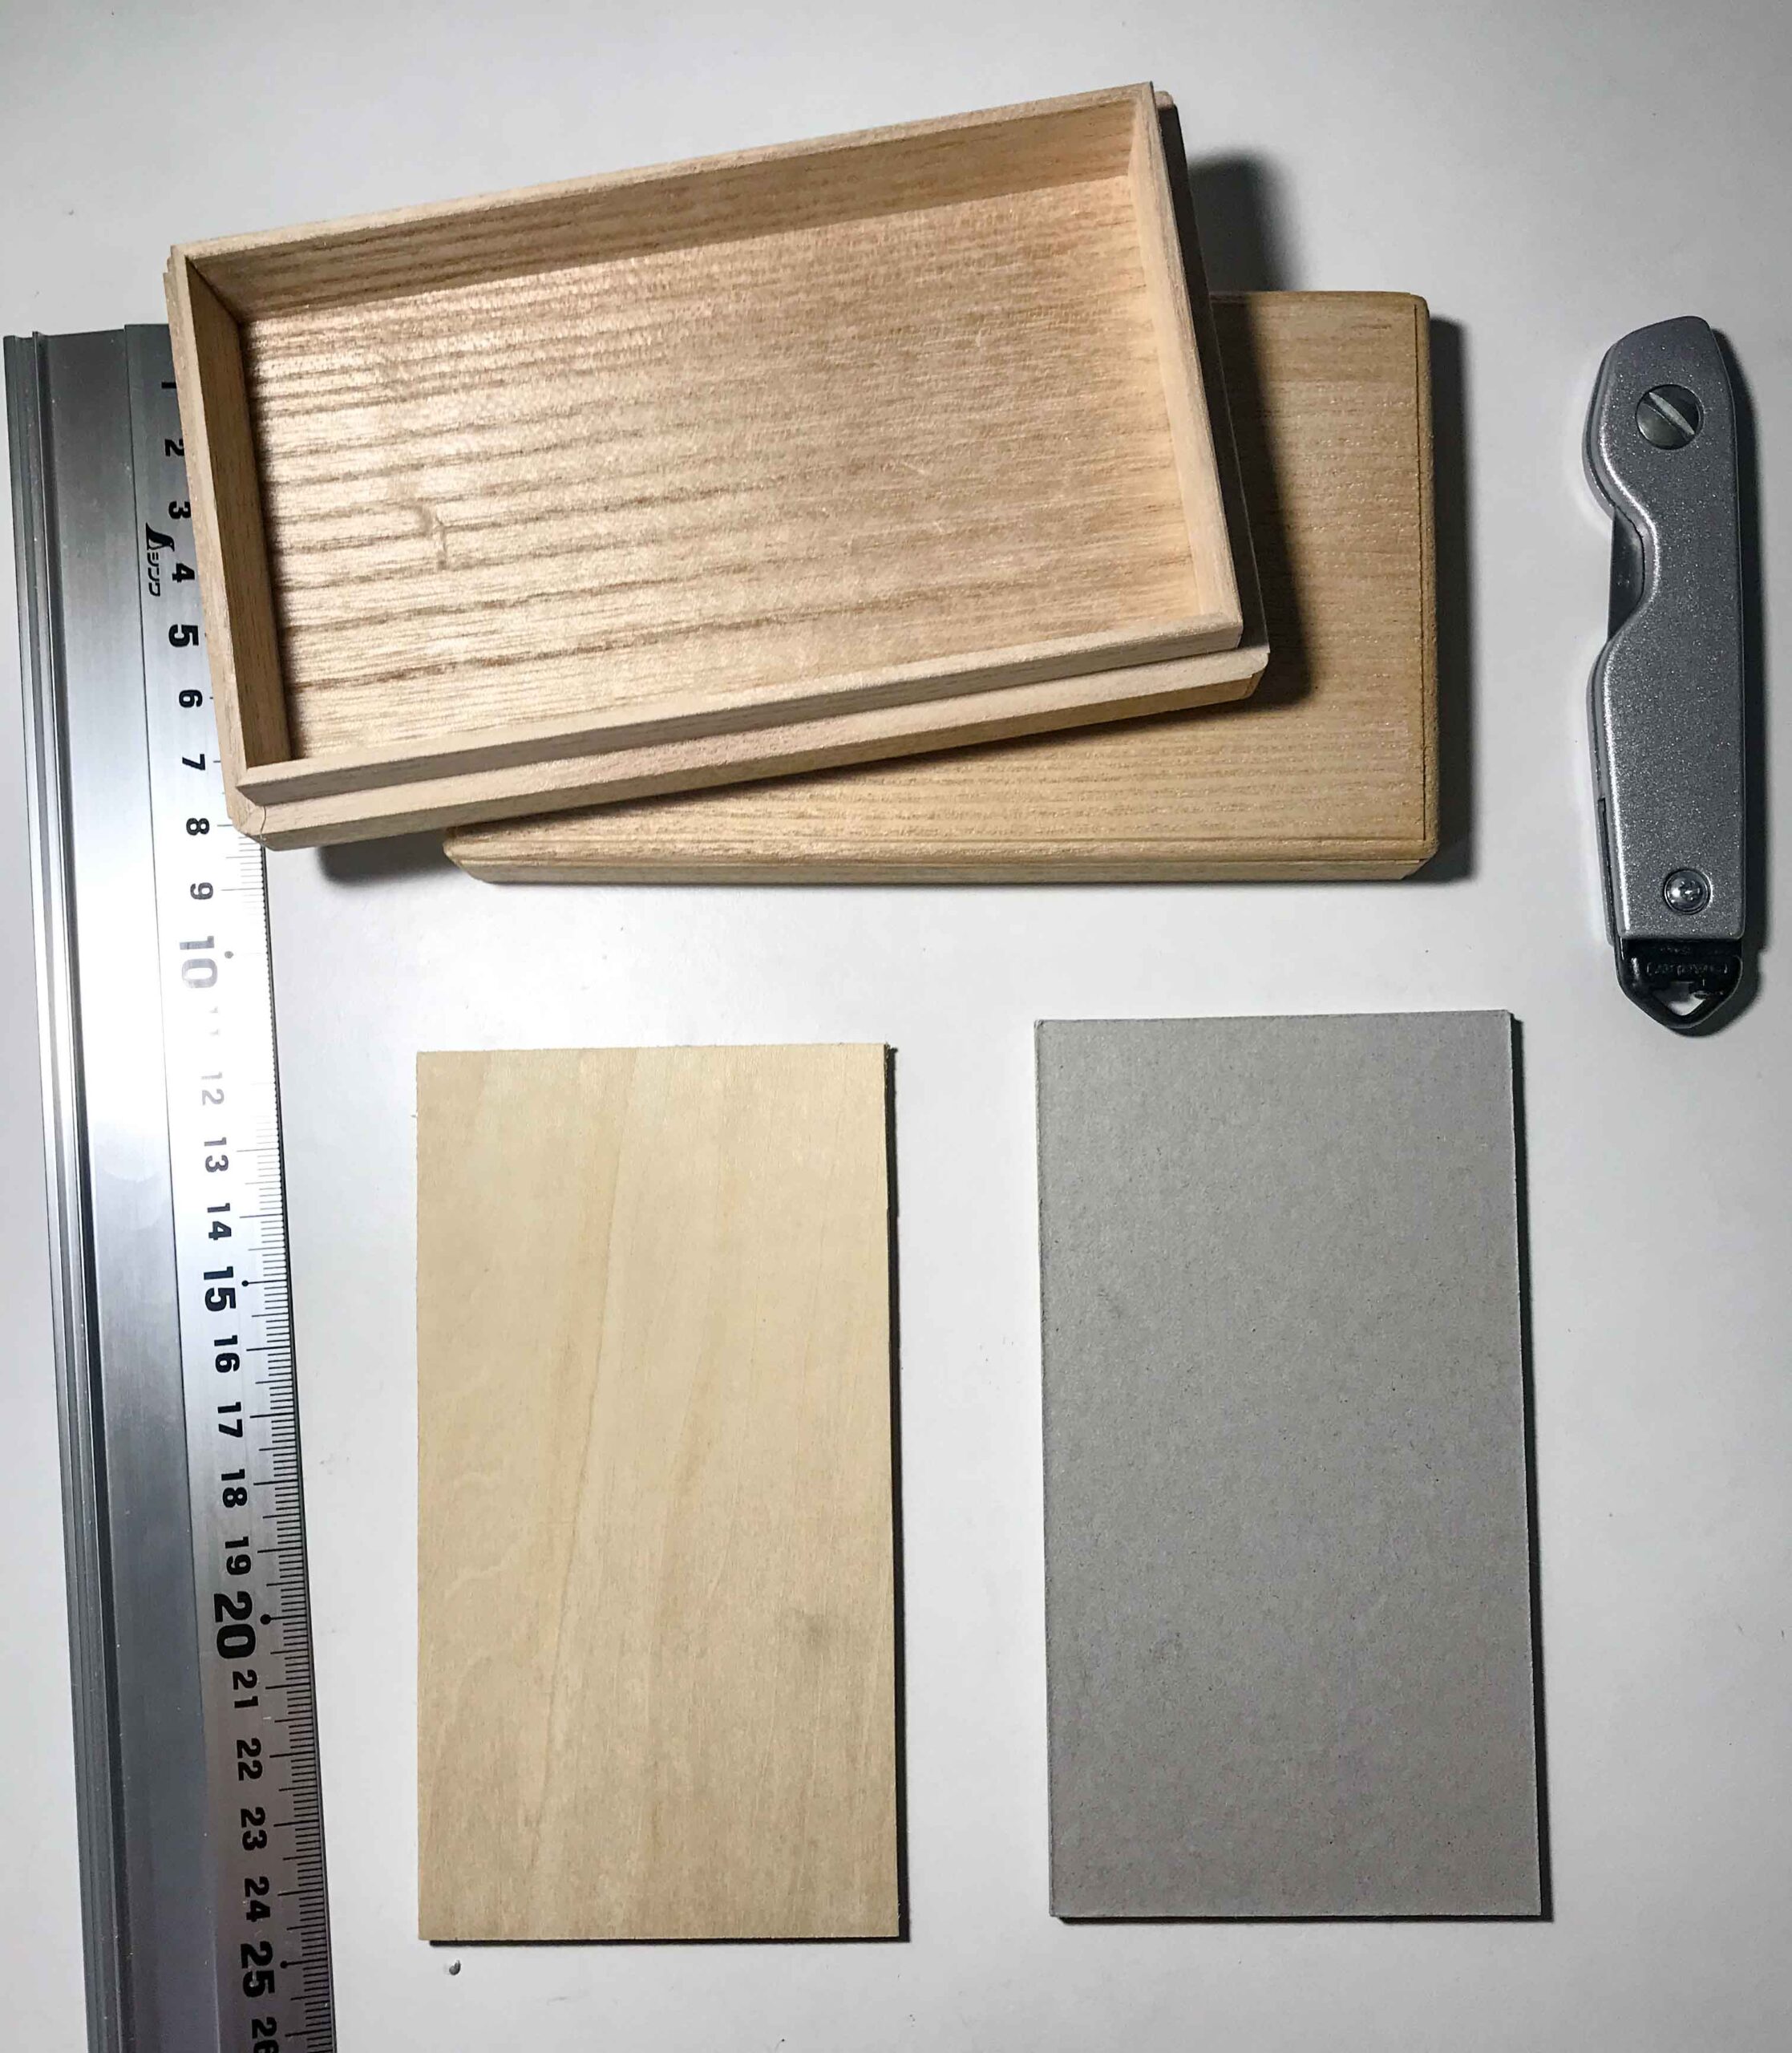
Kiri box (if you do not own a box yet, follow the process below which works for standard Kozuka boxes of high quality)
A wooden sheet (about 4 mm strength, 7 cm x 13 cm)
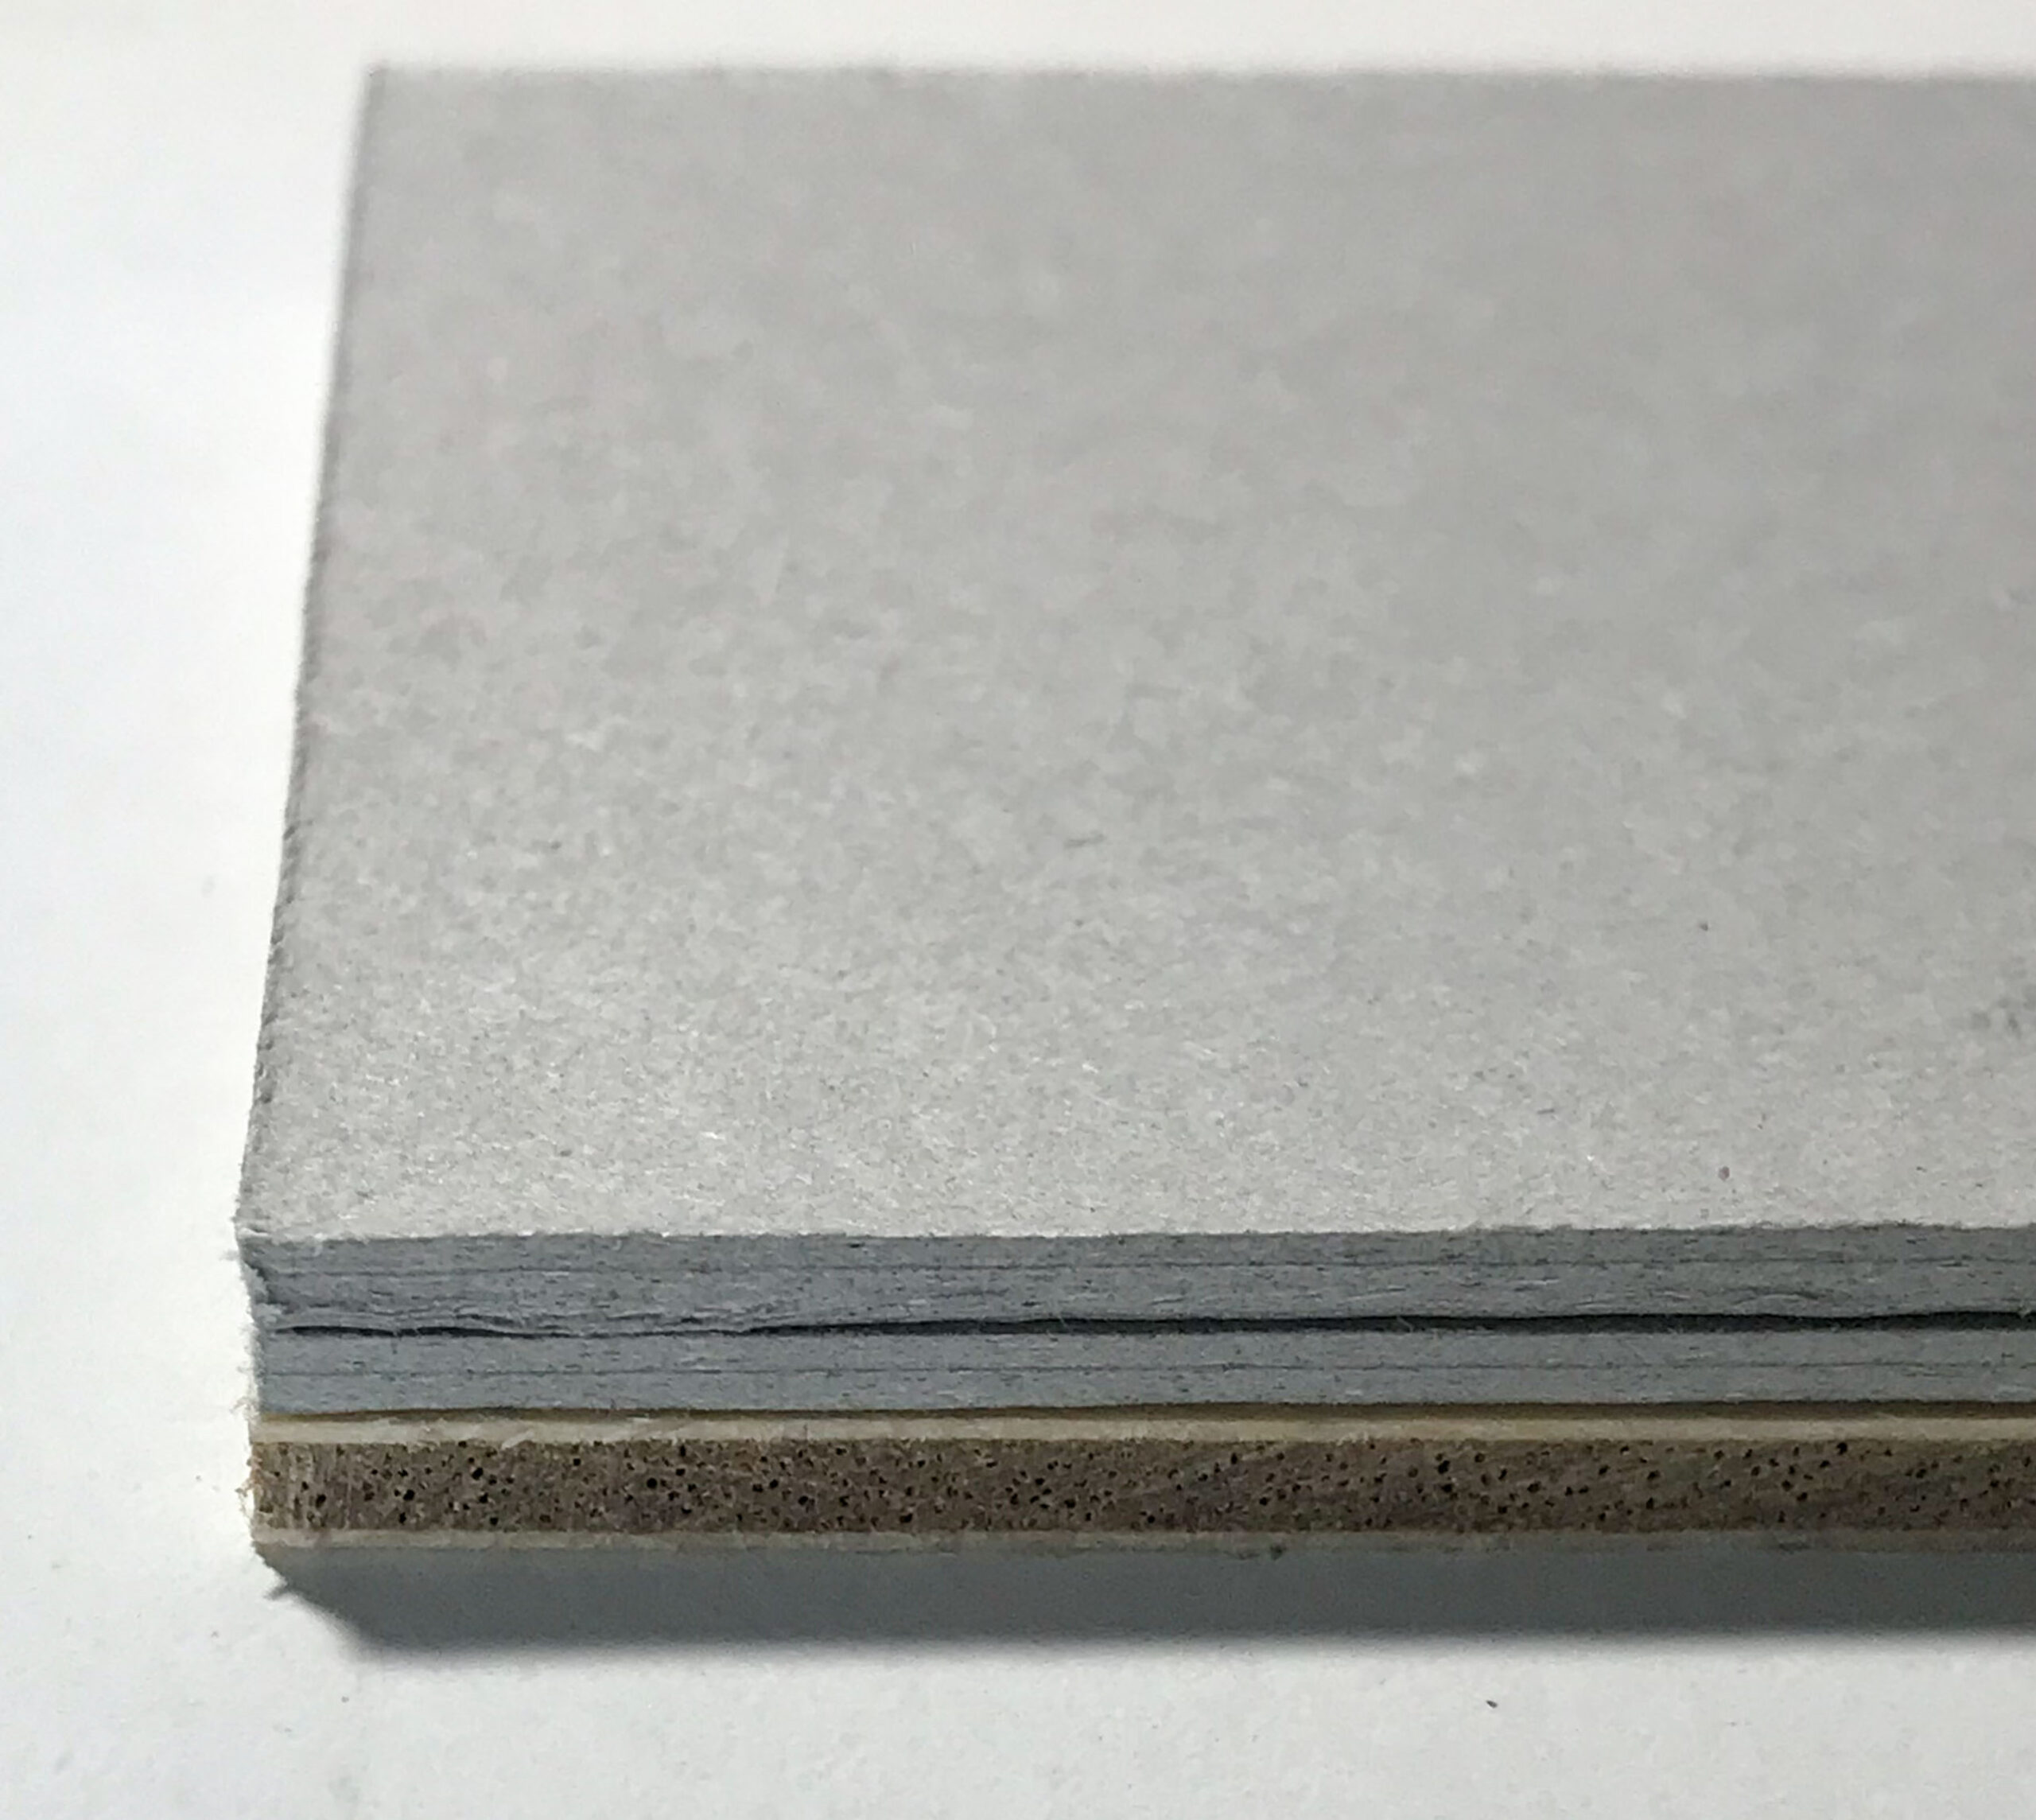
Acid free cardboard, two sheets (each about 2 mm strength, 7 cm x 13 cm)
Japanese silk (please do not use synthetics)
Japanese tissue paper, or thin wrapping paper (optional)
Ruler (you want your Kozuka to be aligned to the boxes edges!)
Cutting board
Building the DAI
Preparations
Cut the wooden sheet and cardboards to the correct size. 13 cm x 7 cm will fit a standard Kozuka and Menuki box.
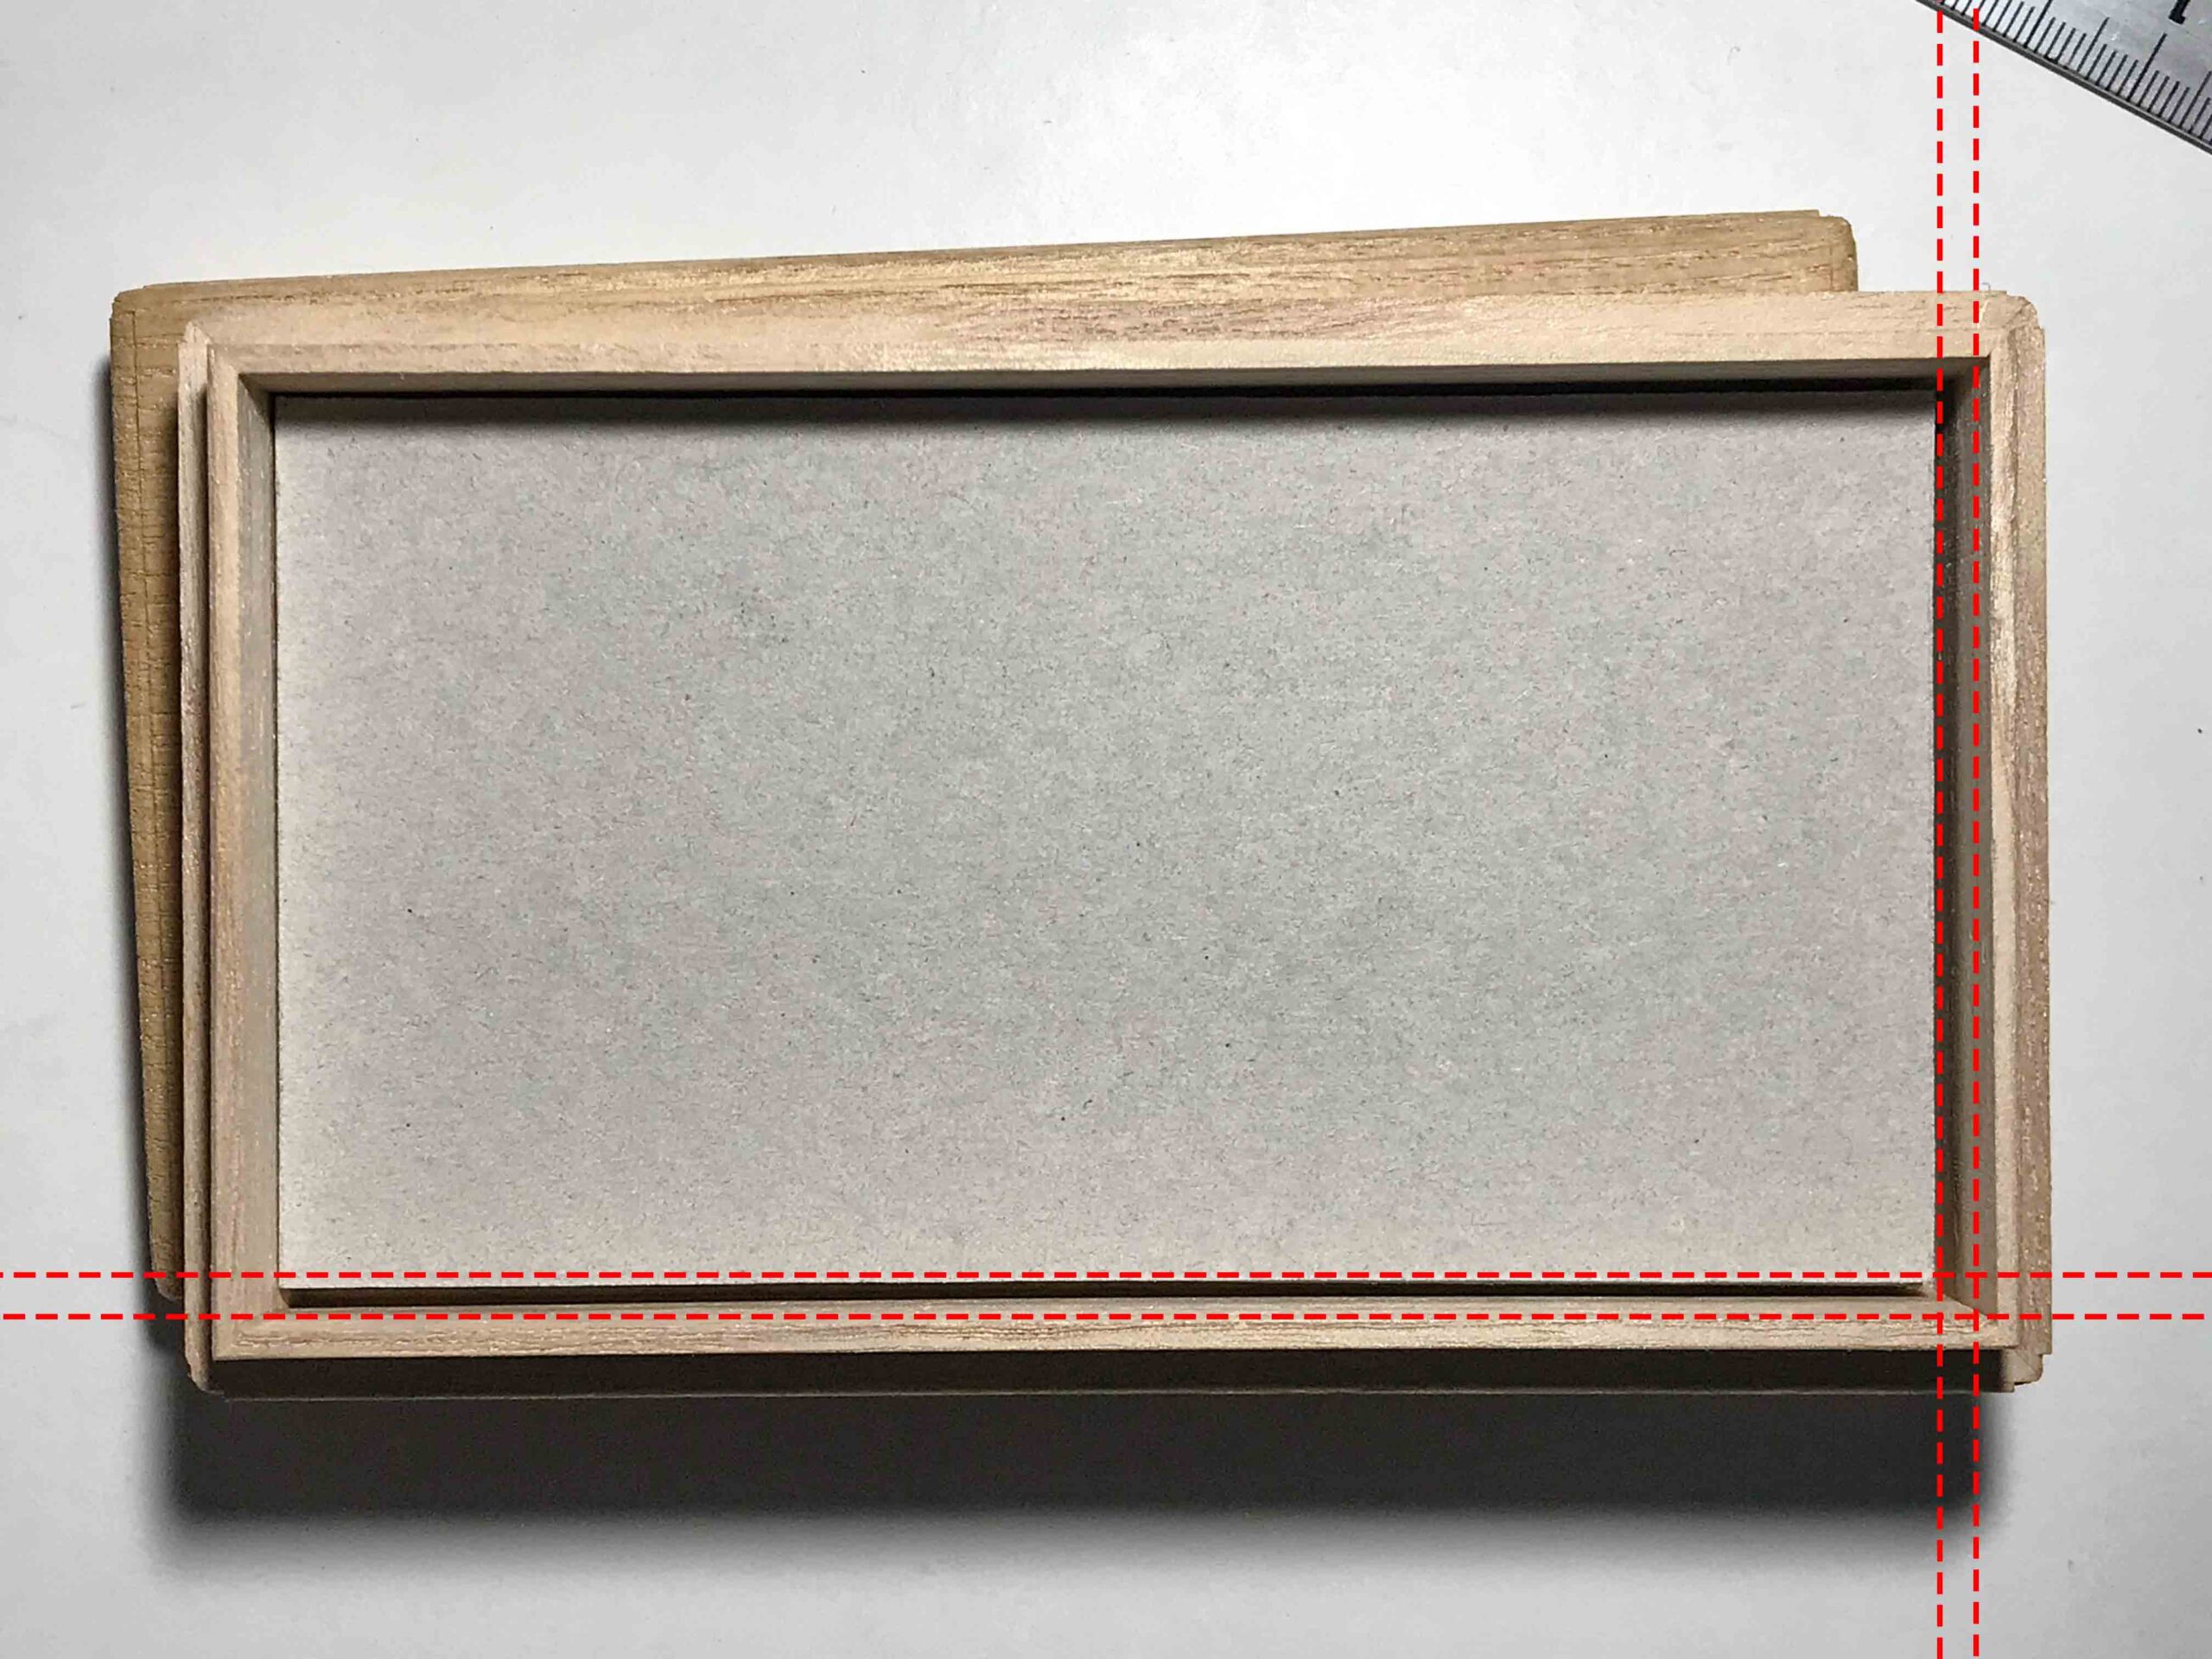
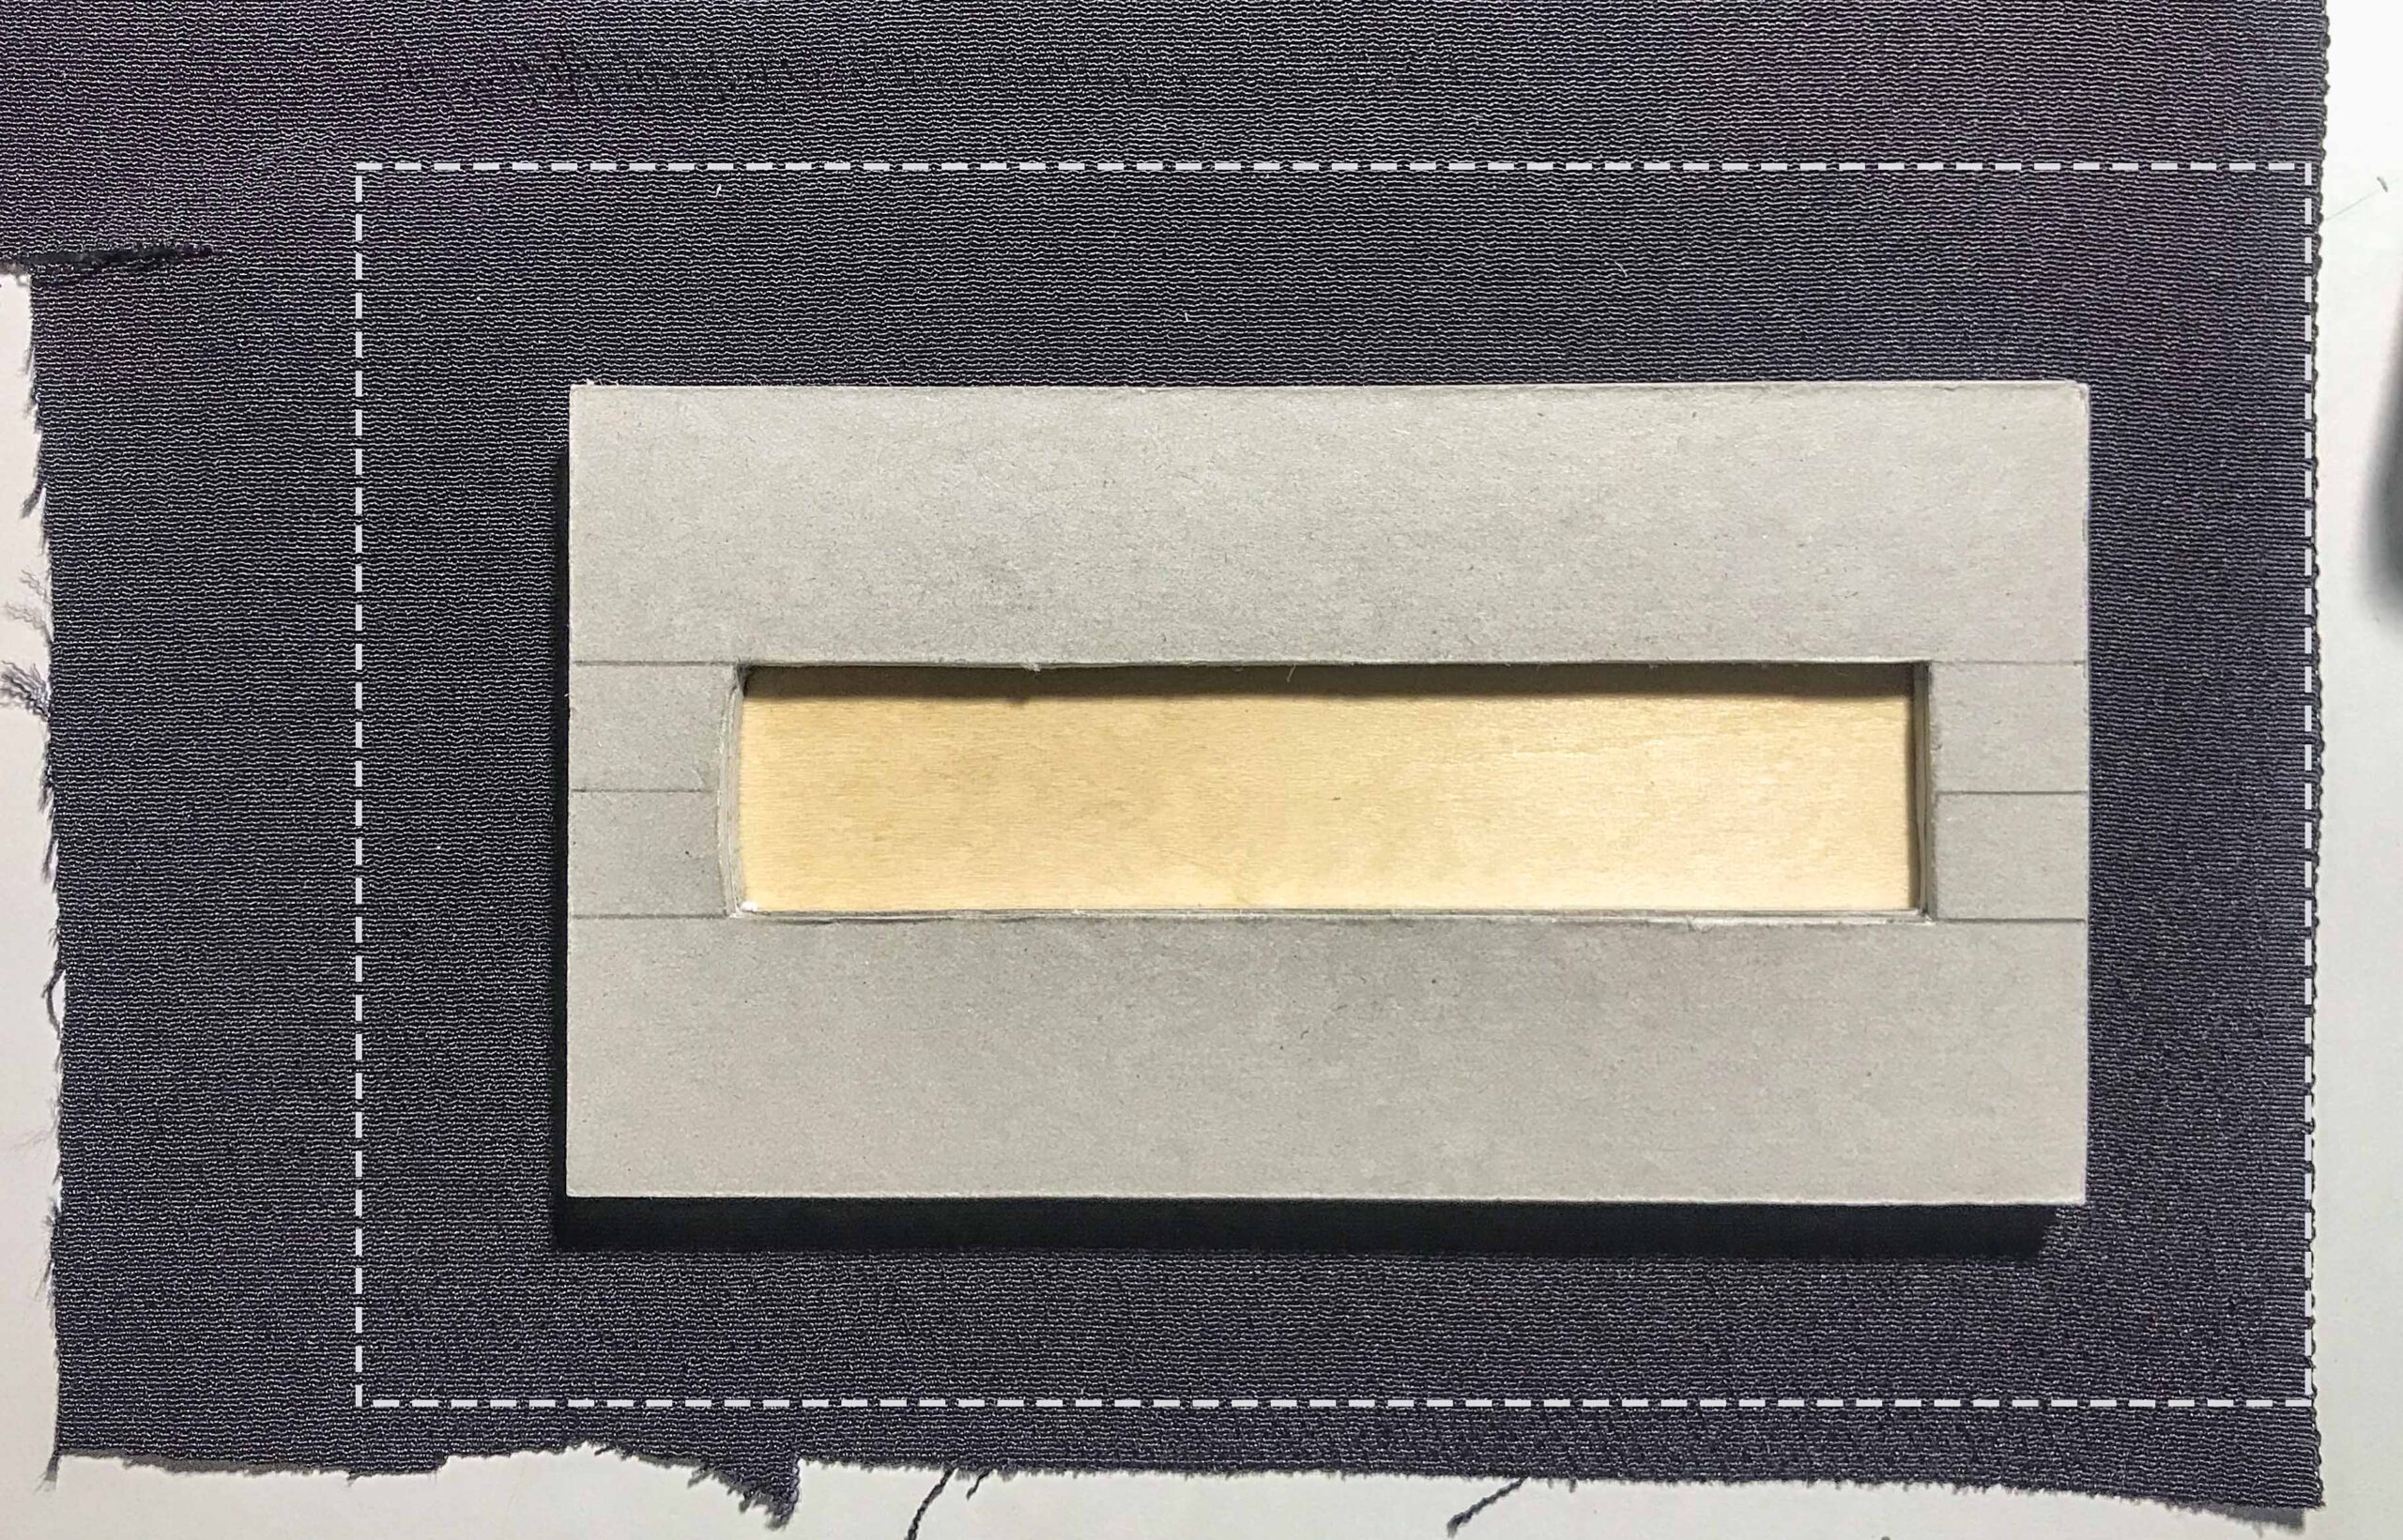
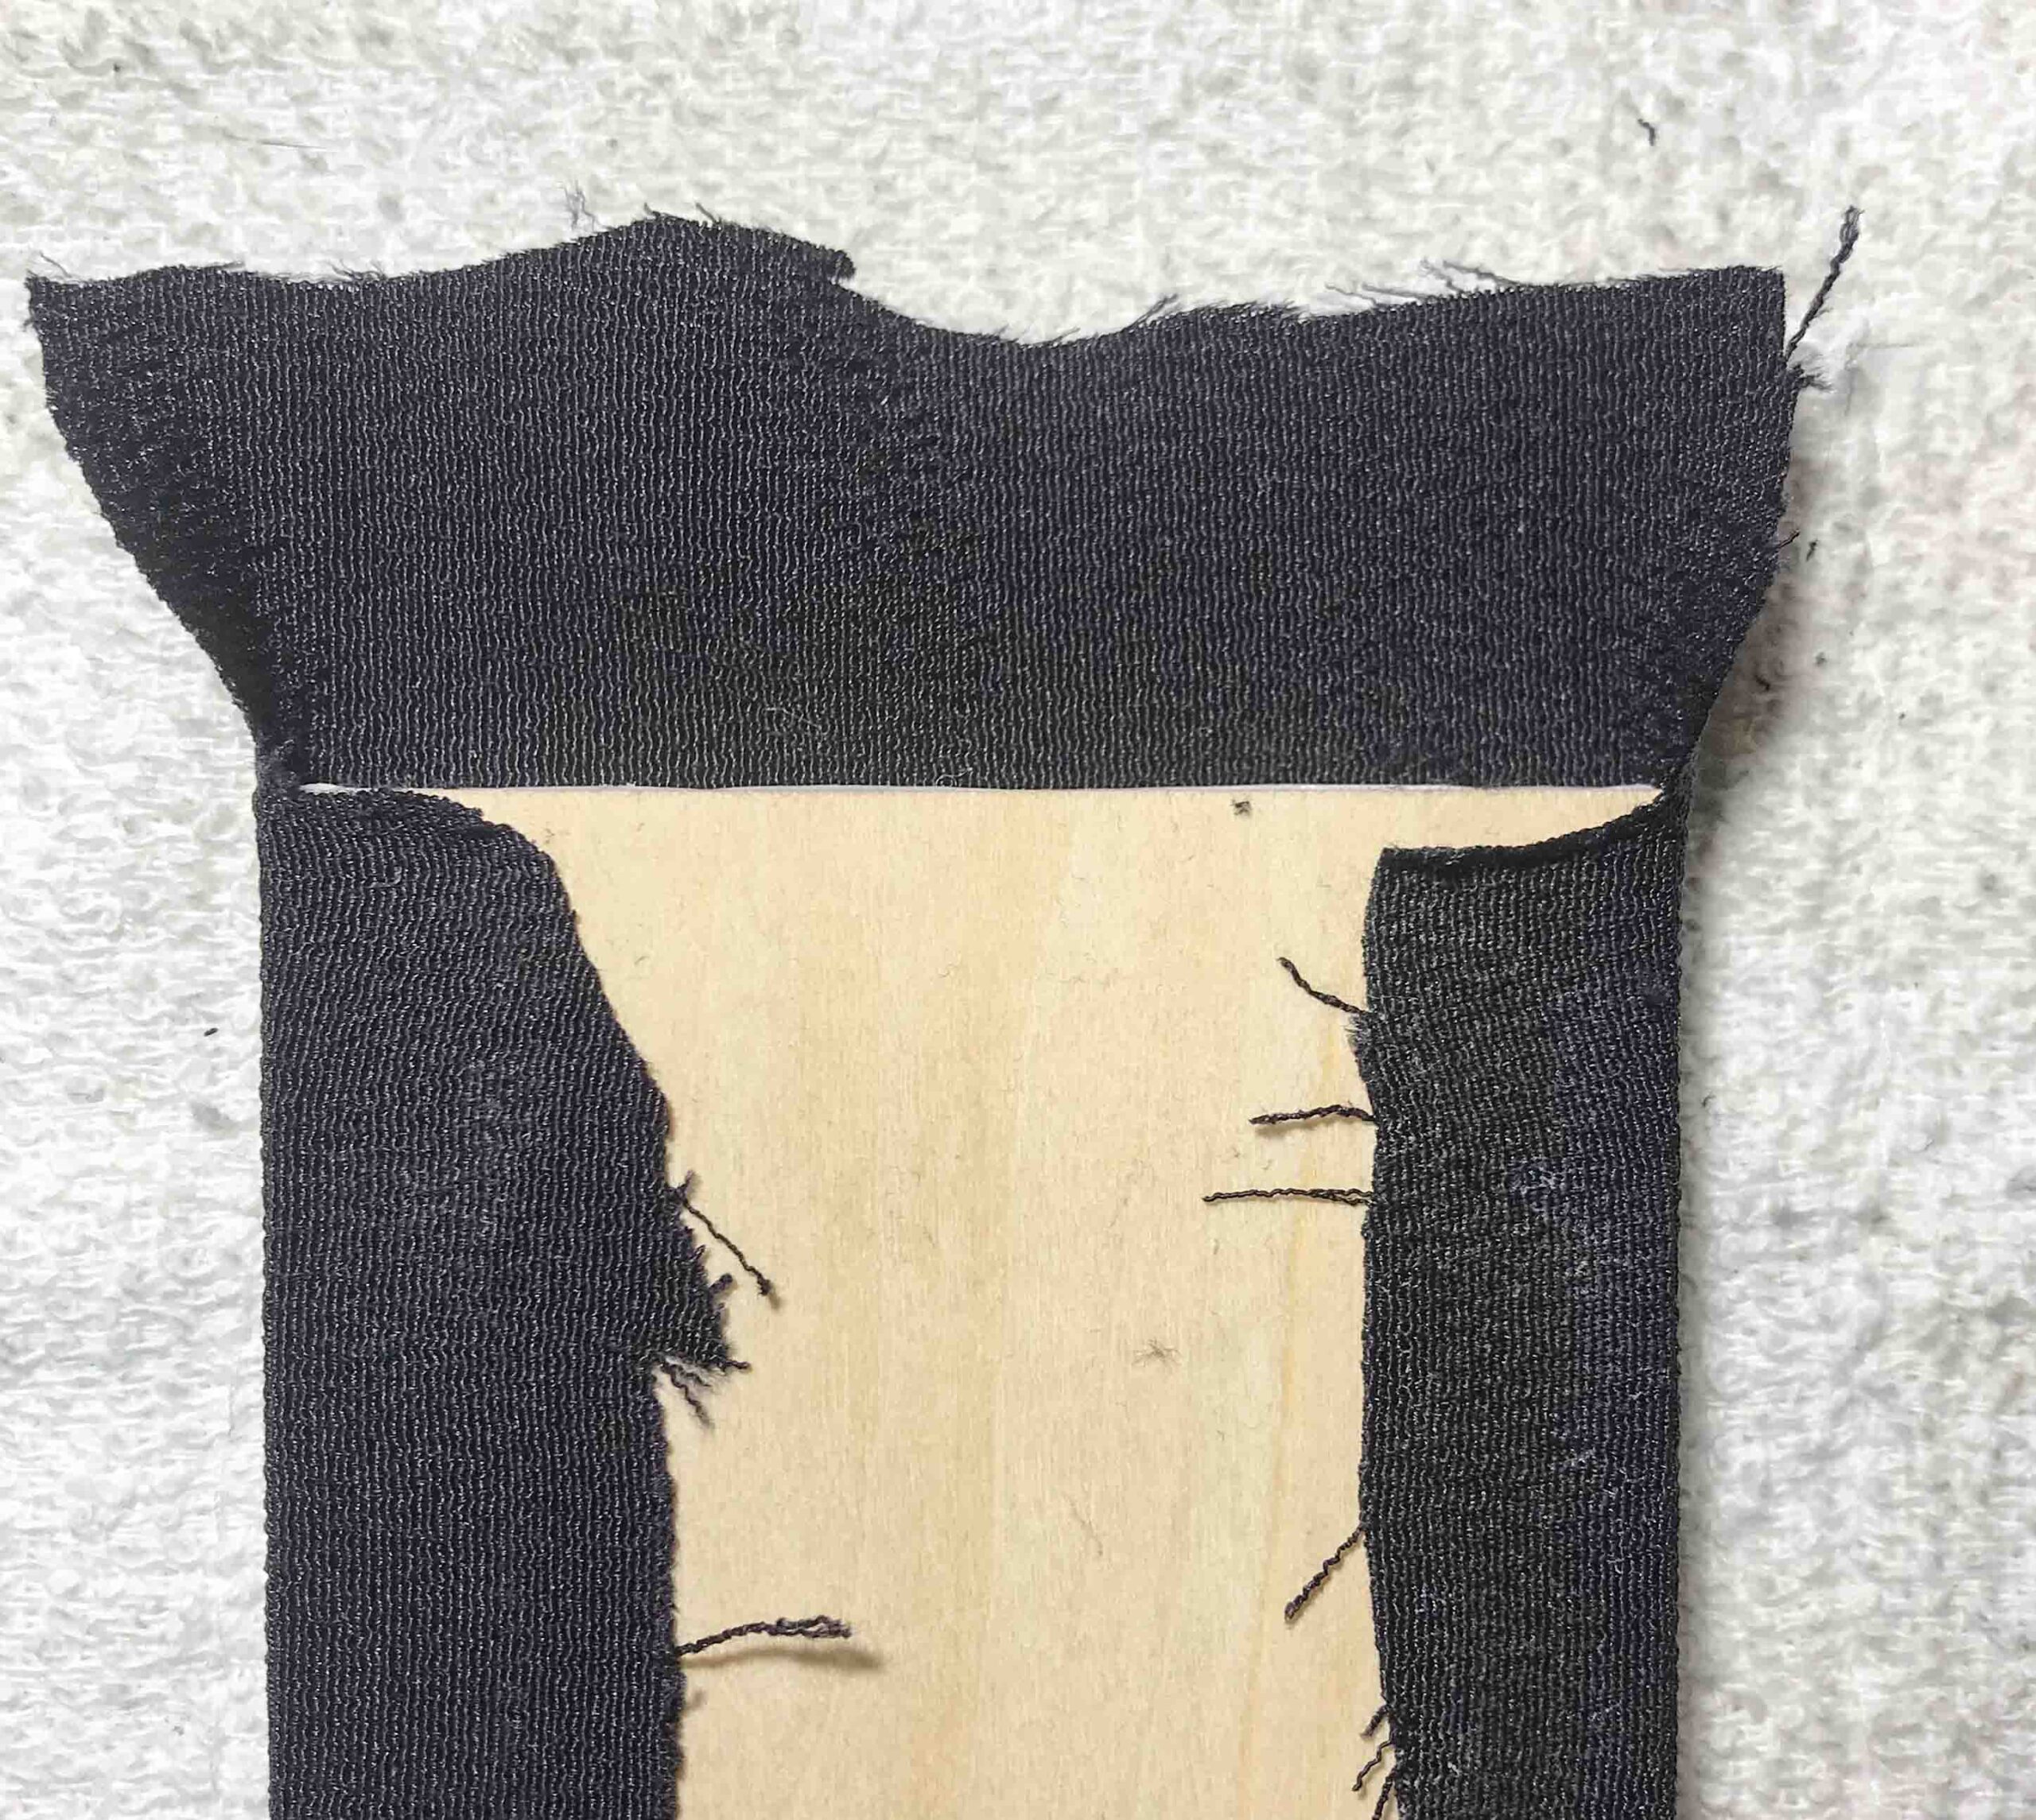
Make sure that there is about 2 mm gap between the inner box walls and the sheets (see pic. 3). If you do not allow enough space, the Dai will not fit anymore after the silk is applied!
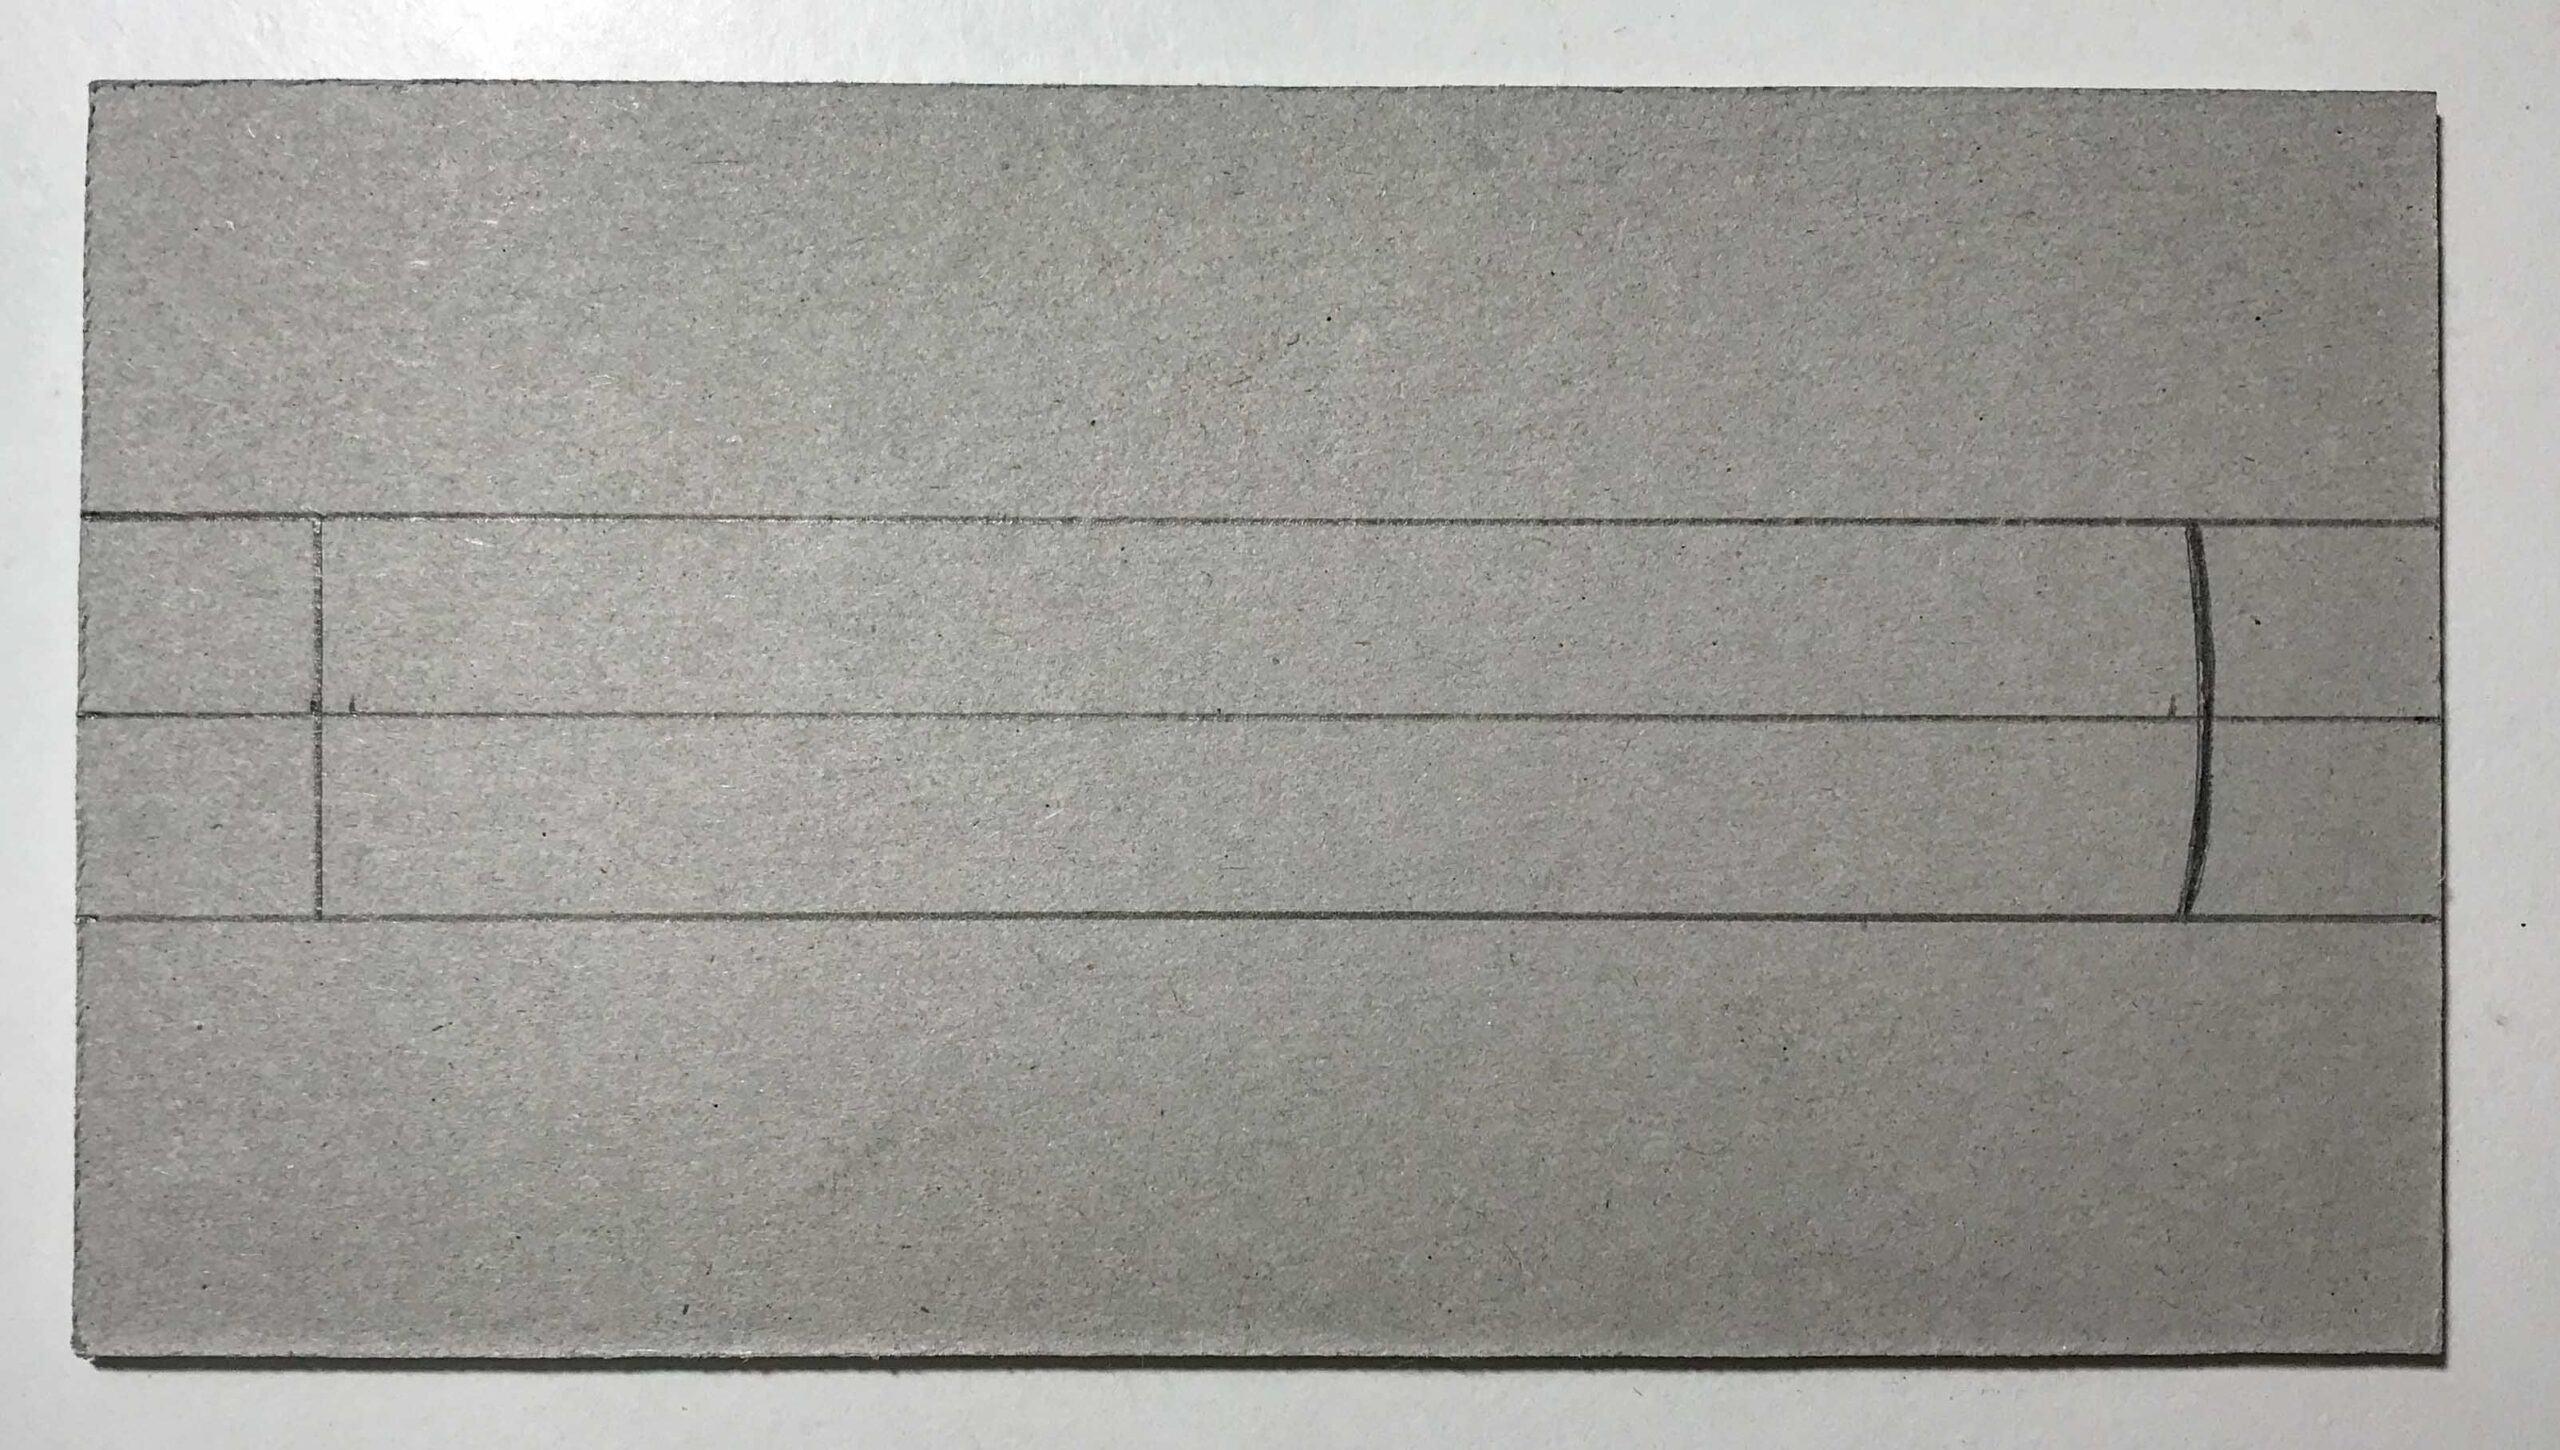
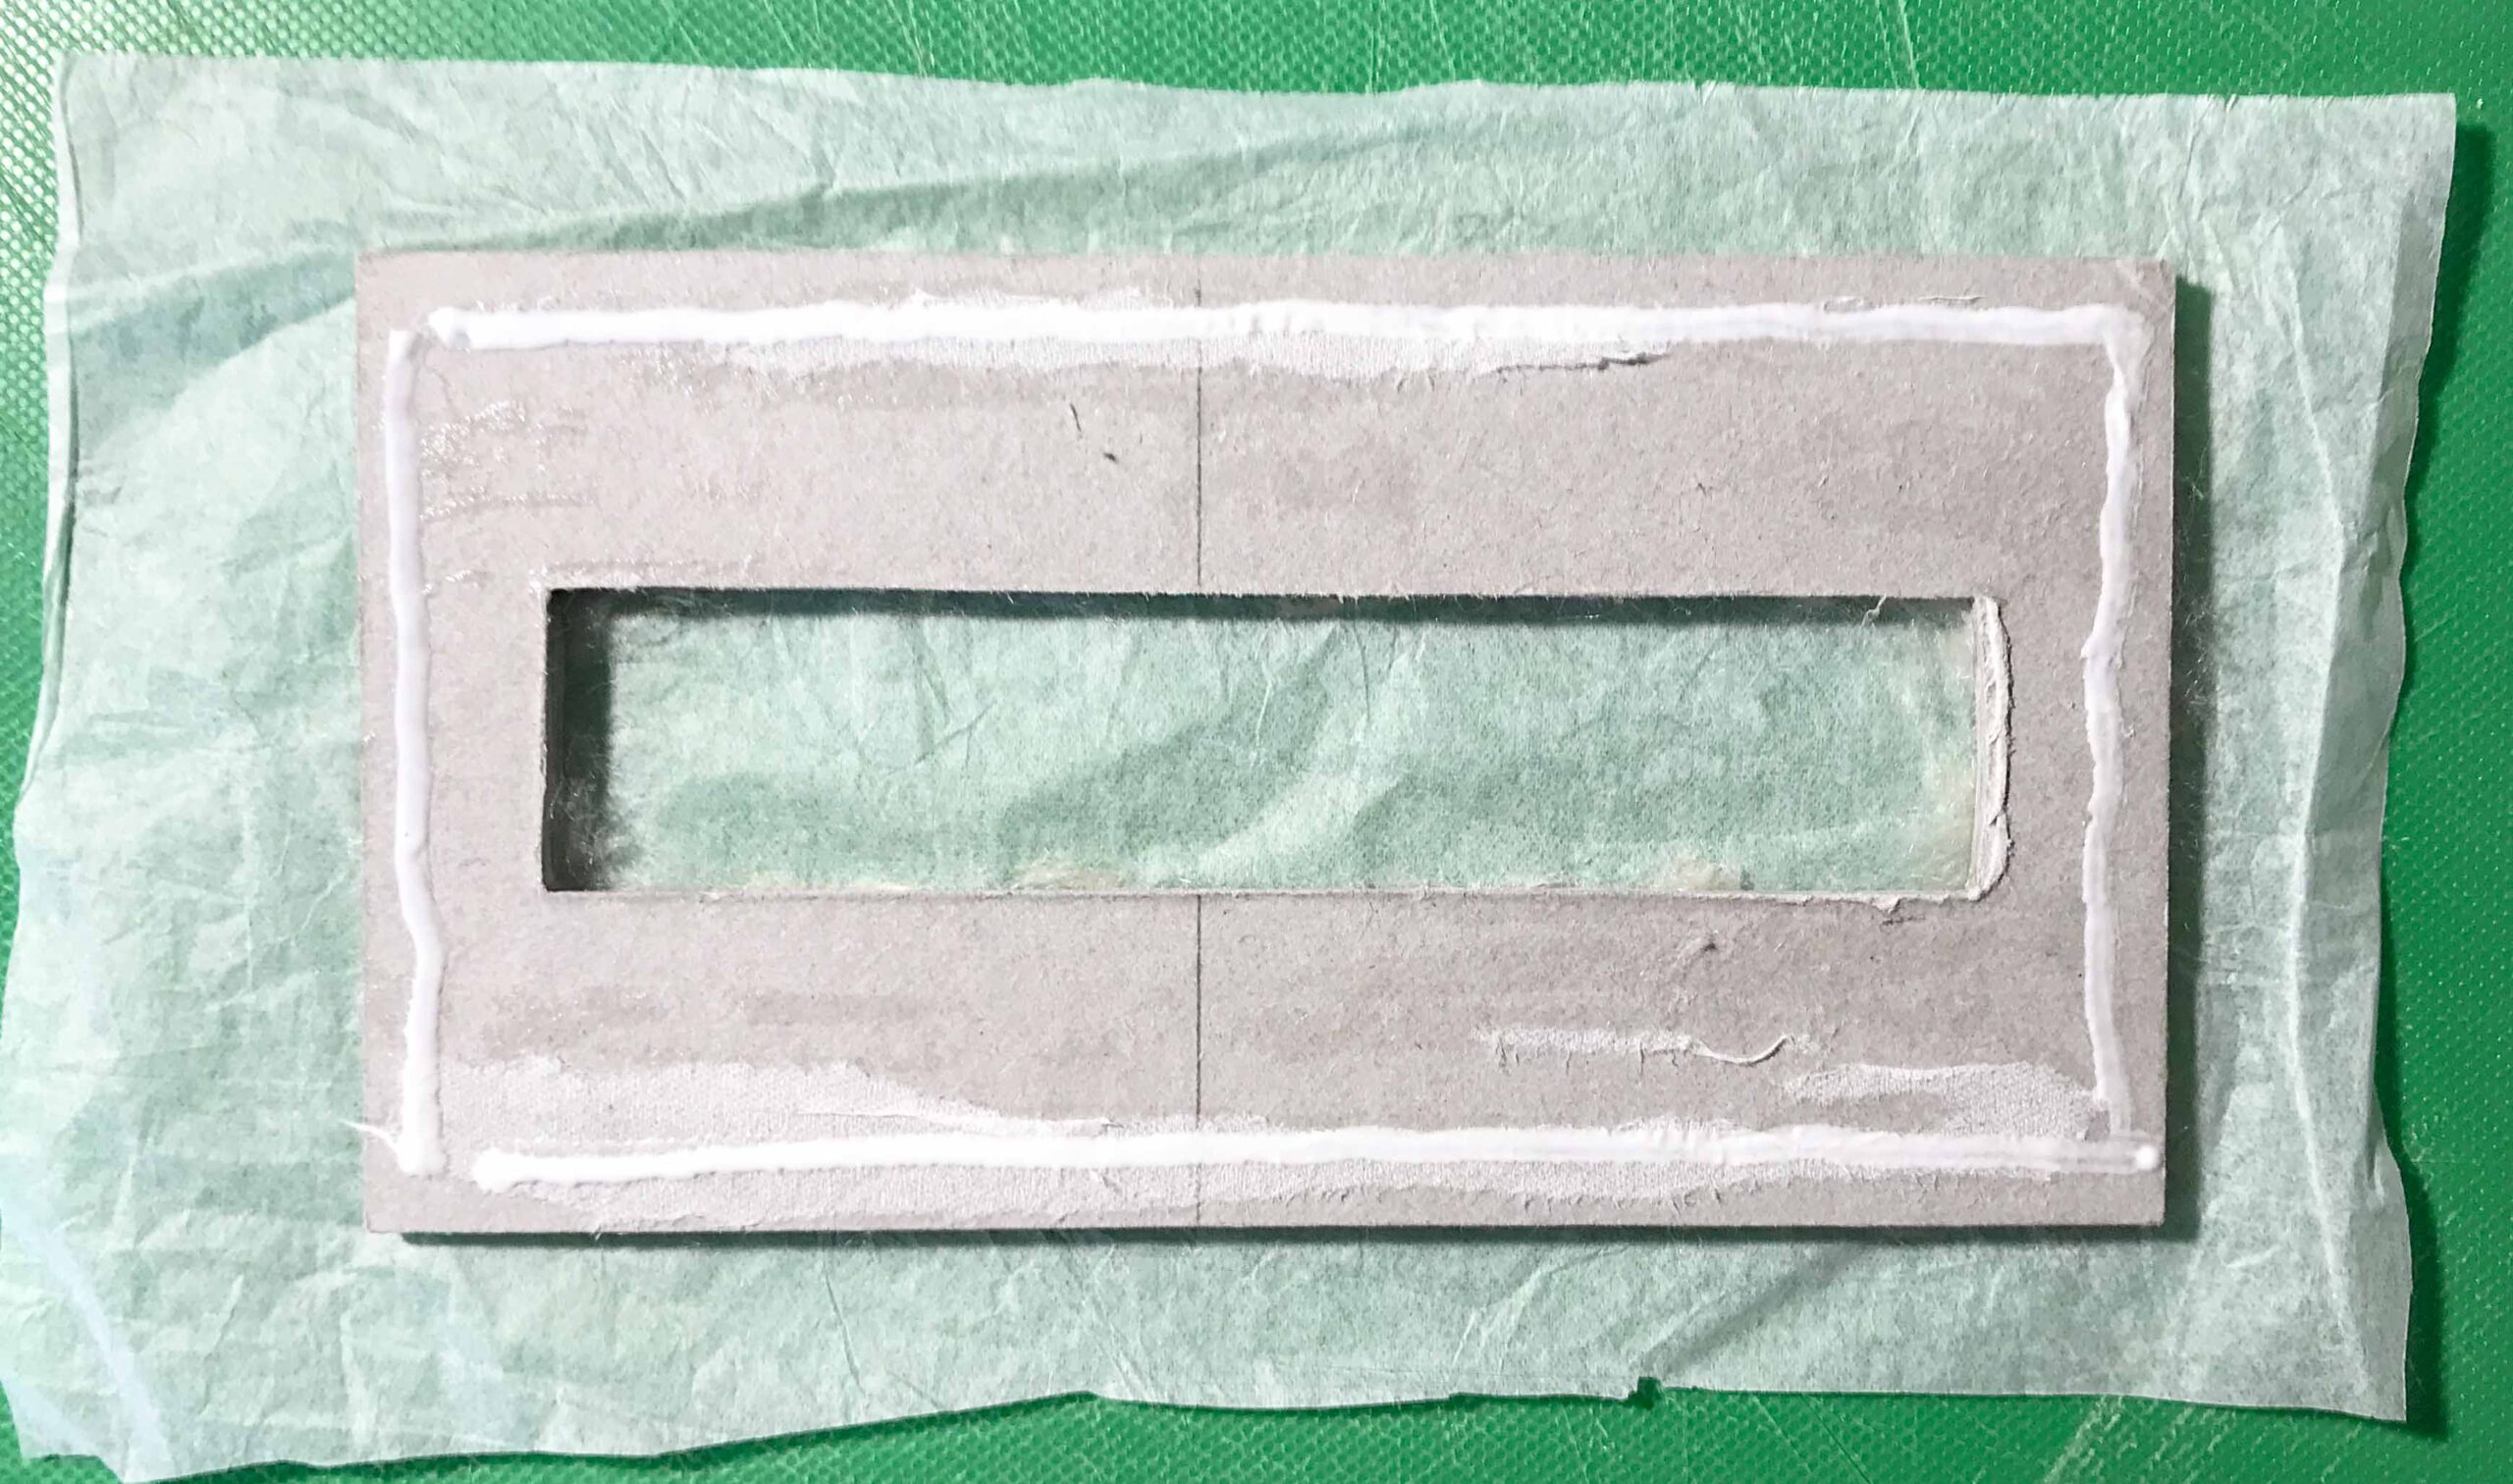
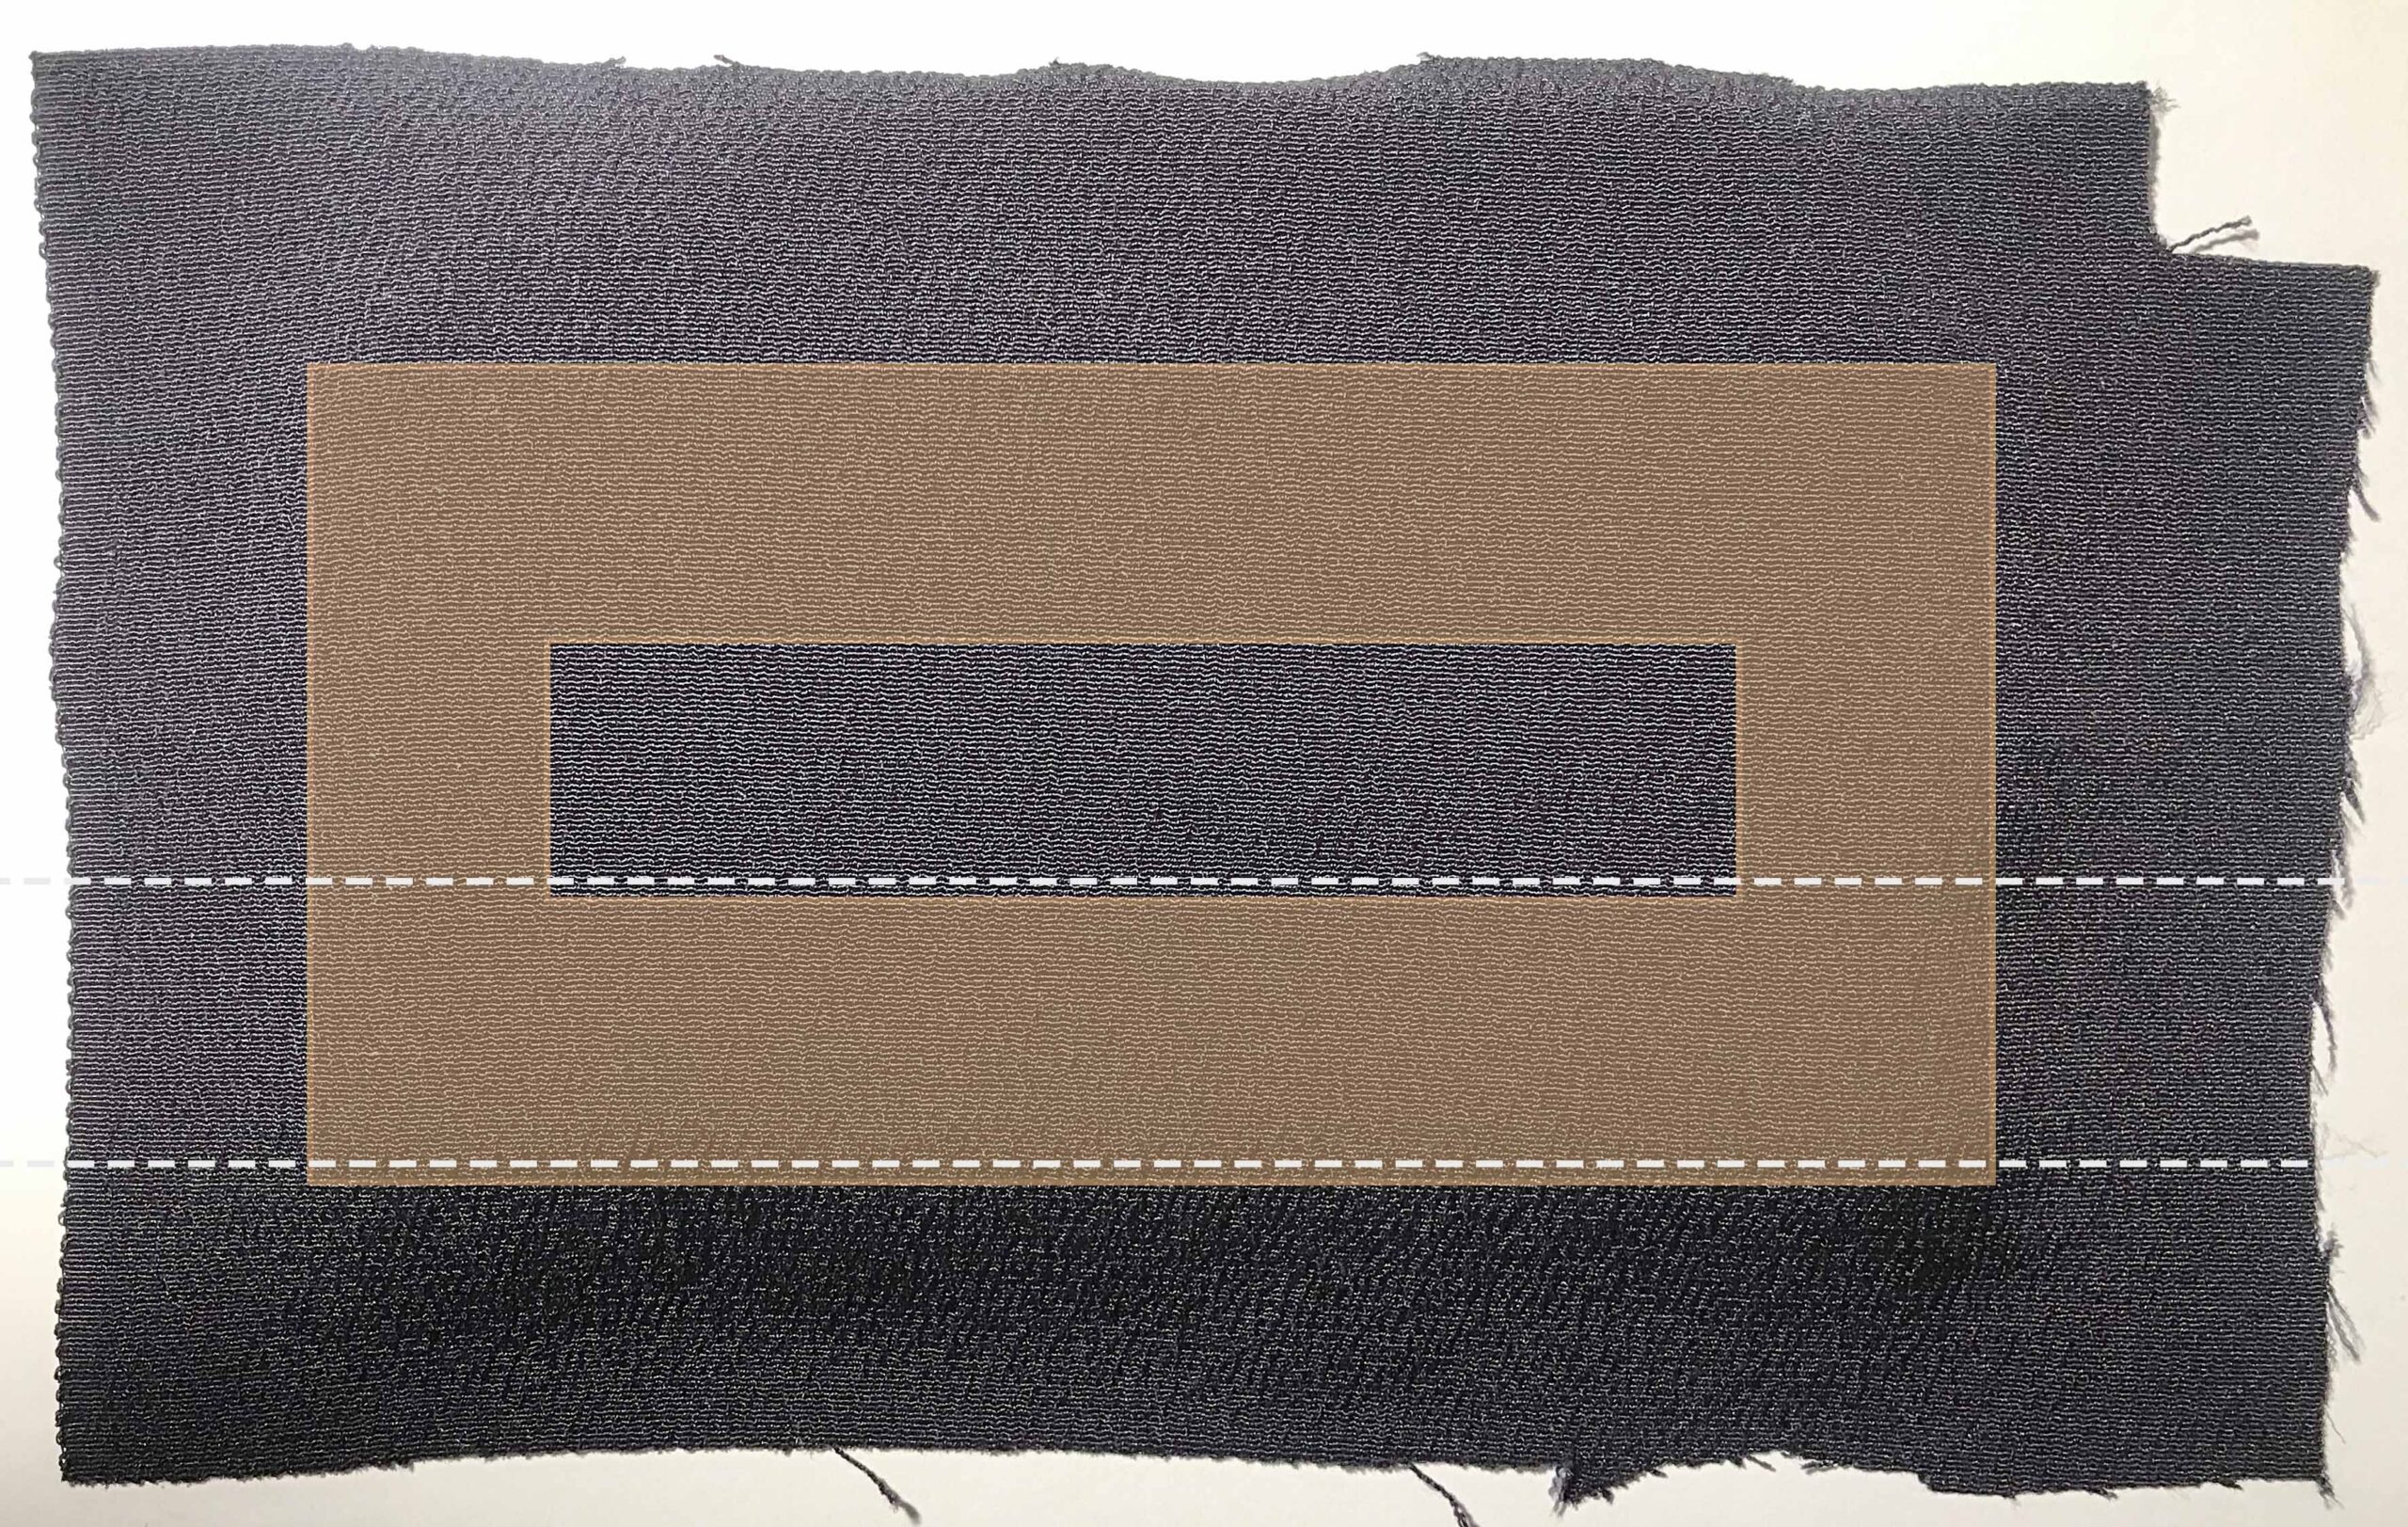
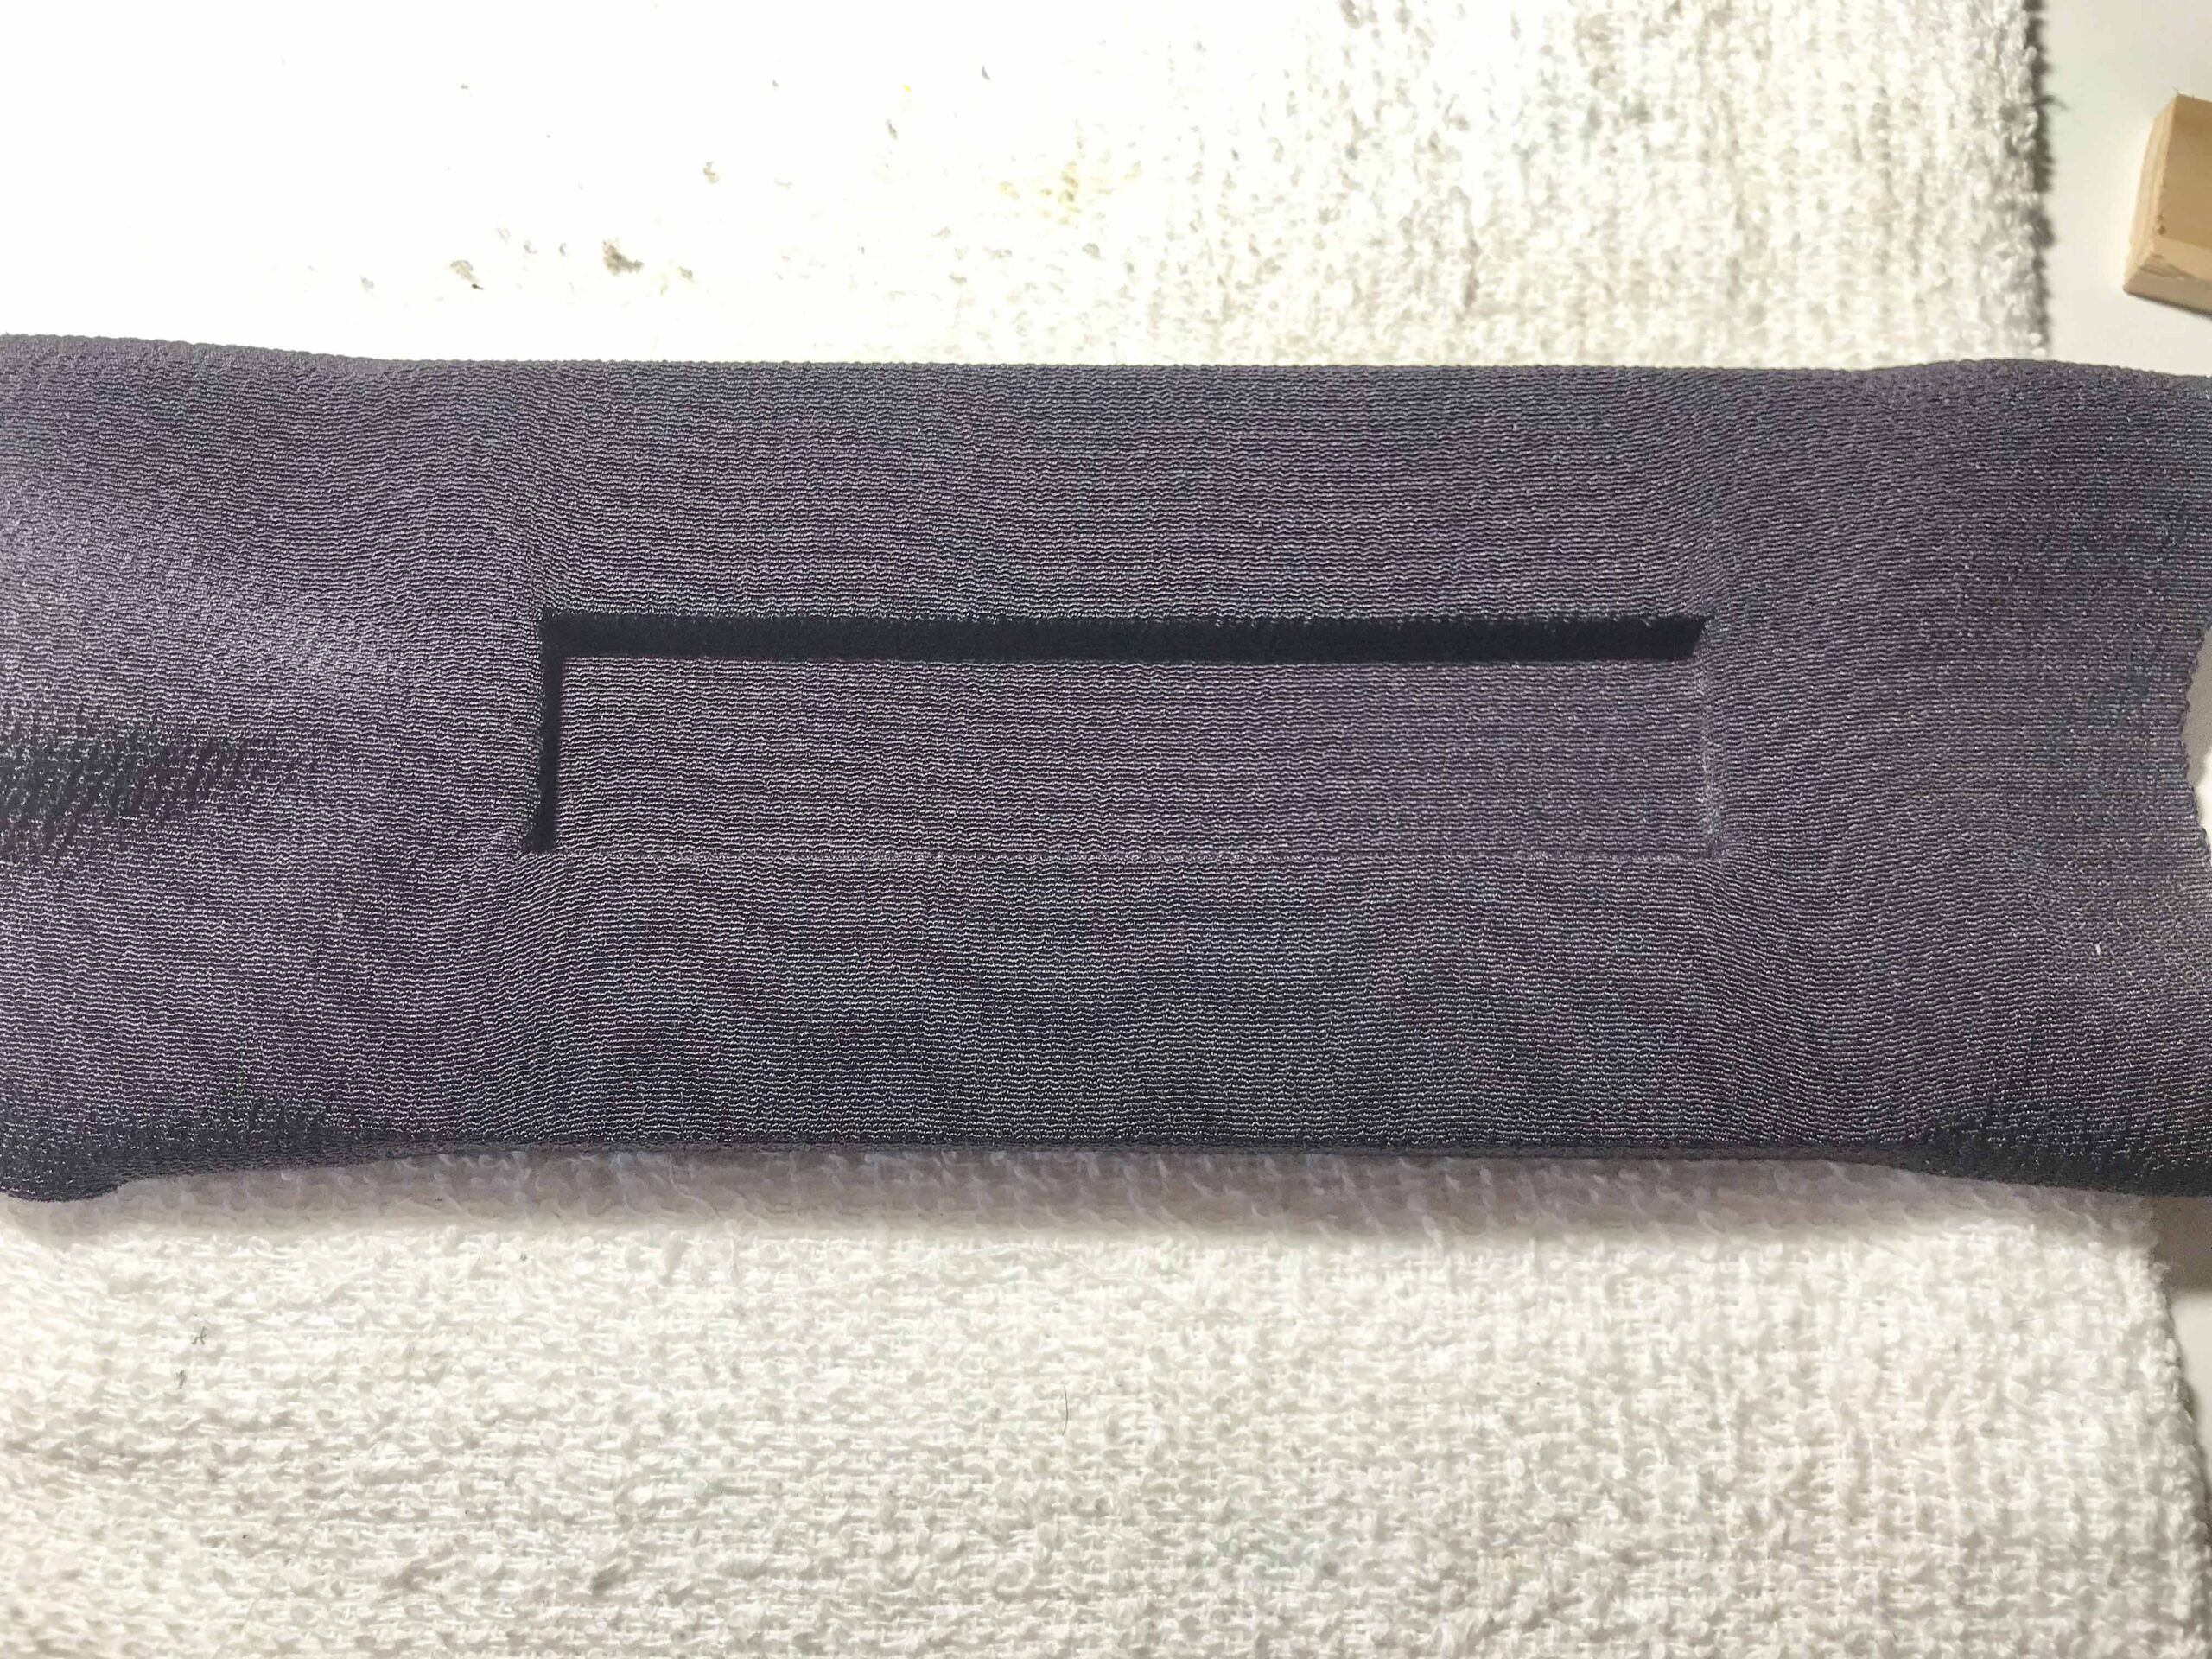
Draw the outlines of the Kozuka on the cardboard increasing its dimension by almost 1 mm on each side (pic. 5). Make sure it is parallel to the bottom and exactly in the middle (pic. 4).
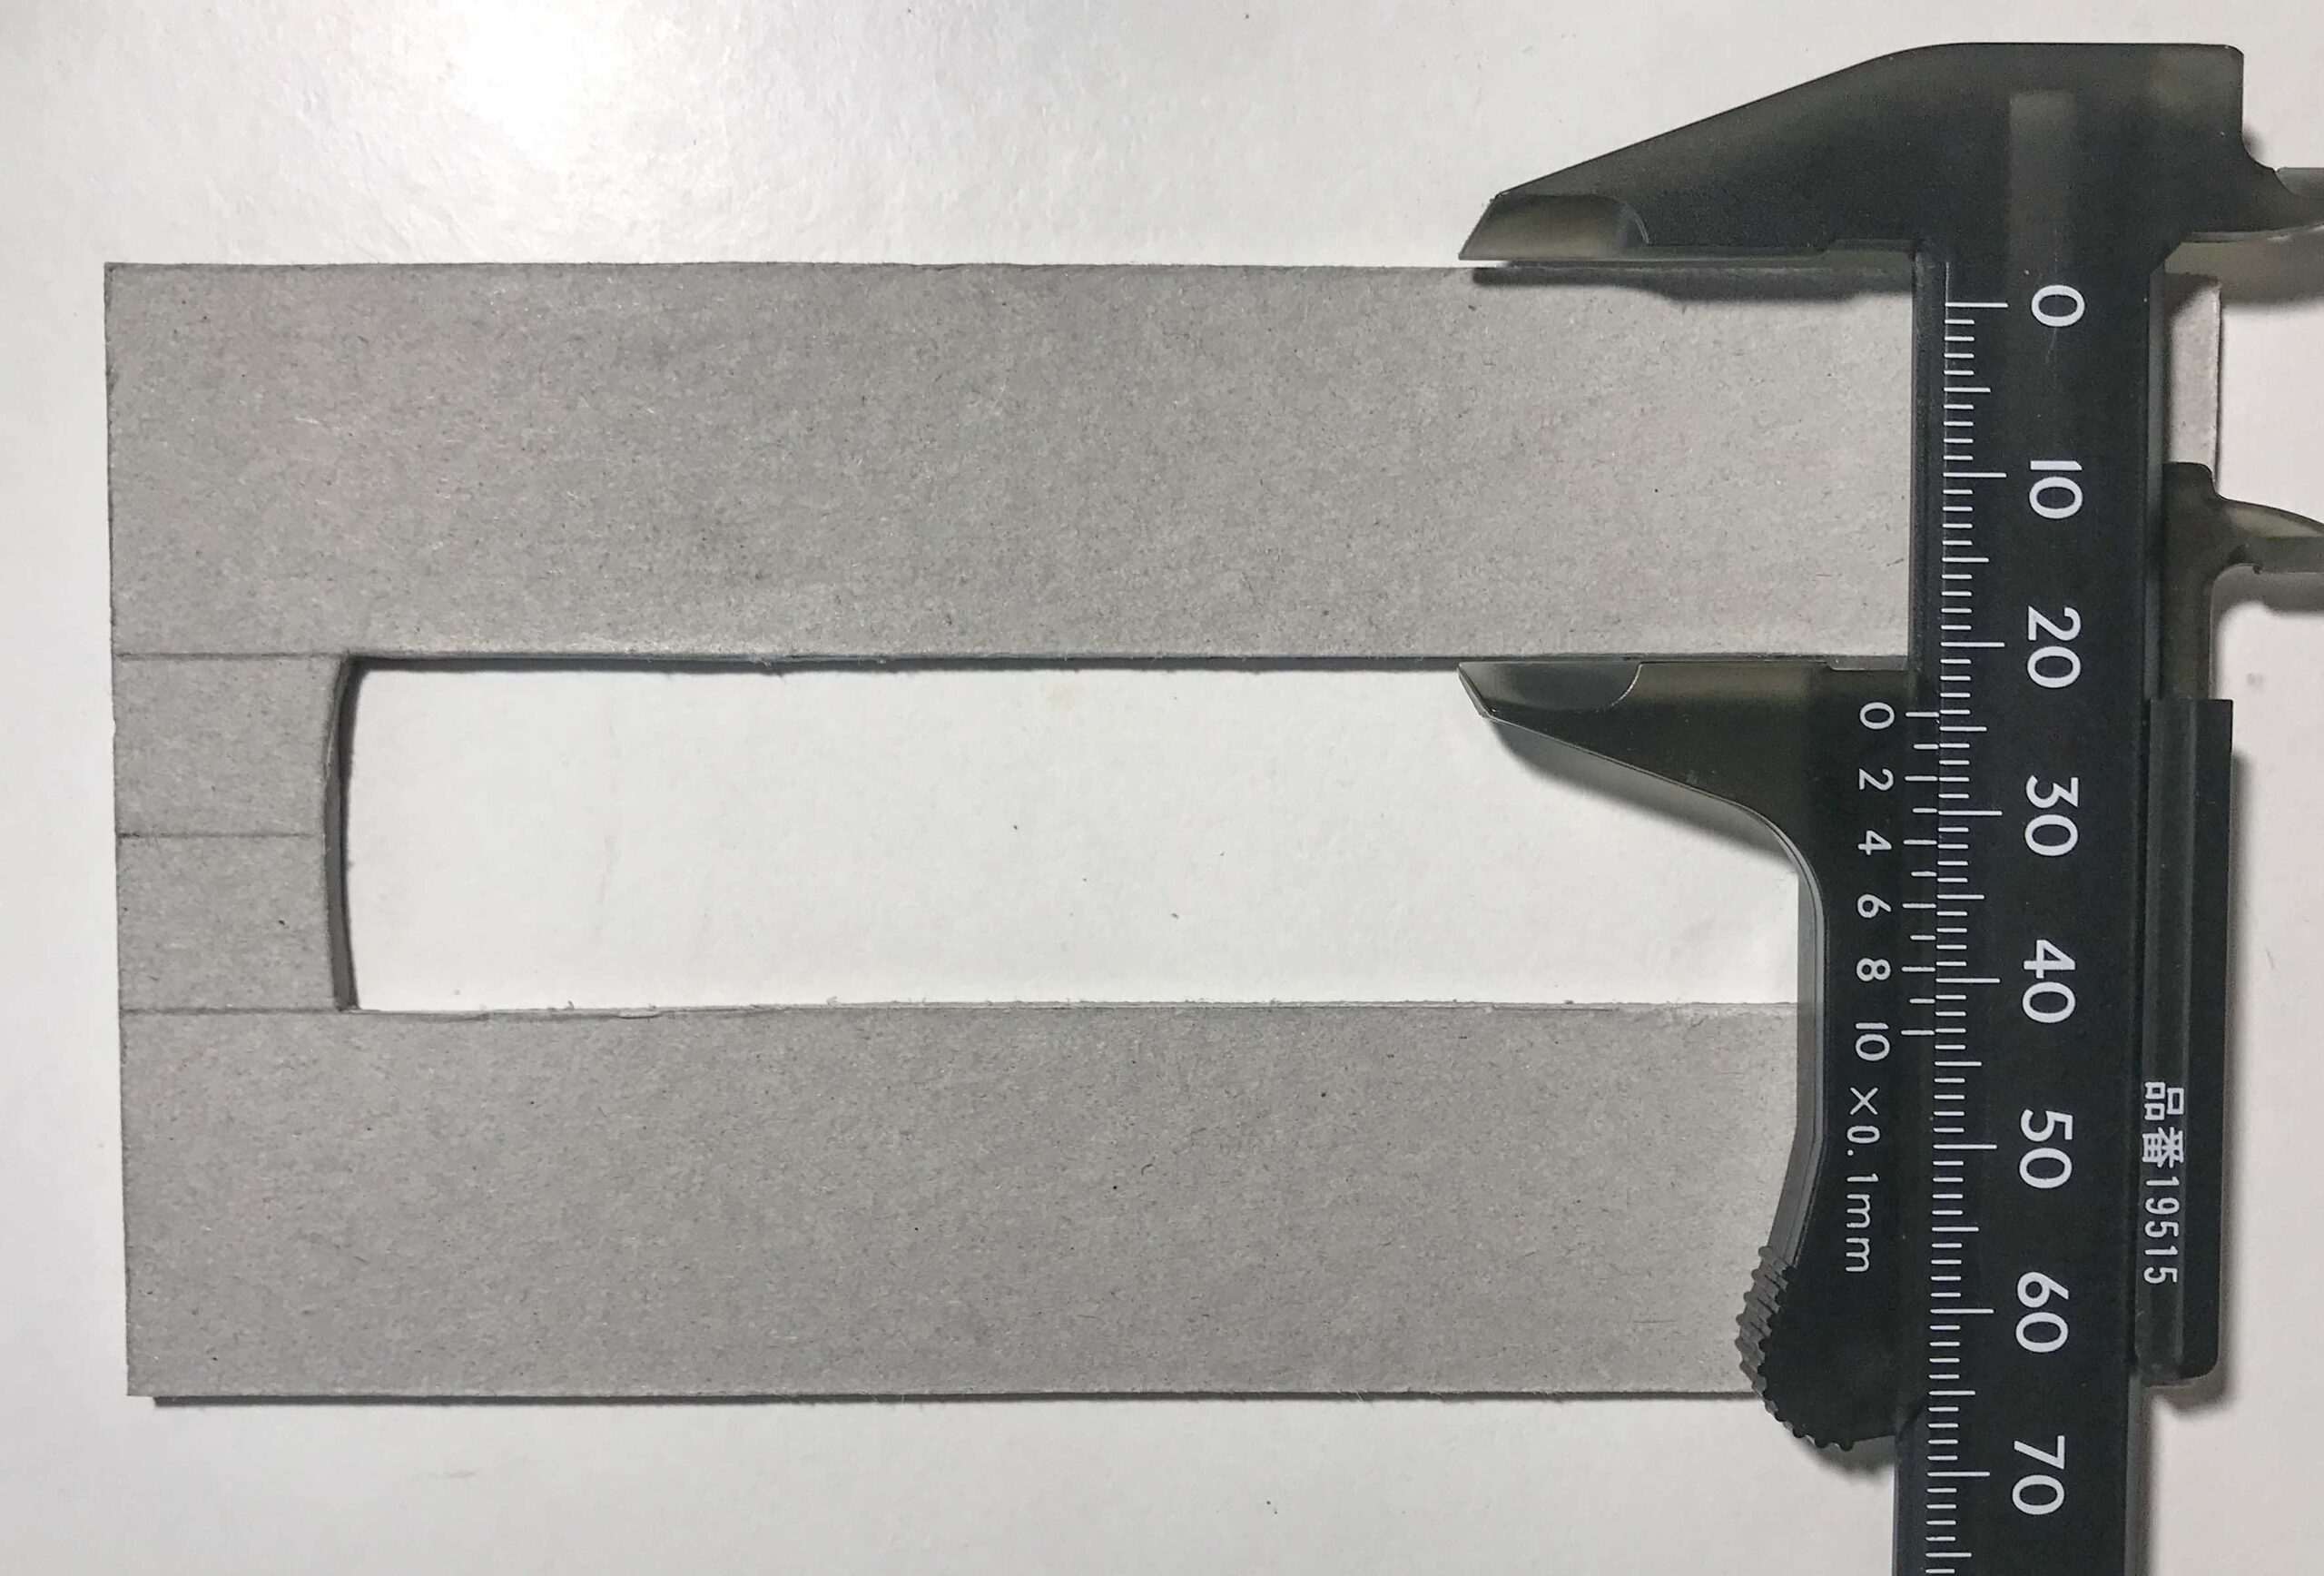
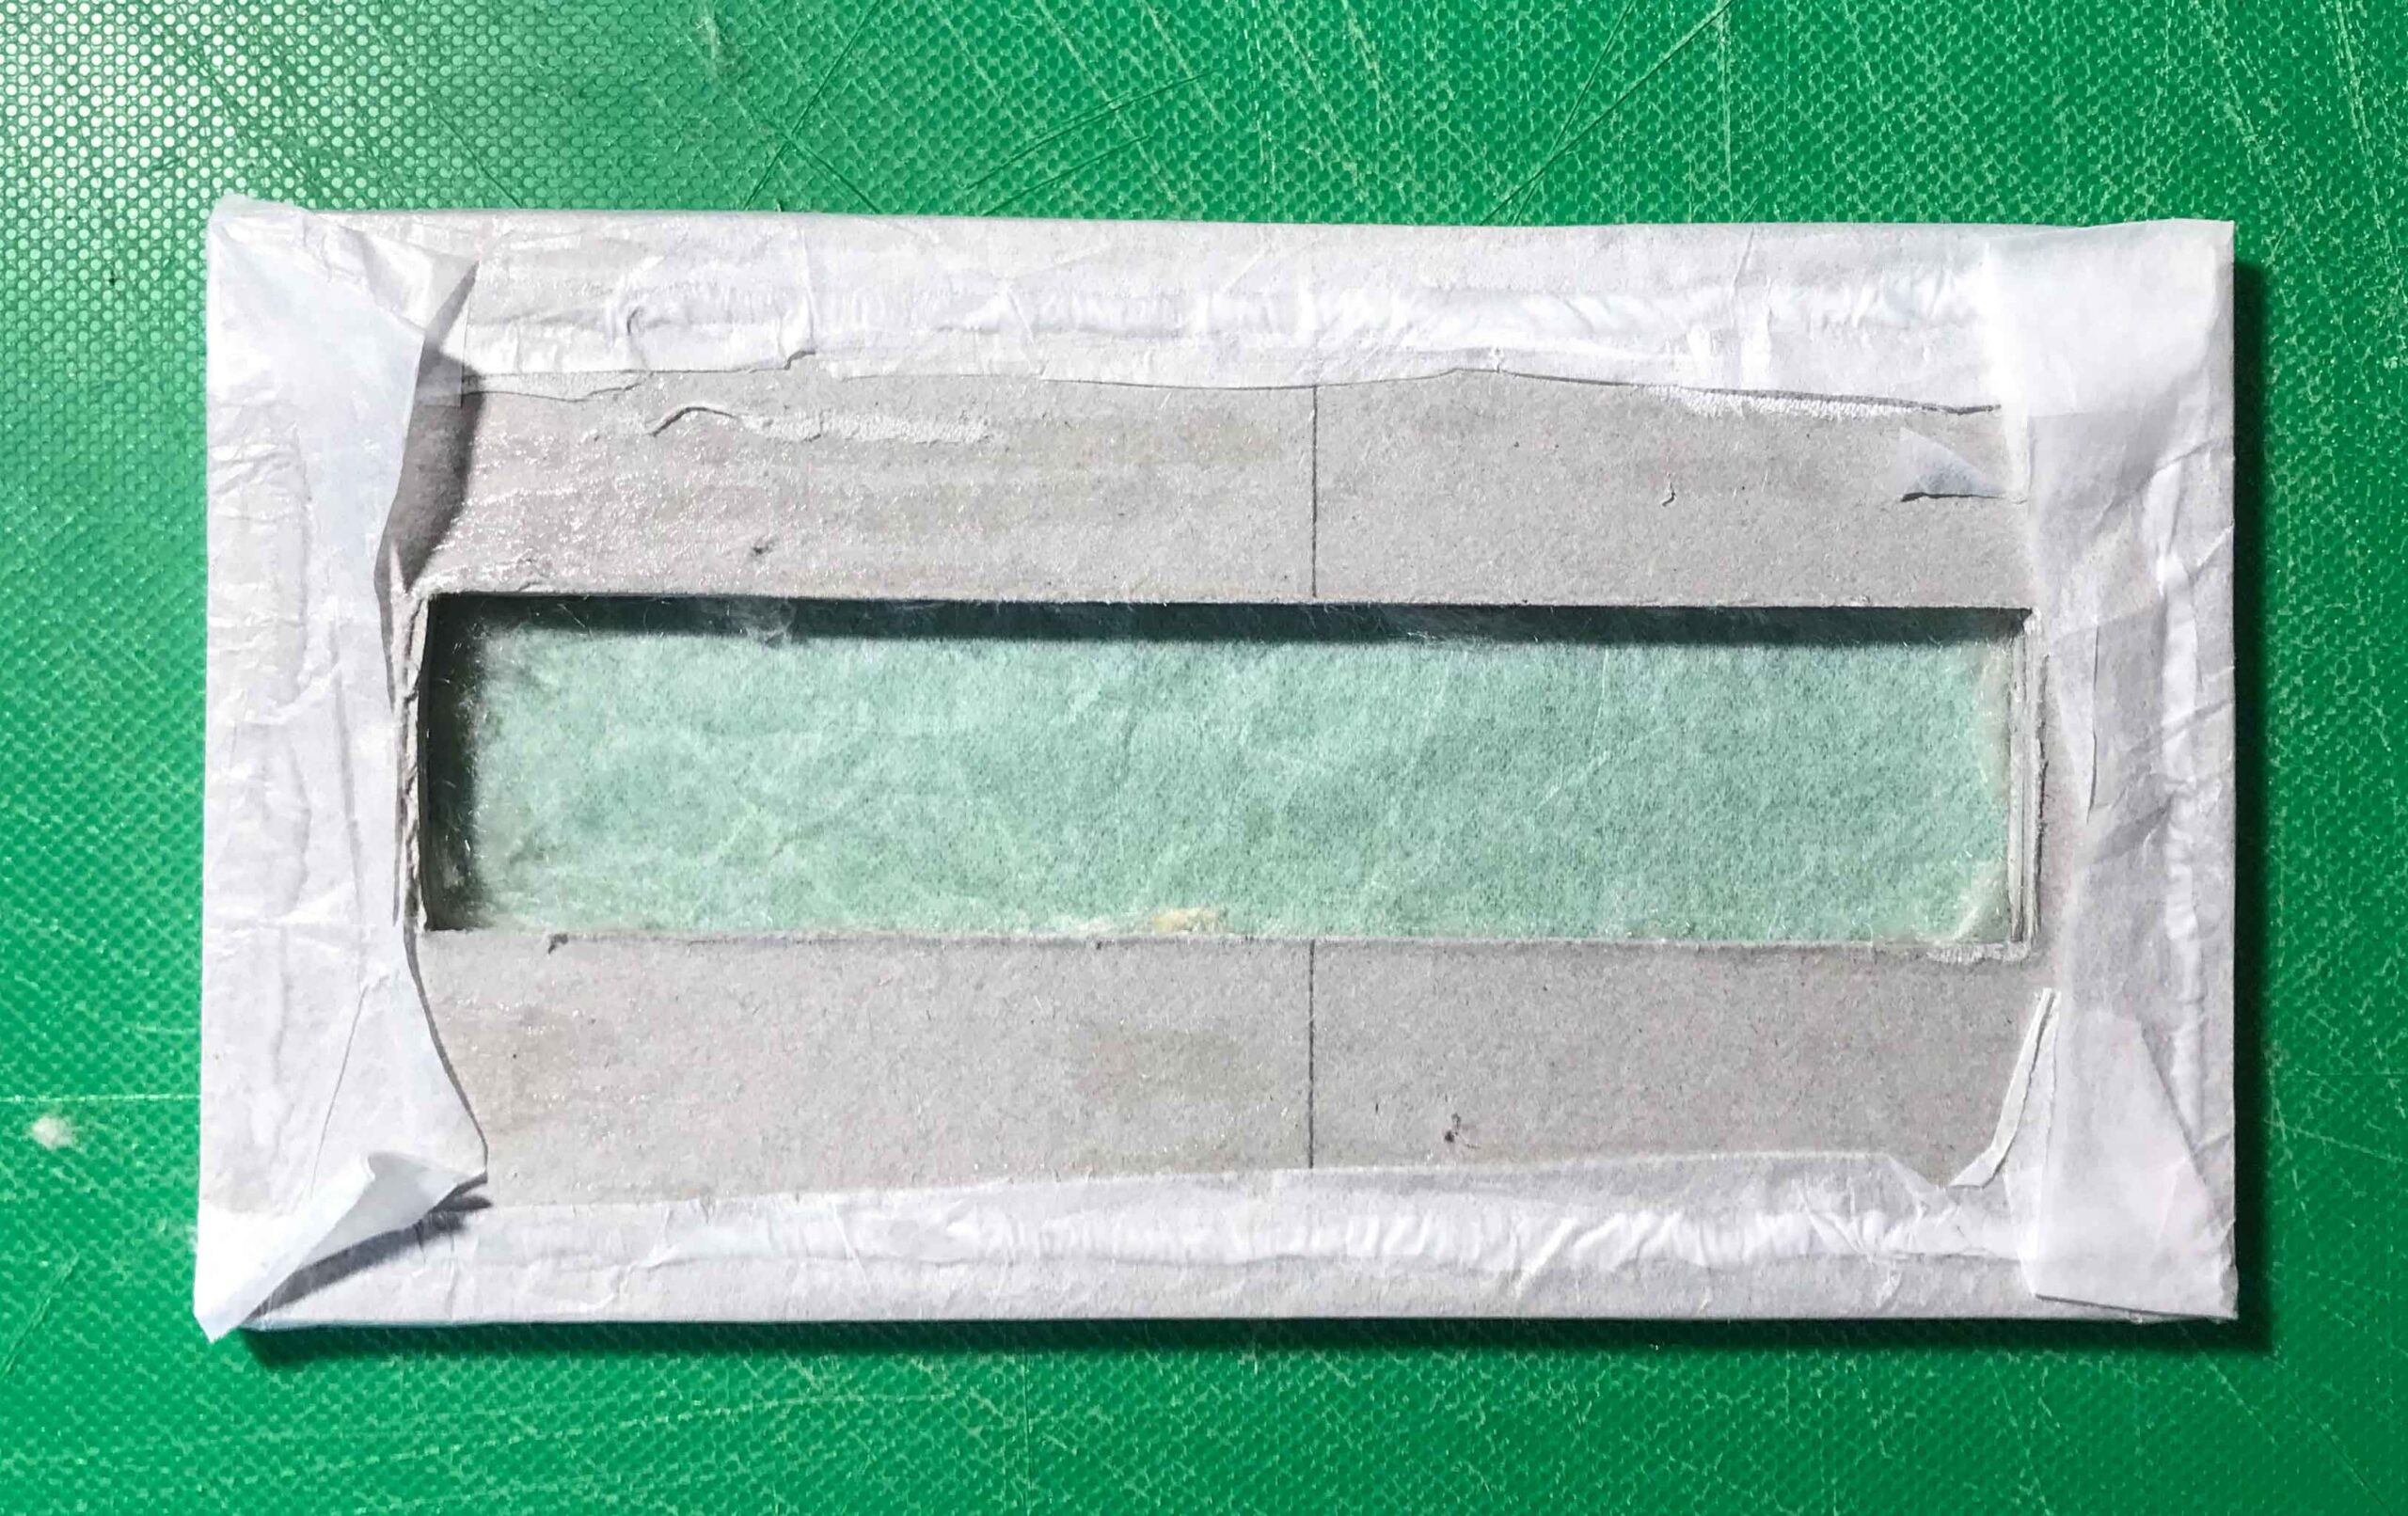
Cut out the shape of the Kozuka and repeat this for the second sheet if used. Measure again if the distance from the bottom to the slot is equal on both ends of the Kozuka (pic. 6). The unarmed eye is able to easily see a difference of 0.3 mm when the Kozuka is placed on the Dai. You would be surprised!
Glue the two cardboard pieces together. Only use a small amount of glue and do not let it squeeze out at the sides.
Make sure that you can easily put the Kozuka through the hole without it getting stuck (pic. 7). Lean back and remember your childhood ;).
Cut out a piece of silk which is overlapping the Dai by at least 2 cm. Make sure that the pattern of the silk runs horizontally, parallel to the Kozuka (pic. 8).
Make sure that your Kozuka fits perfectly when putting the silk below.
Prepare your materials
I used 2 x 2 mm of cardboard
Make sure there is a gap of 2 mm
Mark the outlines of your Kozuka exactly in the middle
Keep a margin of around 1 mm on each side
Make sure your Kozuka slot is parallel to the bottom
Your Kozuka should easily come through the slot without getting stuck
Cut out a piece of silk at least 2 cm wider on each side of the Dai
Test if your Kozuka fits into the slot
Adding a soft under layer (optional)
You might have already noticed, that the silk on a Japanese Dai has a kind of soft touch to it, as if there was a cushion underneath. This feature is very subtle and might not want to go the length of creating it, but it gives your Dai a more elegant appearance.
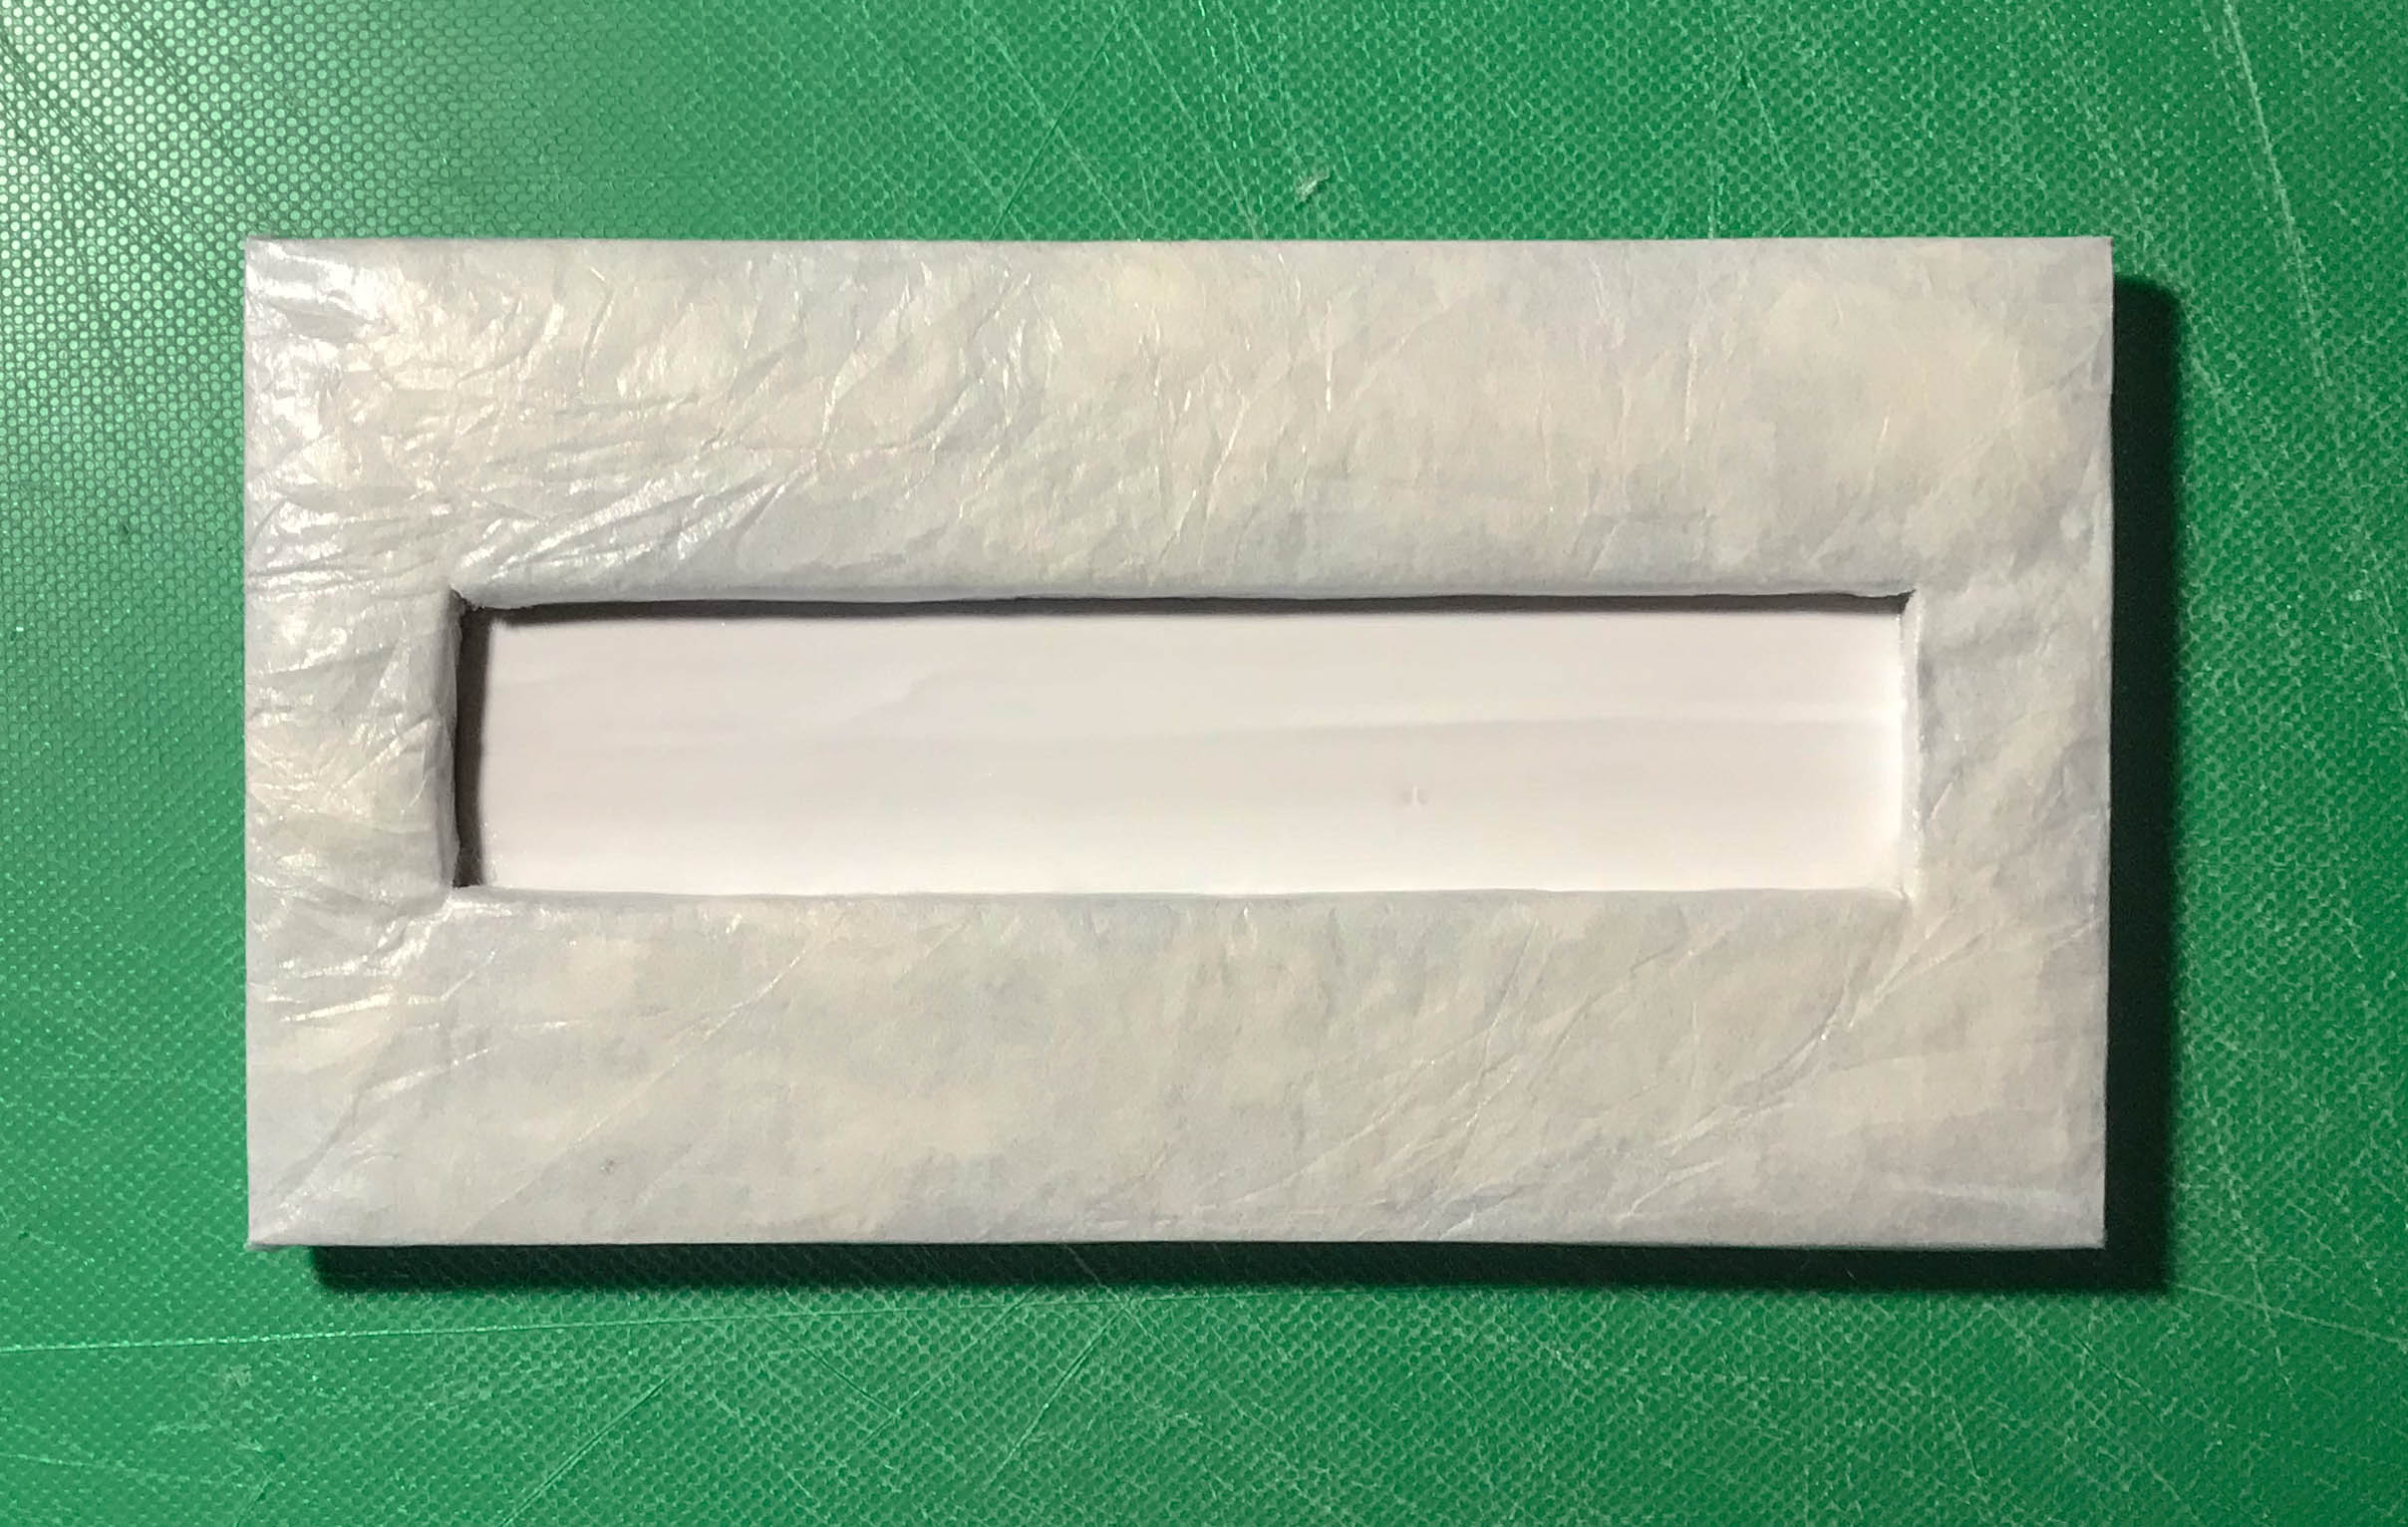
Apply a thin layer of glue to the top side of the cardboard (pic. 1).
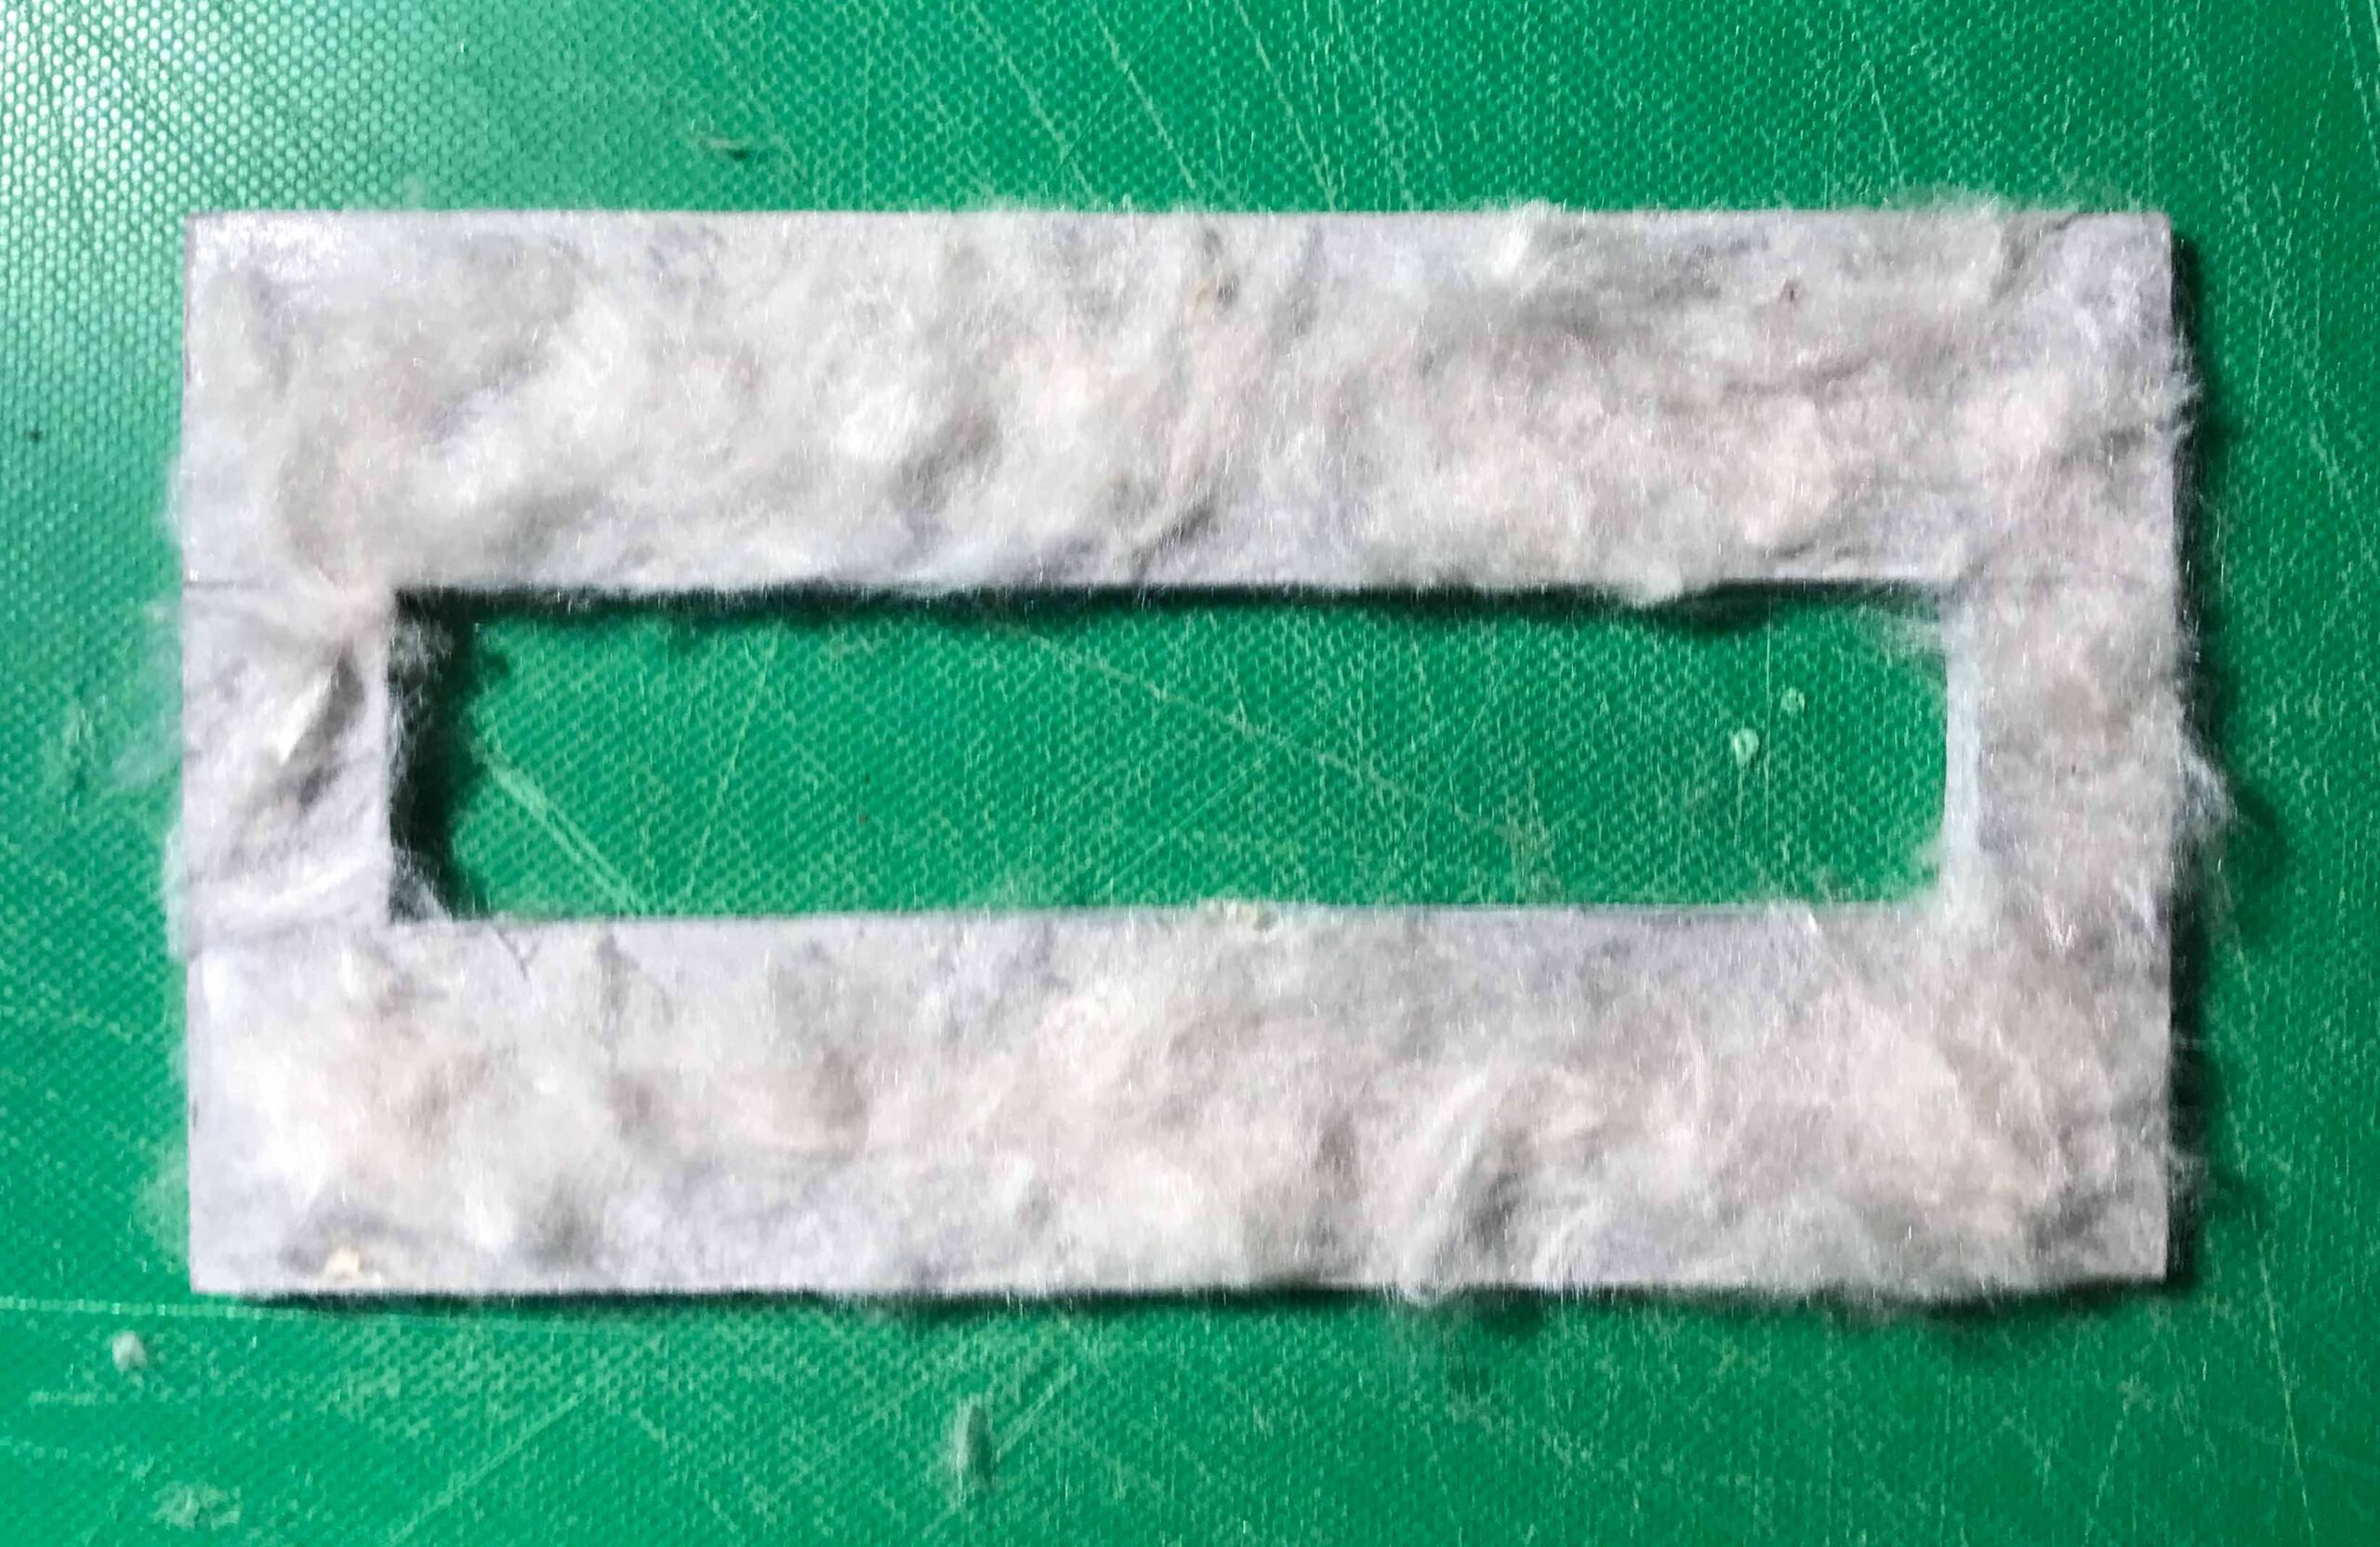
Rip off small pieces of Watta and apply them to the glue until there is a uniform layer of Watta of about 2 to 3 mm in height. Cut off any pieces which are standing over the boarder of the cardboard (pic. 2).
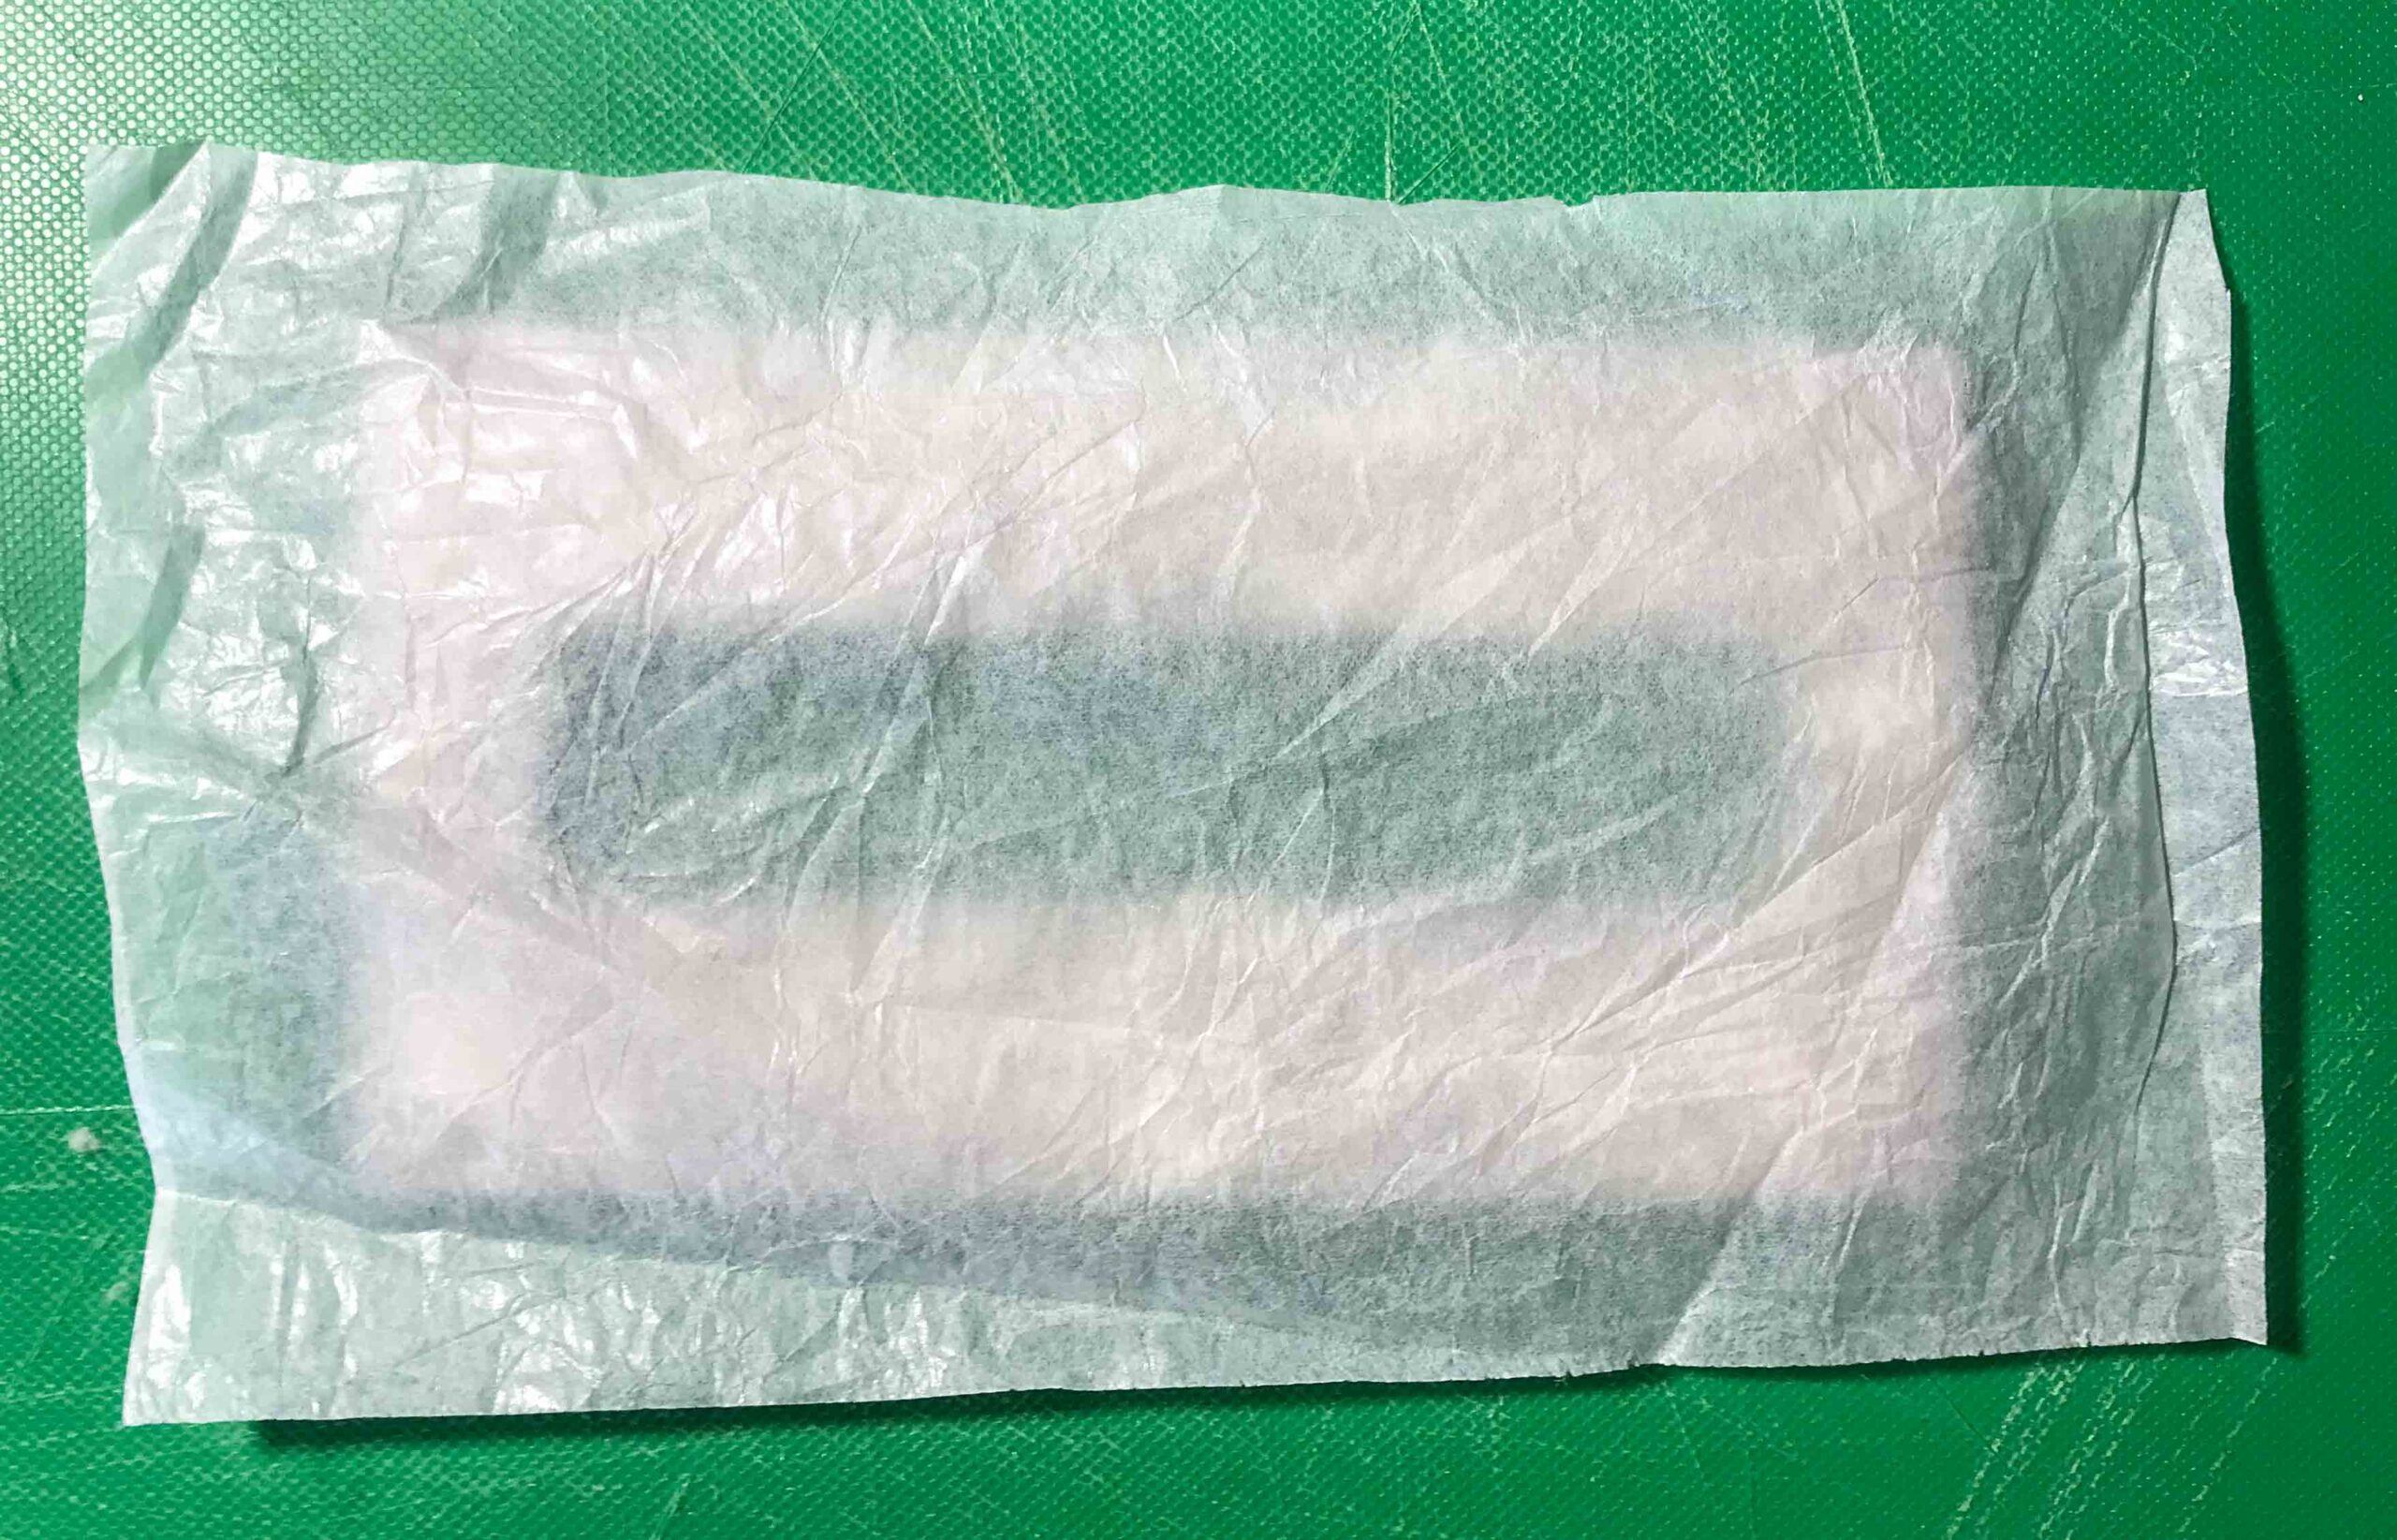
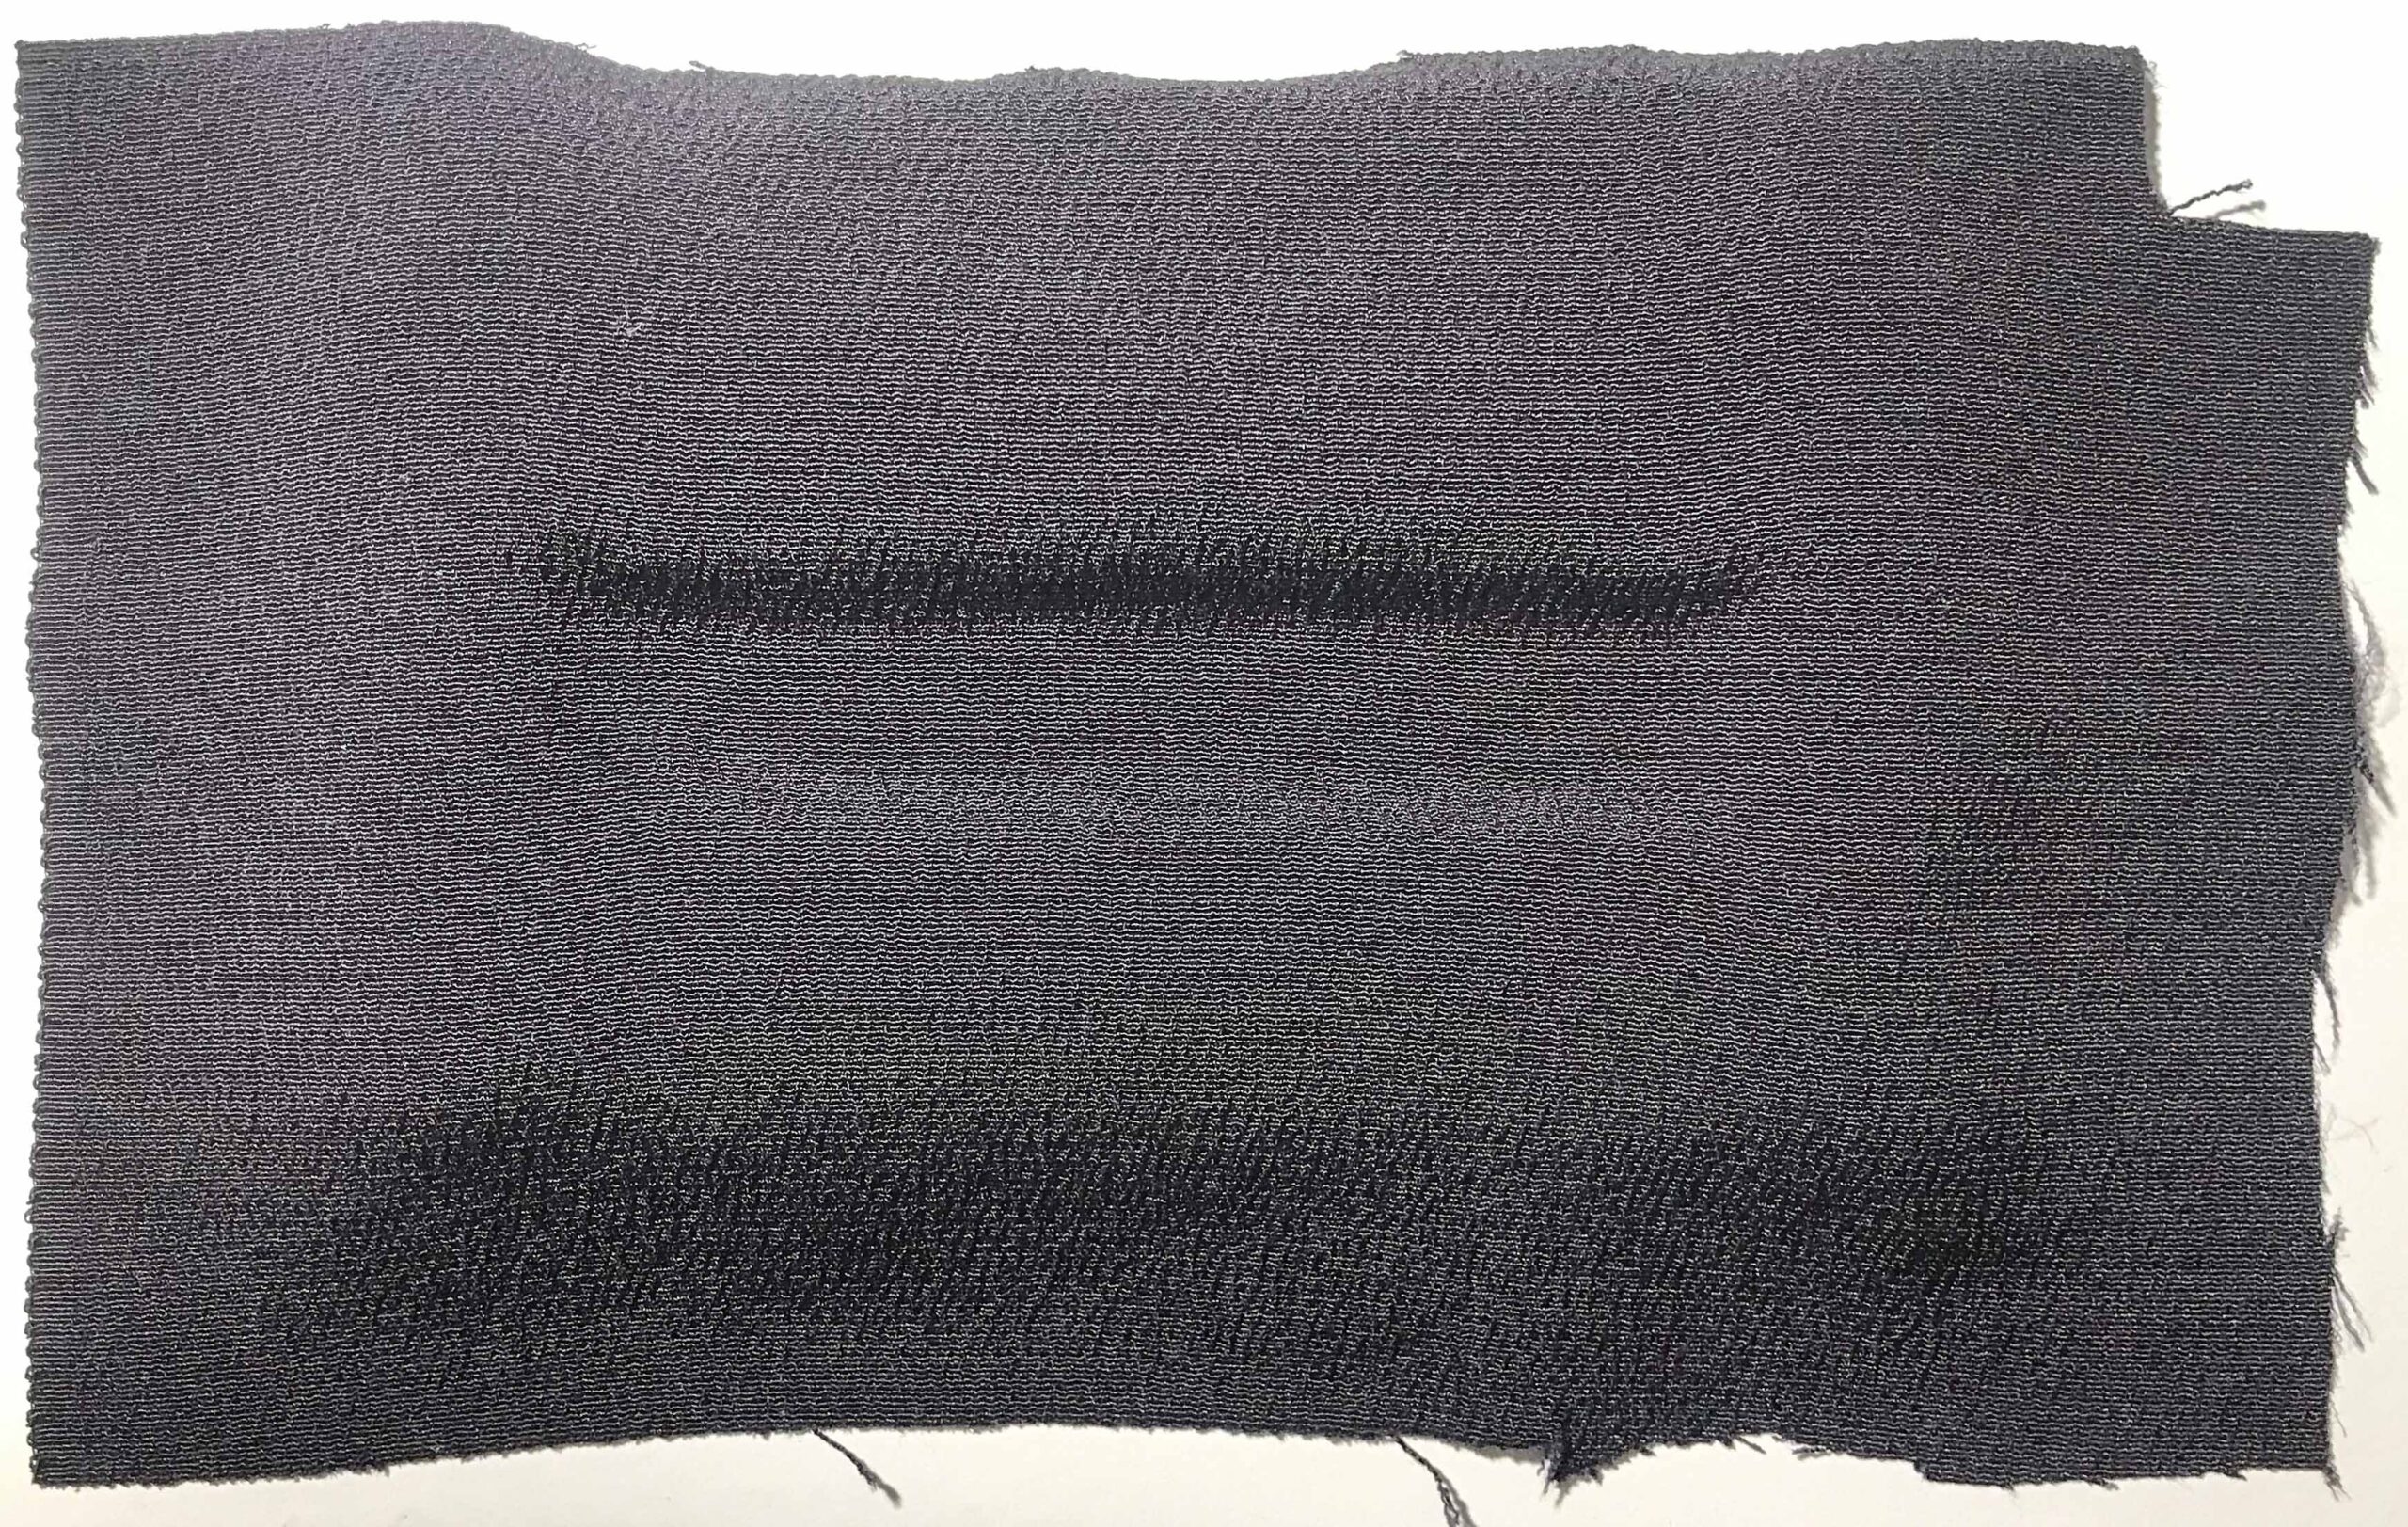
Cut out a piece of wrapping paper overlapping the Dai by at least 1 cm (pic. 3).
Fold the wrapping paper around the Dai and glue it to its backside. Do not apply any glue between the Watta and the wrapping paper. (pic. 4, 5).
Cut the wrapping paper from the back in the middle (pic. 6, 7) and fold and glue it to the back of the cardboard (pic. 8). Make sure that the Watta stays on top of the cardboard and does get stuck in the middle where the wrapping paper is folded around.
Apply glue to the top
Apply a layer of cotton wool about 3 mm
Apply wrapping paper
Put the glue on the back
Fold around the edgeds and stick the paper to the back
Cut the paper
Cut like this
Glue the inner parts of the paper to the back
Stick the cardboard to the wood
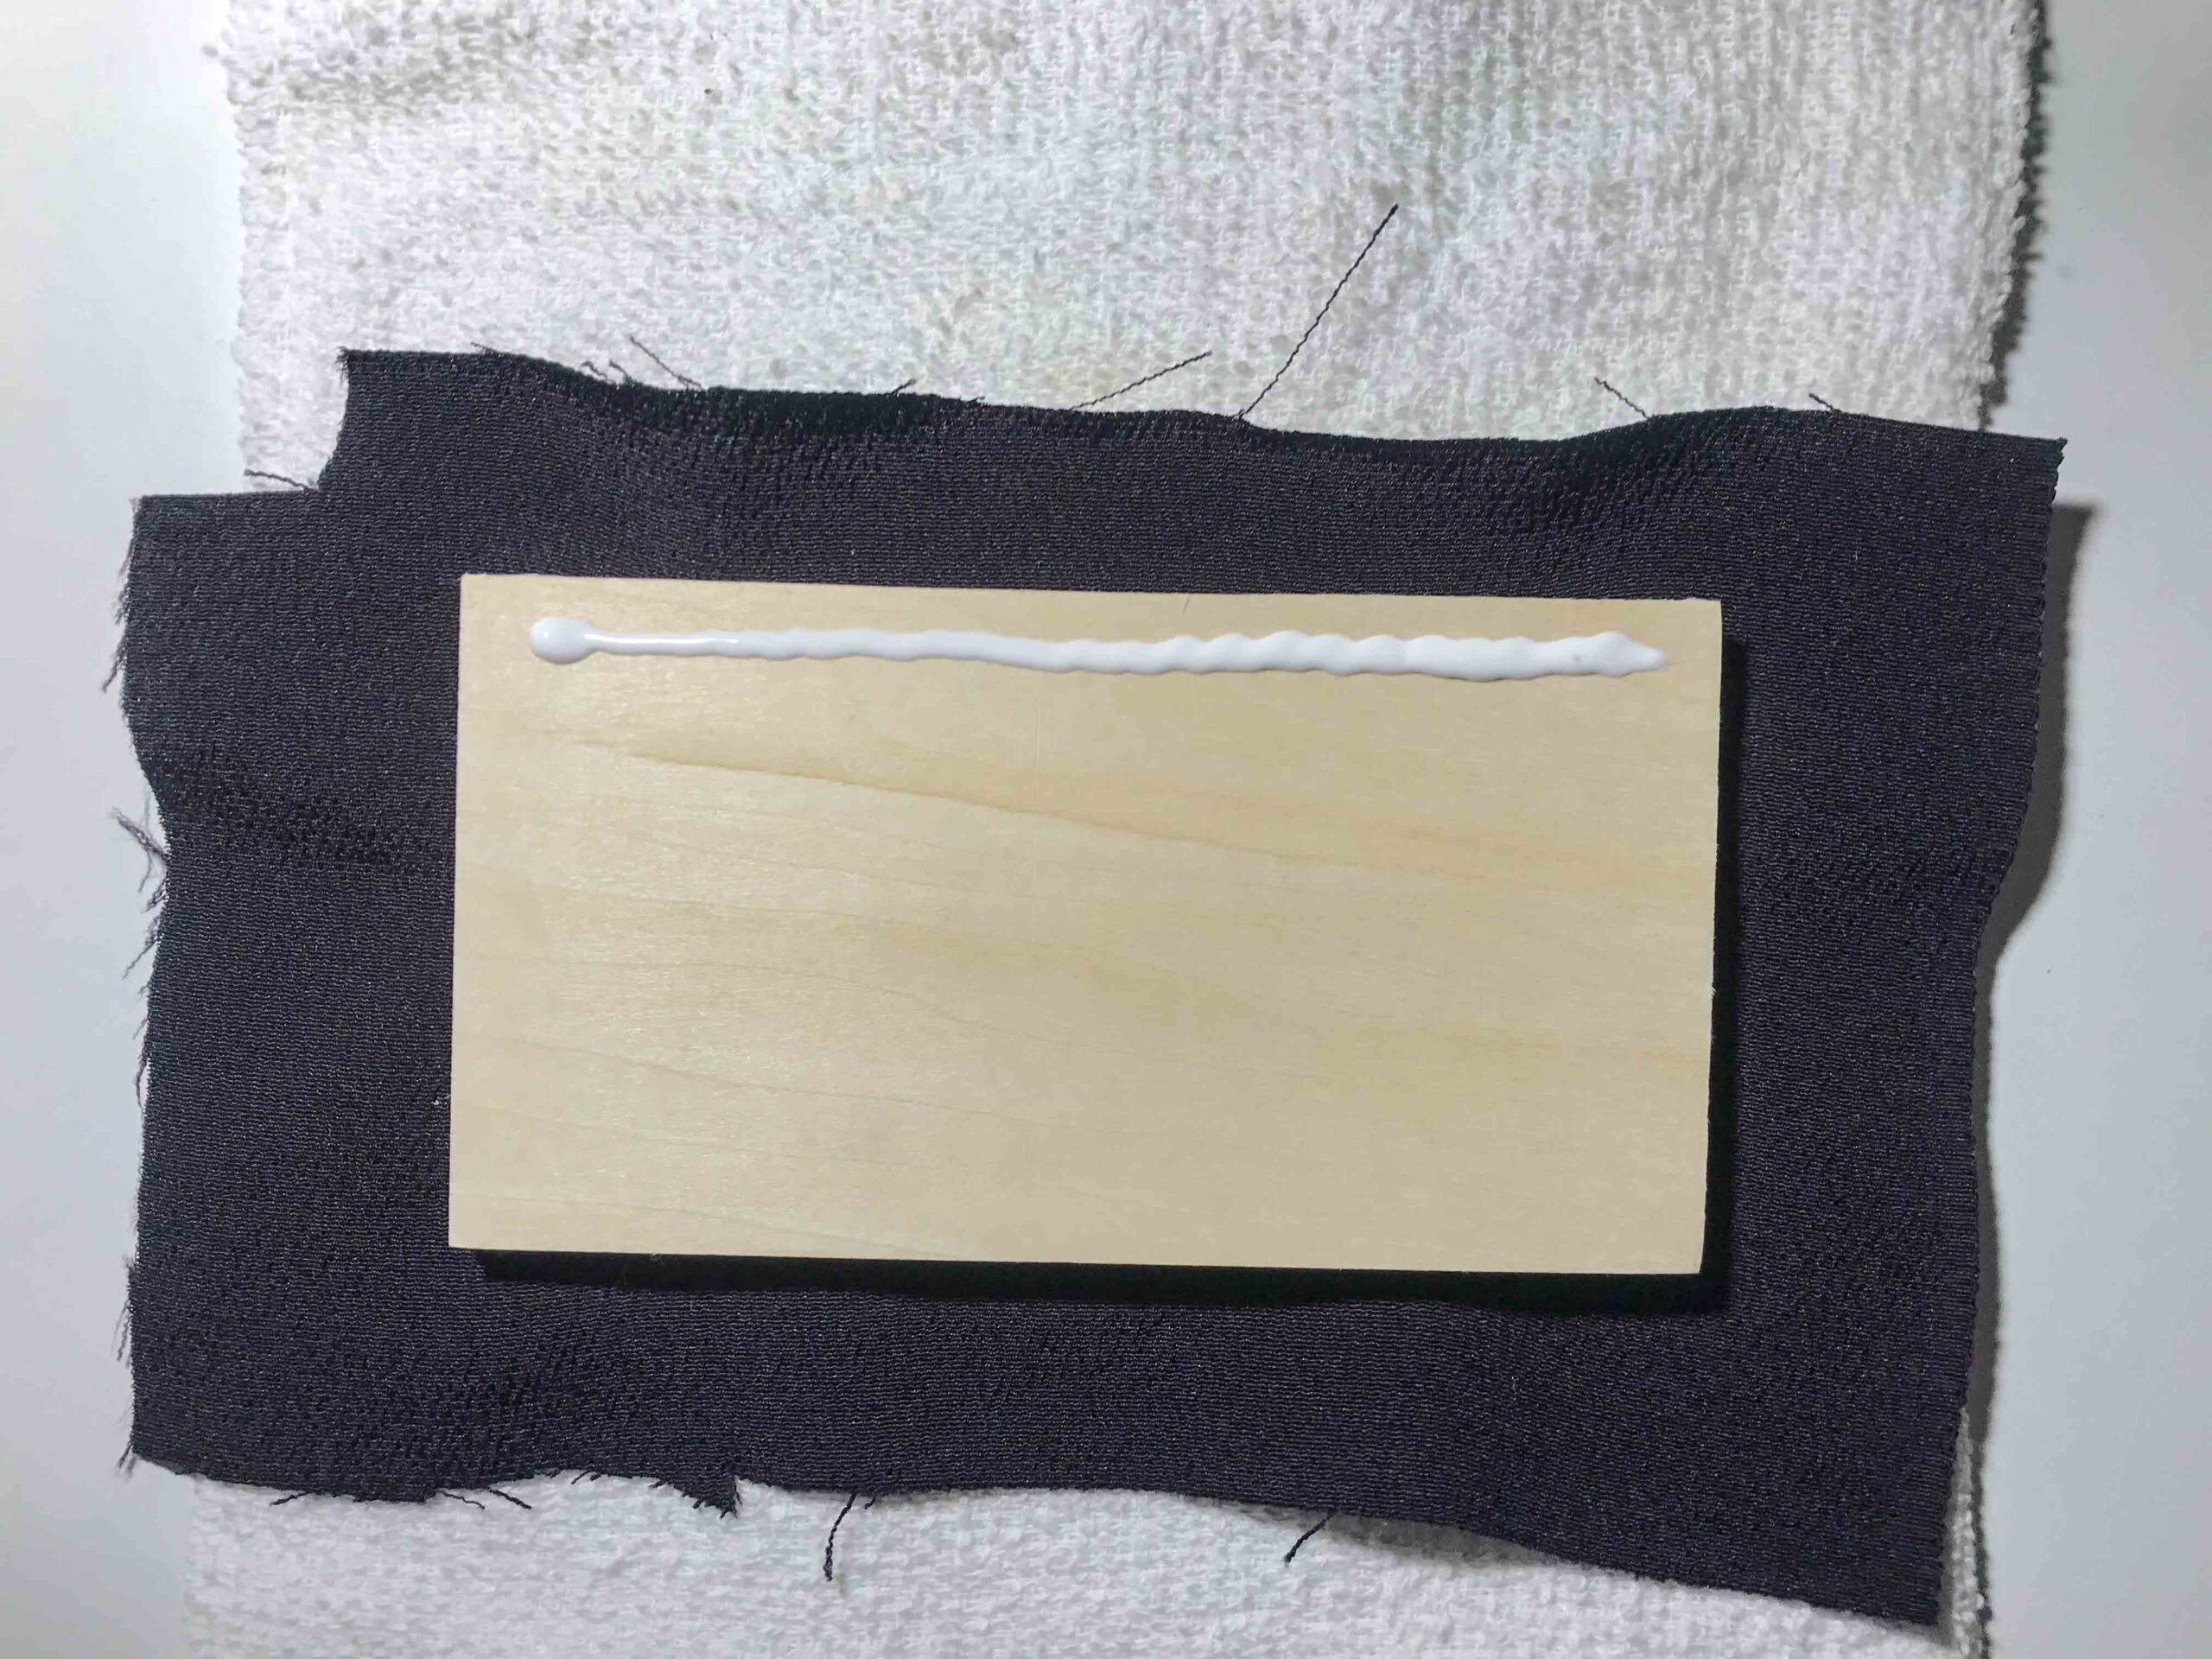
Apply a good amount of glue to the wooden sheet (pic. 1).
Distribute the glue equally on the wood with a scraper (pic. 2). I used the cut out piece of cardboard. Take care the space where the Kozuka will sit is equally covered with glue.
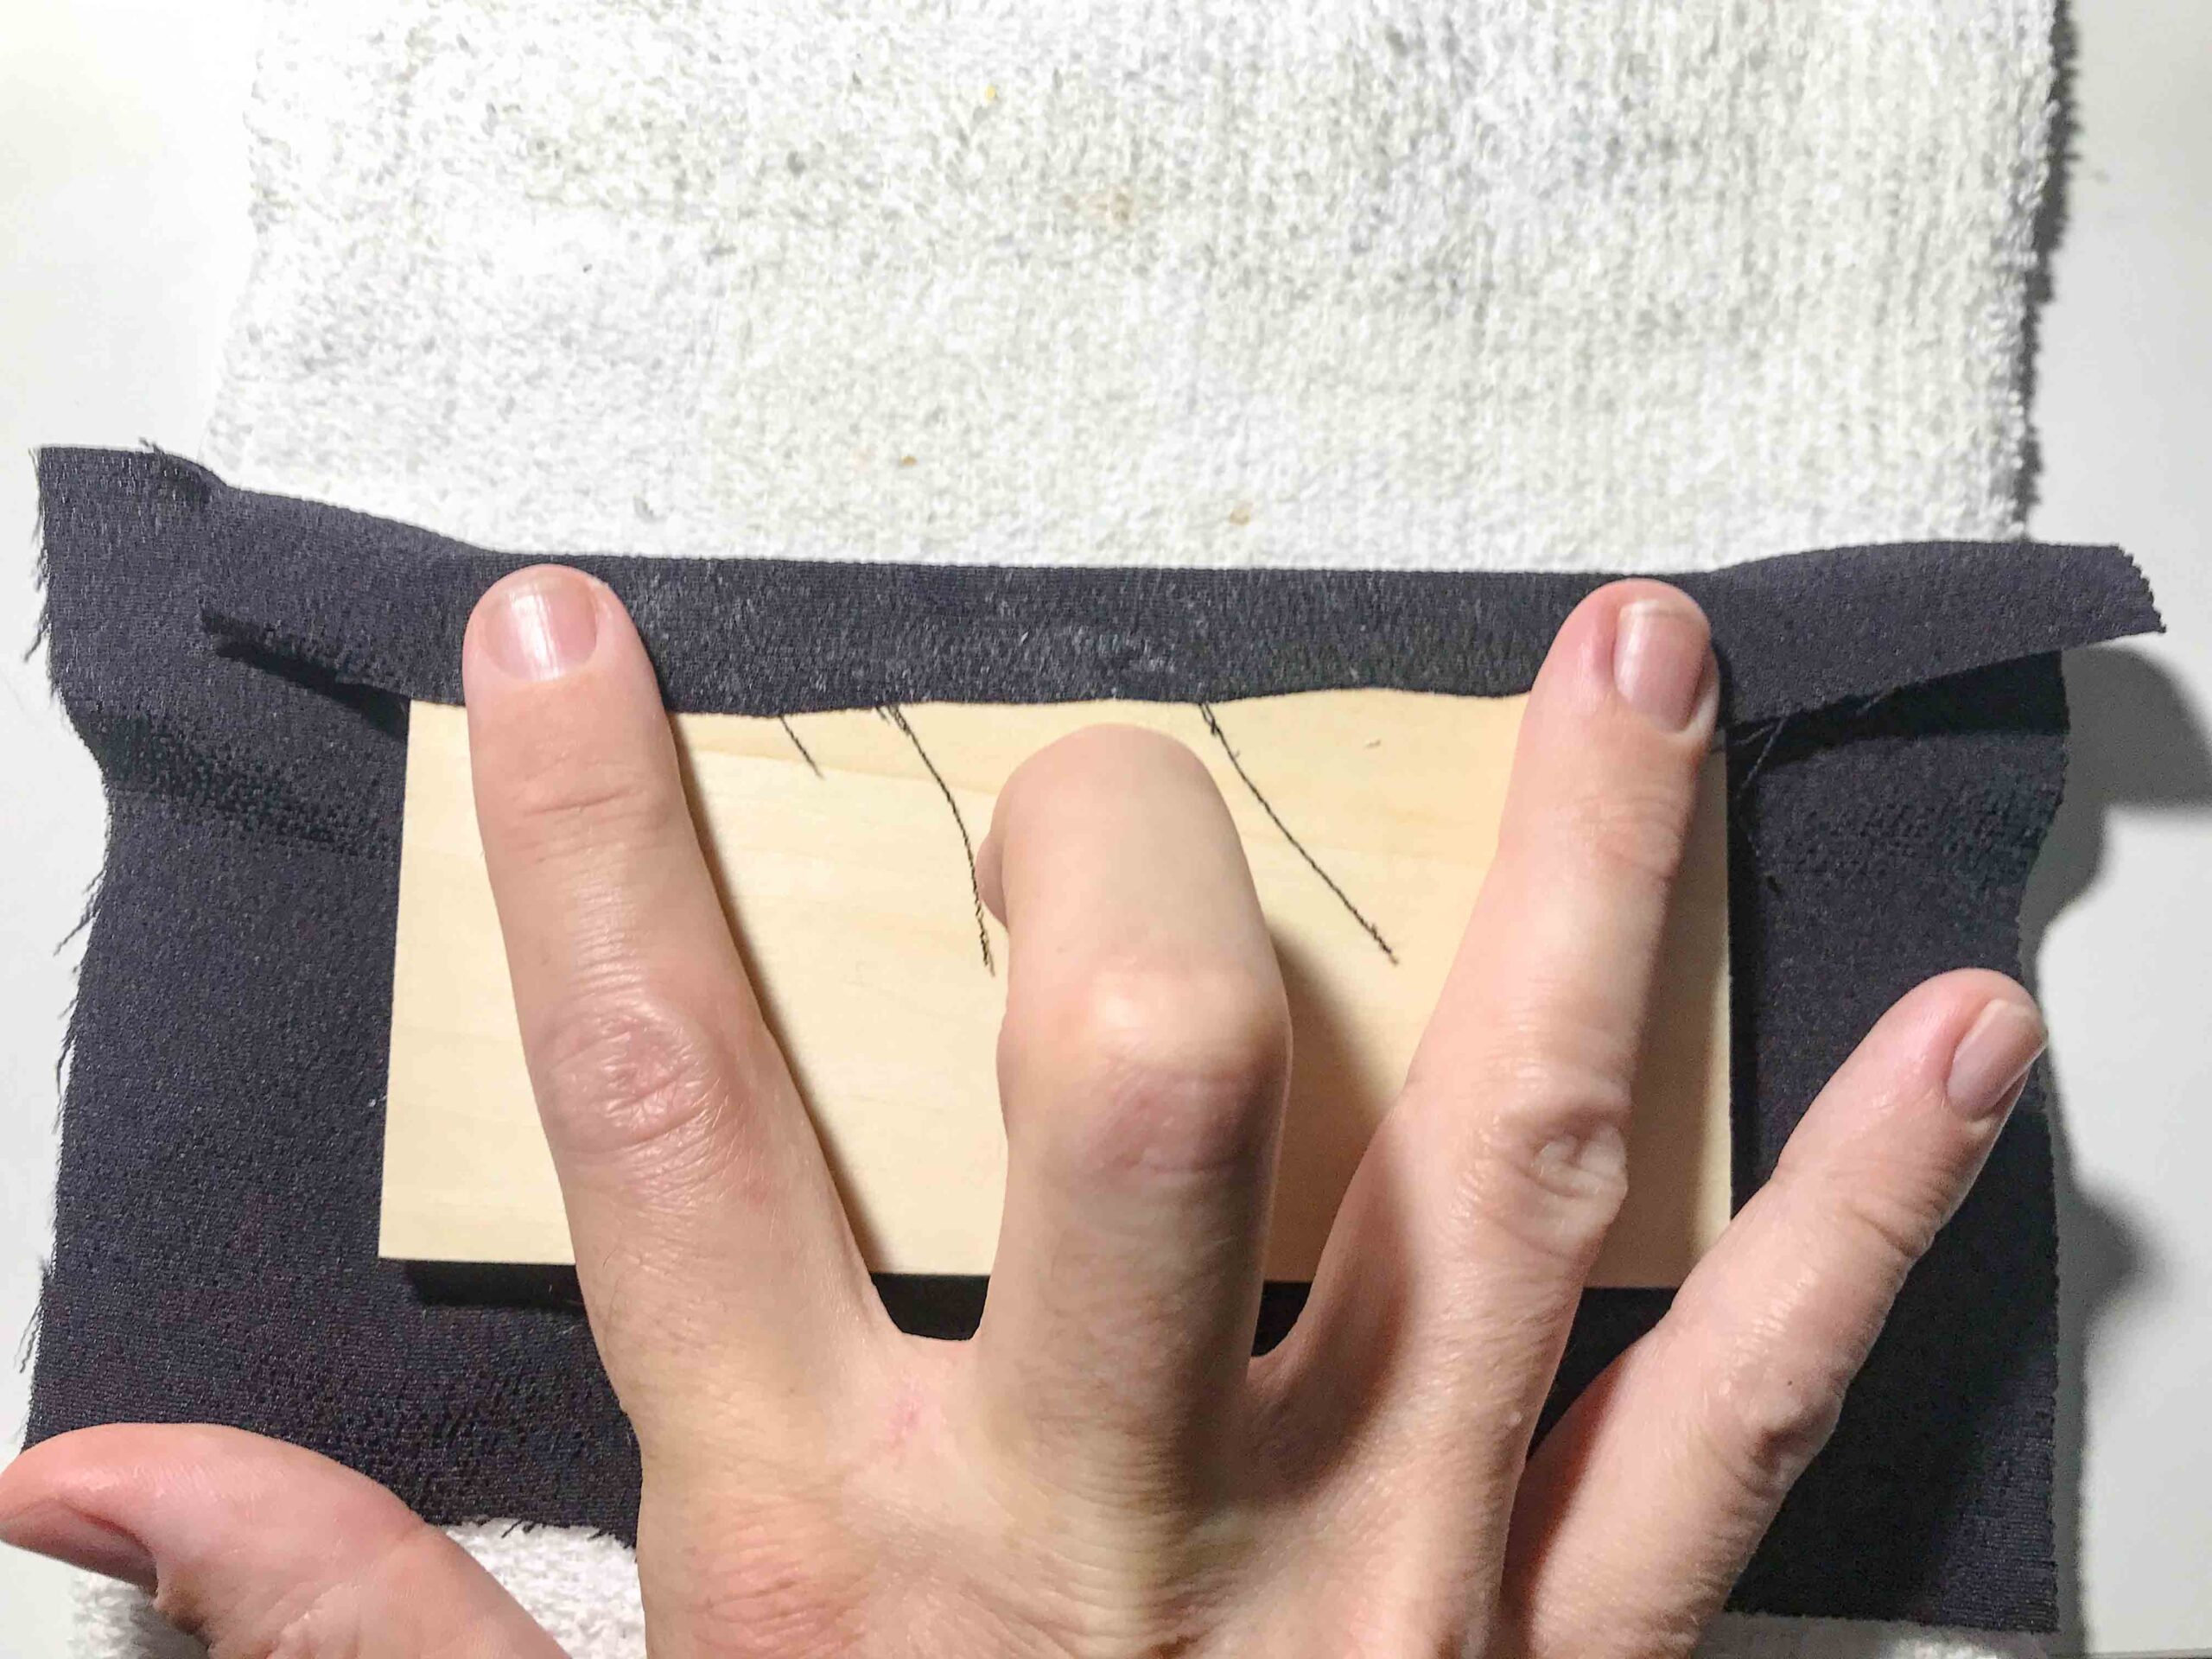
Attach the cardboard to the wood (pic. 3). If any glue squeezes out on the sides, wipe it away with a tissue.
Press the two layers firmly together and wait several minutes to let the glue dry.
Attach glue to the wood
Spread the glue equally
Stick the cardboard to the wood
Attach the silk
As mentioned above, you should by all means that any glue will get in touch with the silk, especially that part of it which will later be seen. I recommend to prepare a clean space, such as a different clean table to perform the next steps. Also clean your hands before working with the silk to avoid any stains. Before performing this step, I recommend attaching a little bit of silk to a small piece of wood to find out how long to wait until the glue is dry enough so it won’t soak through the silk, but still wet enough, that it will bond.
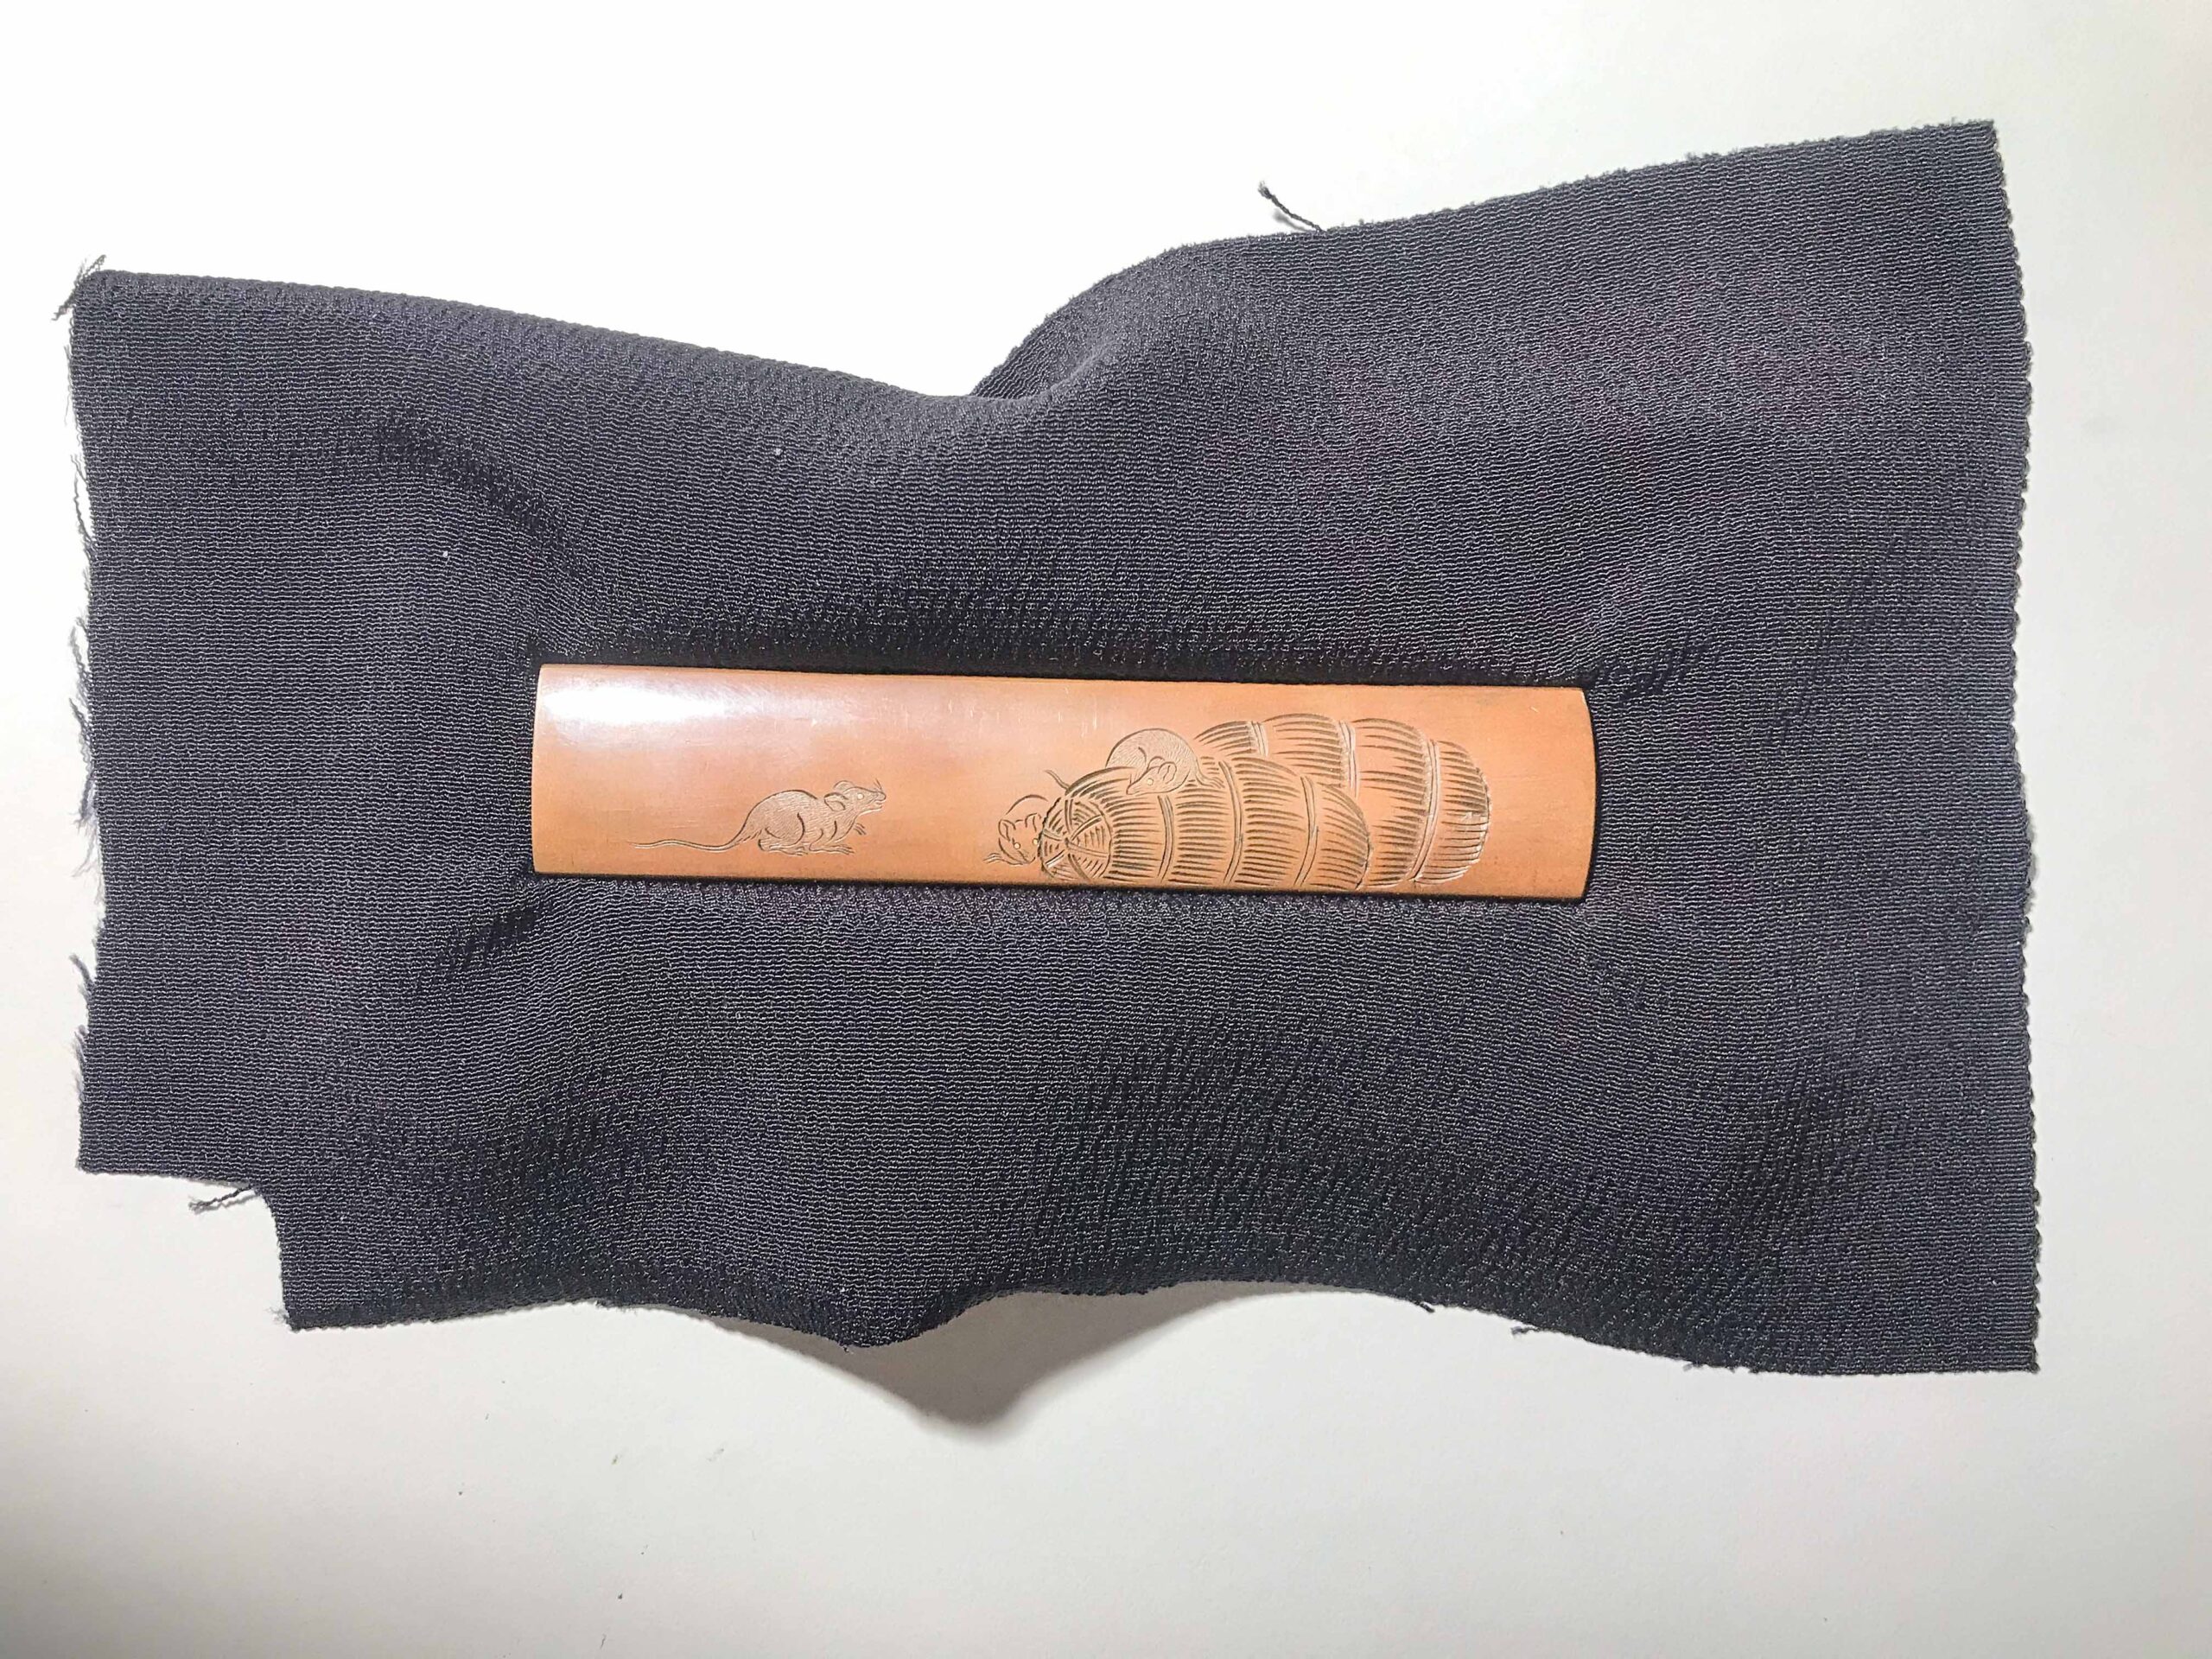
Put the piece of silk on top of your prepared Dai such that the silk pattern is parallel to the Dai (pic. 1).
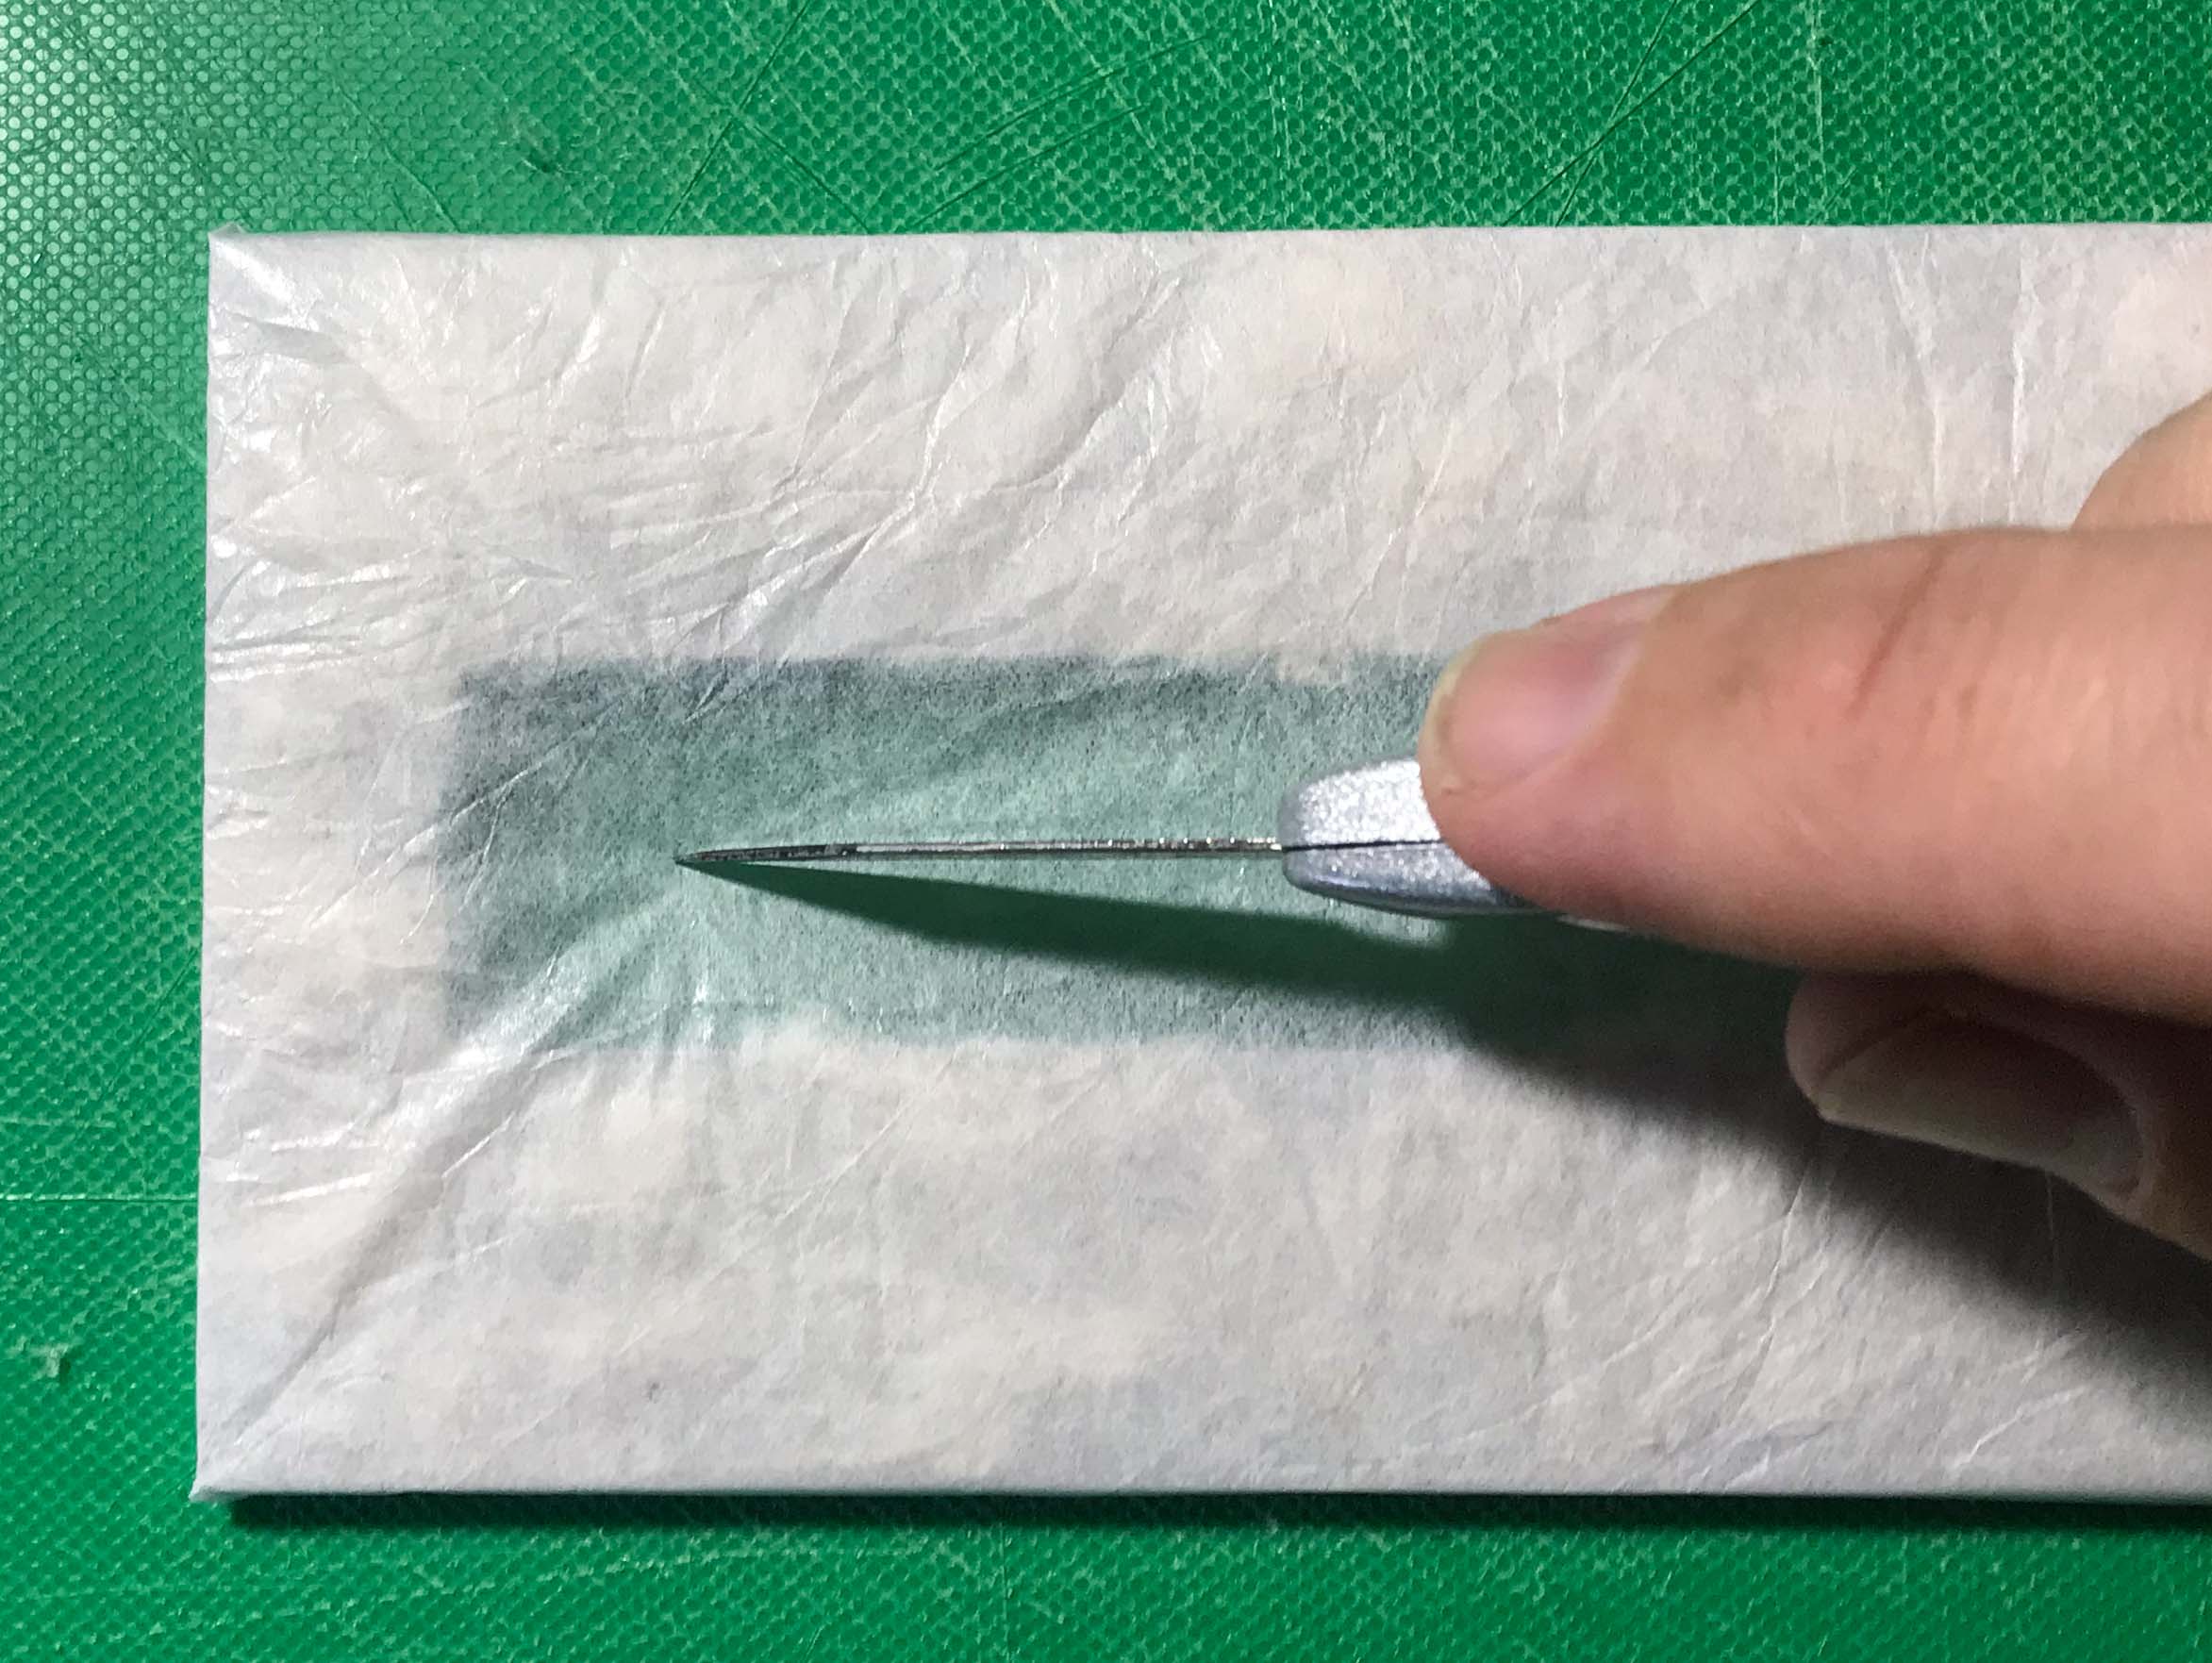
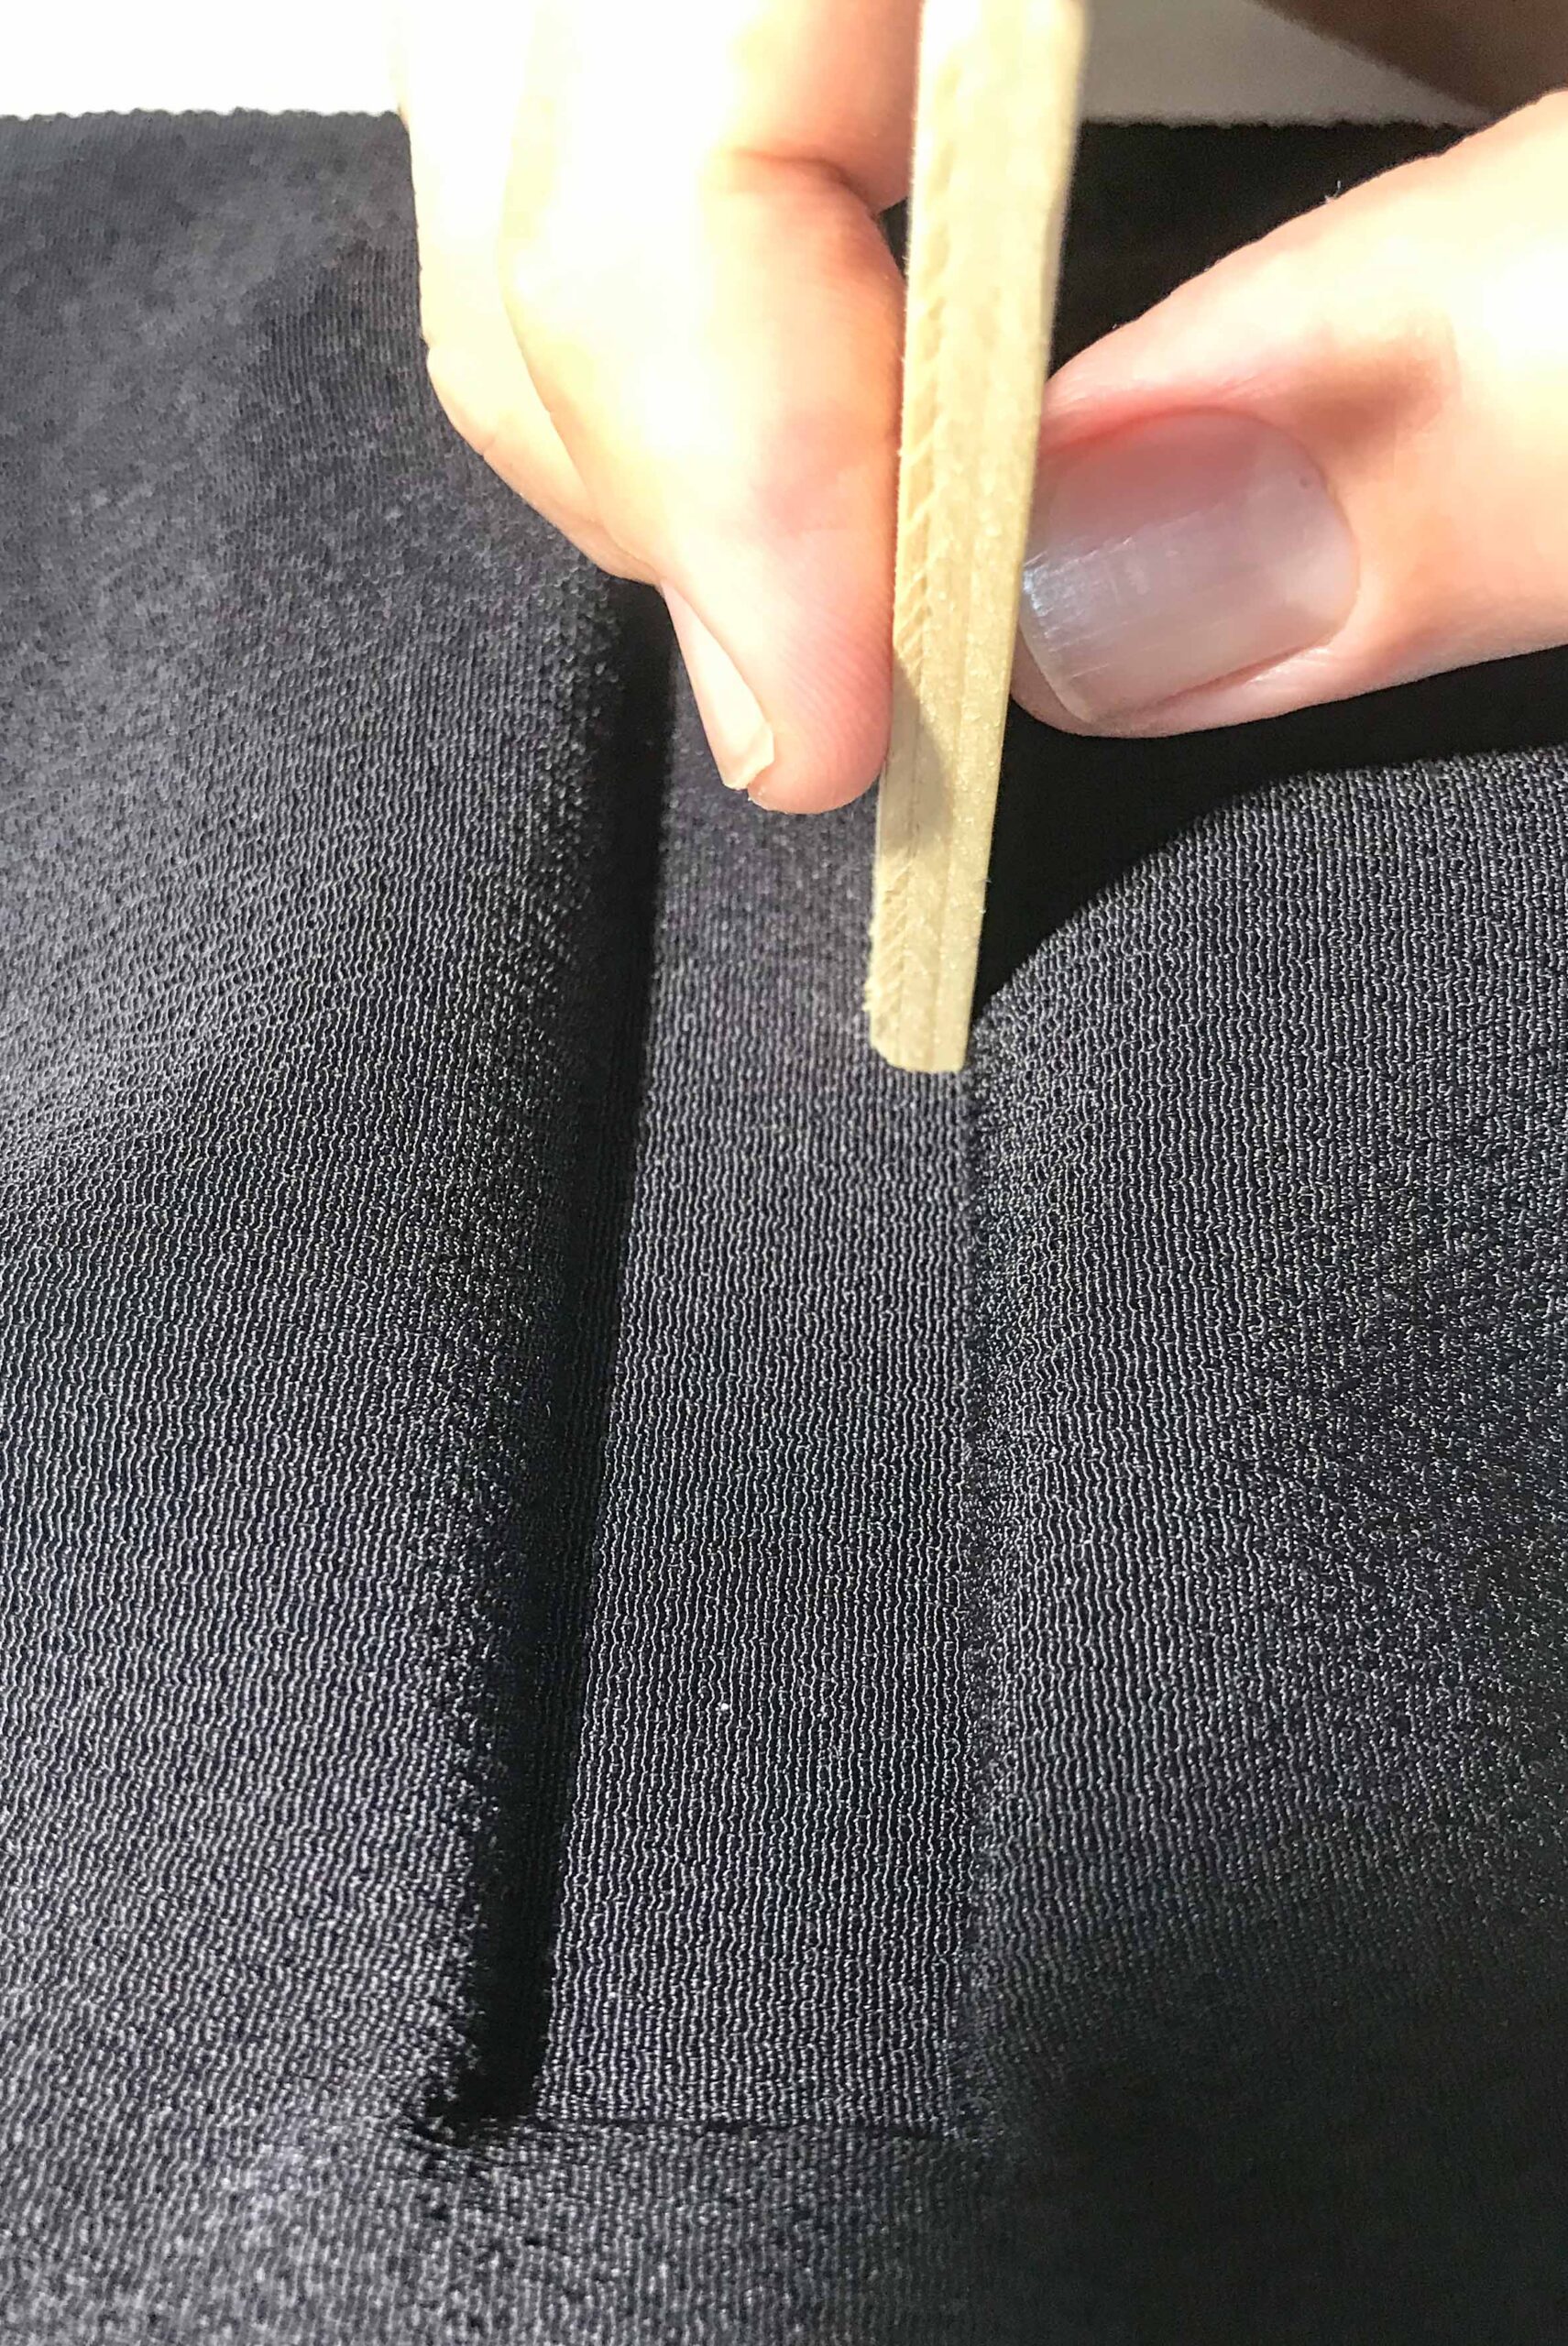
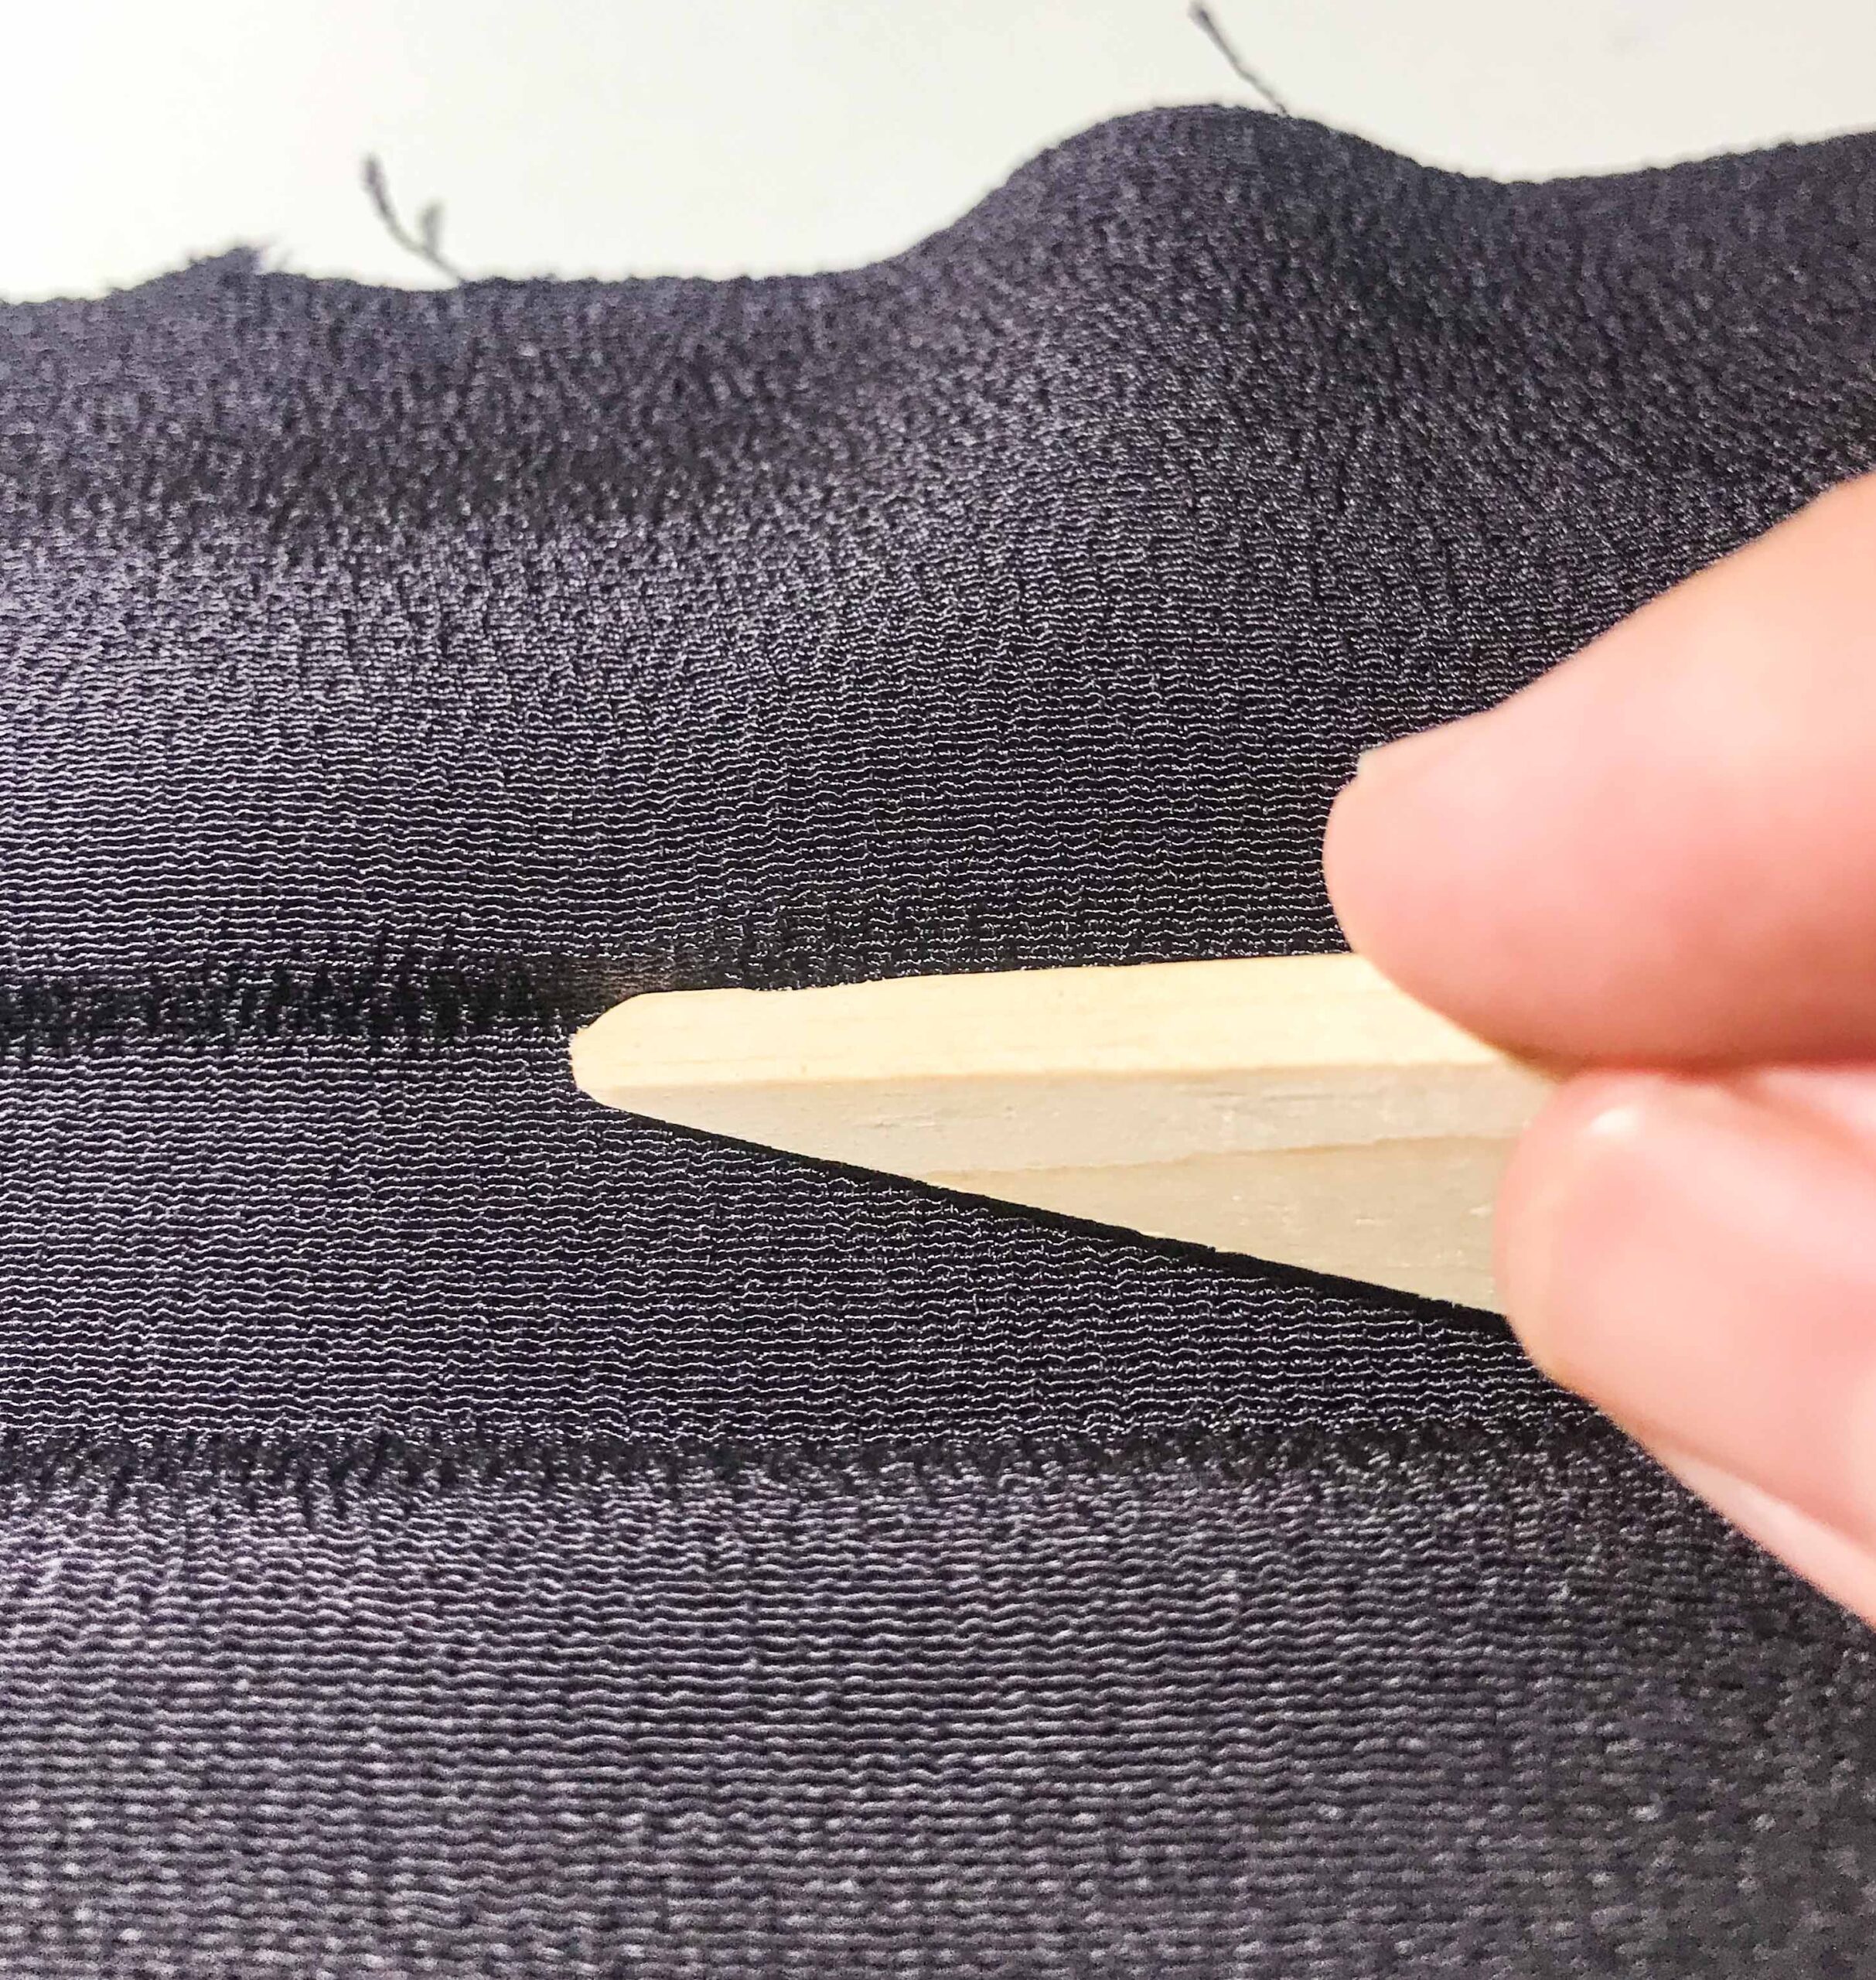
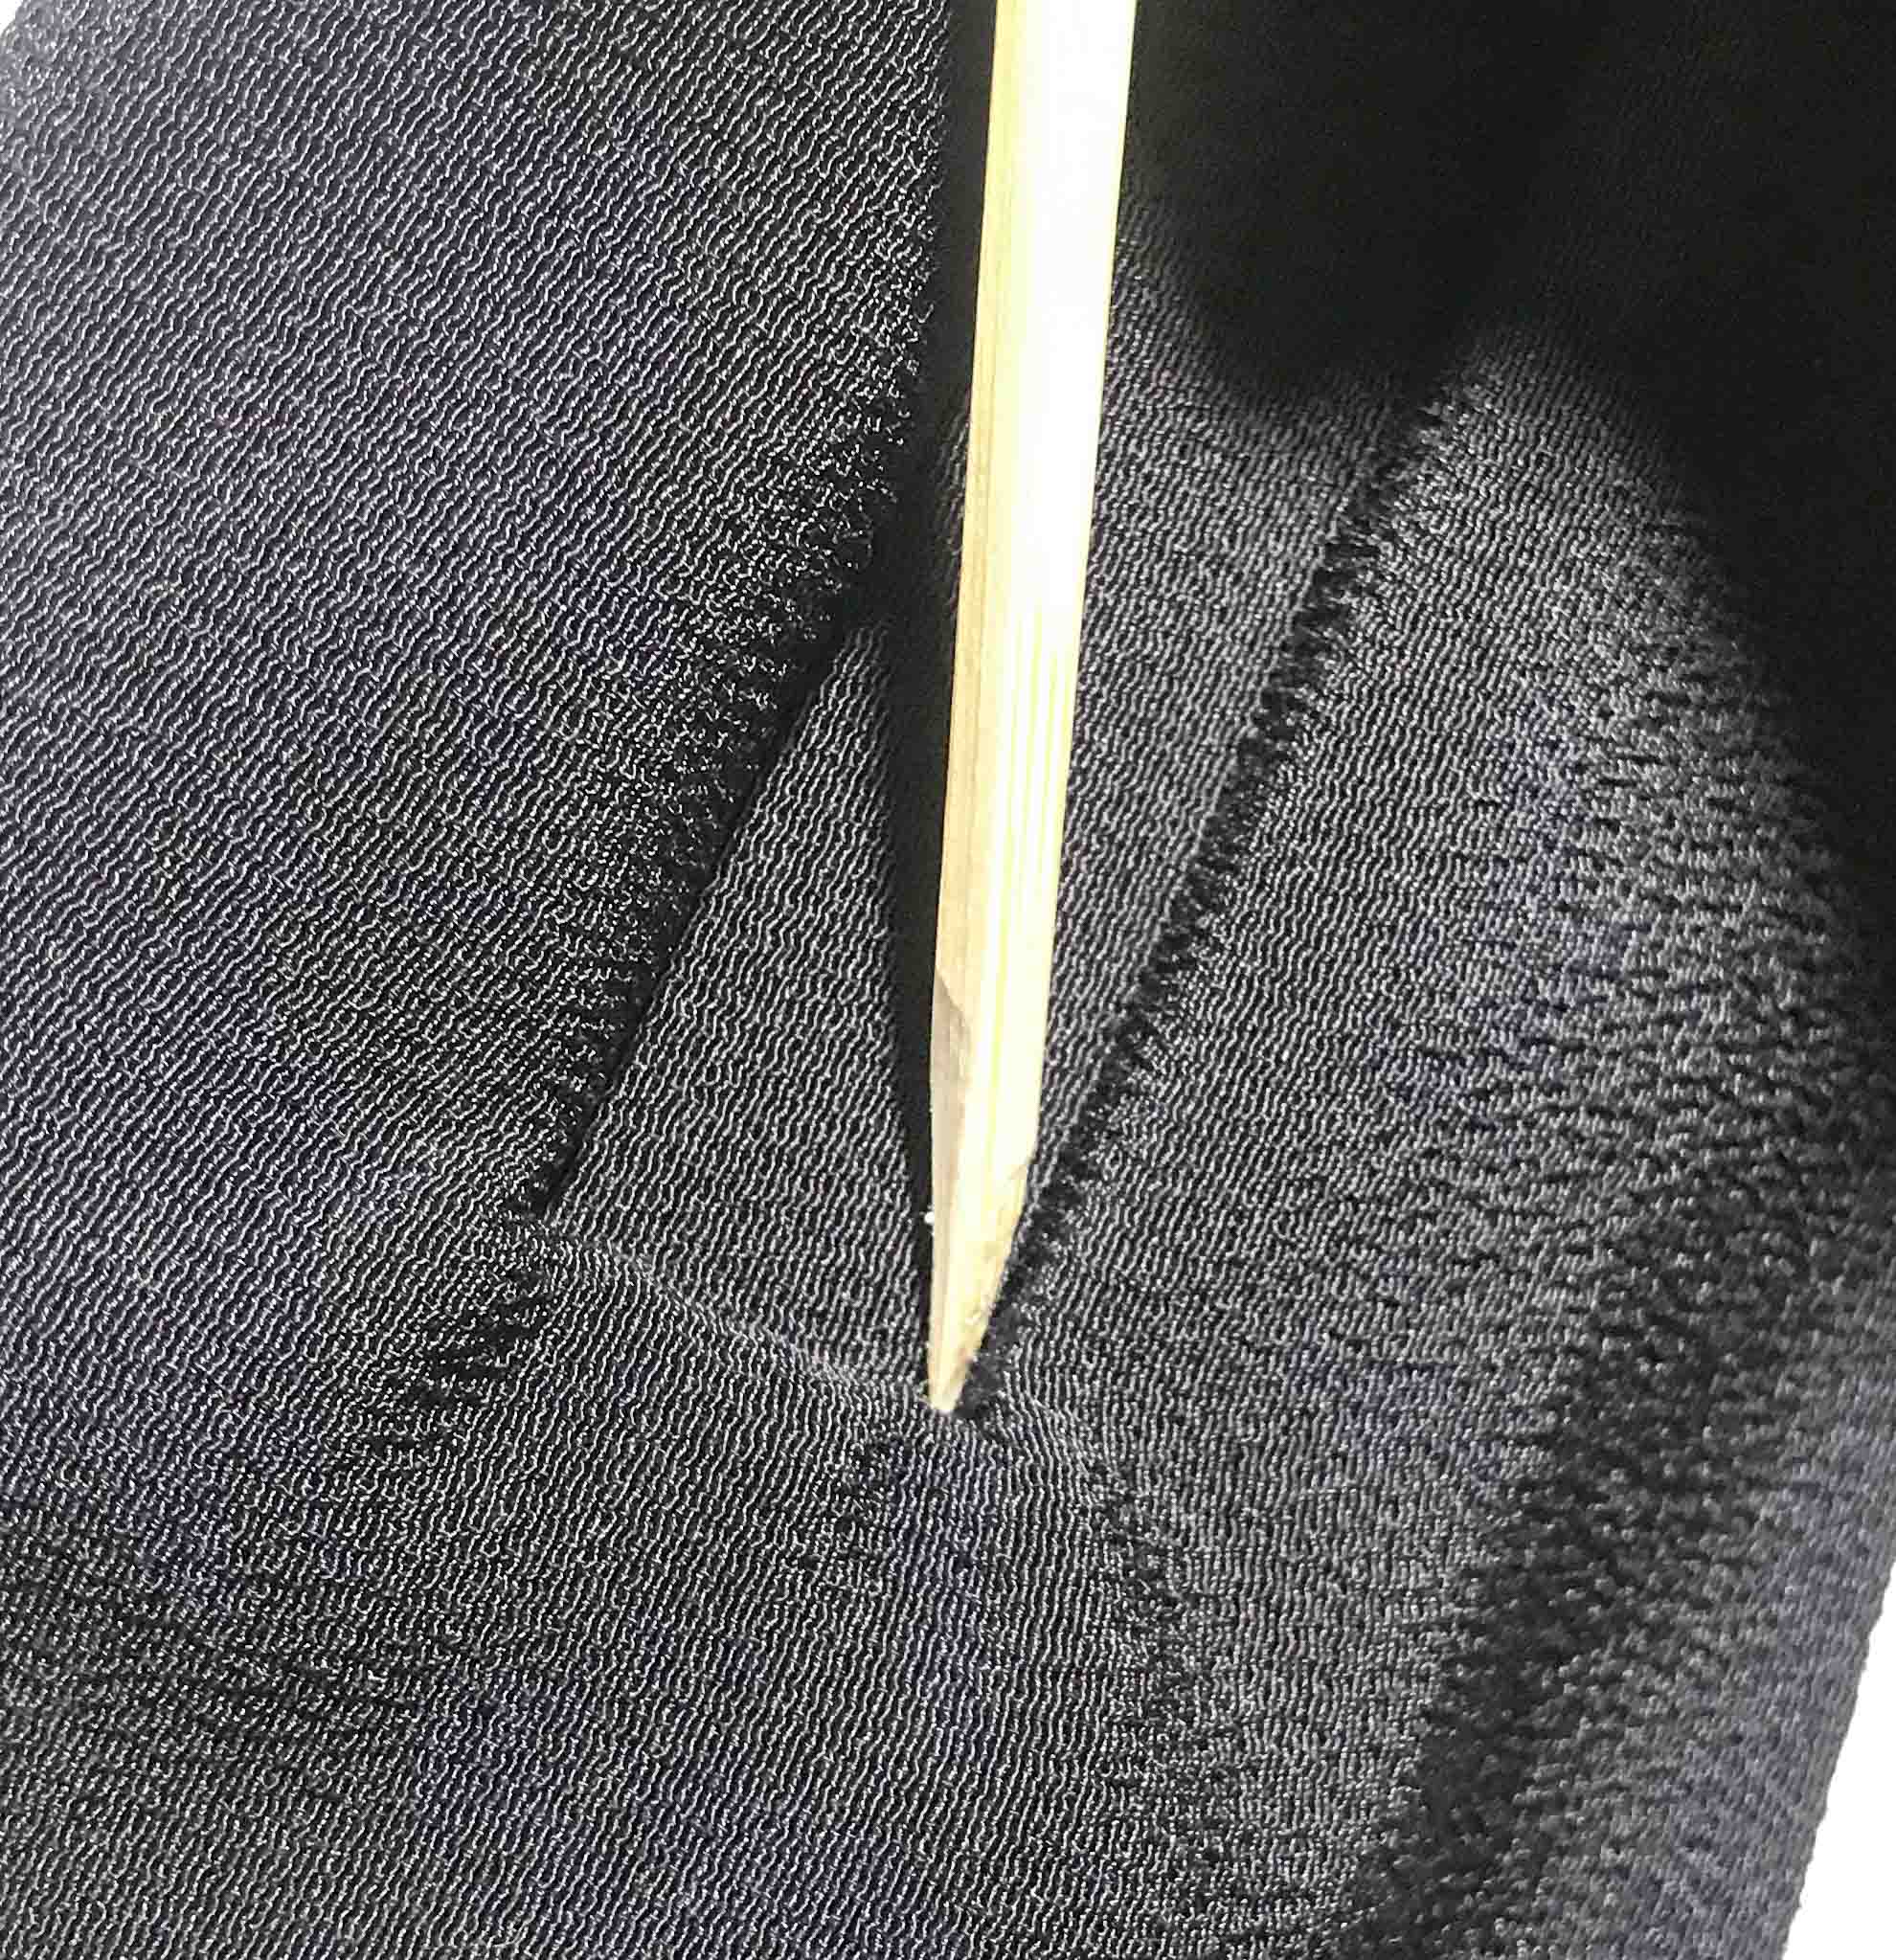
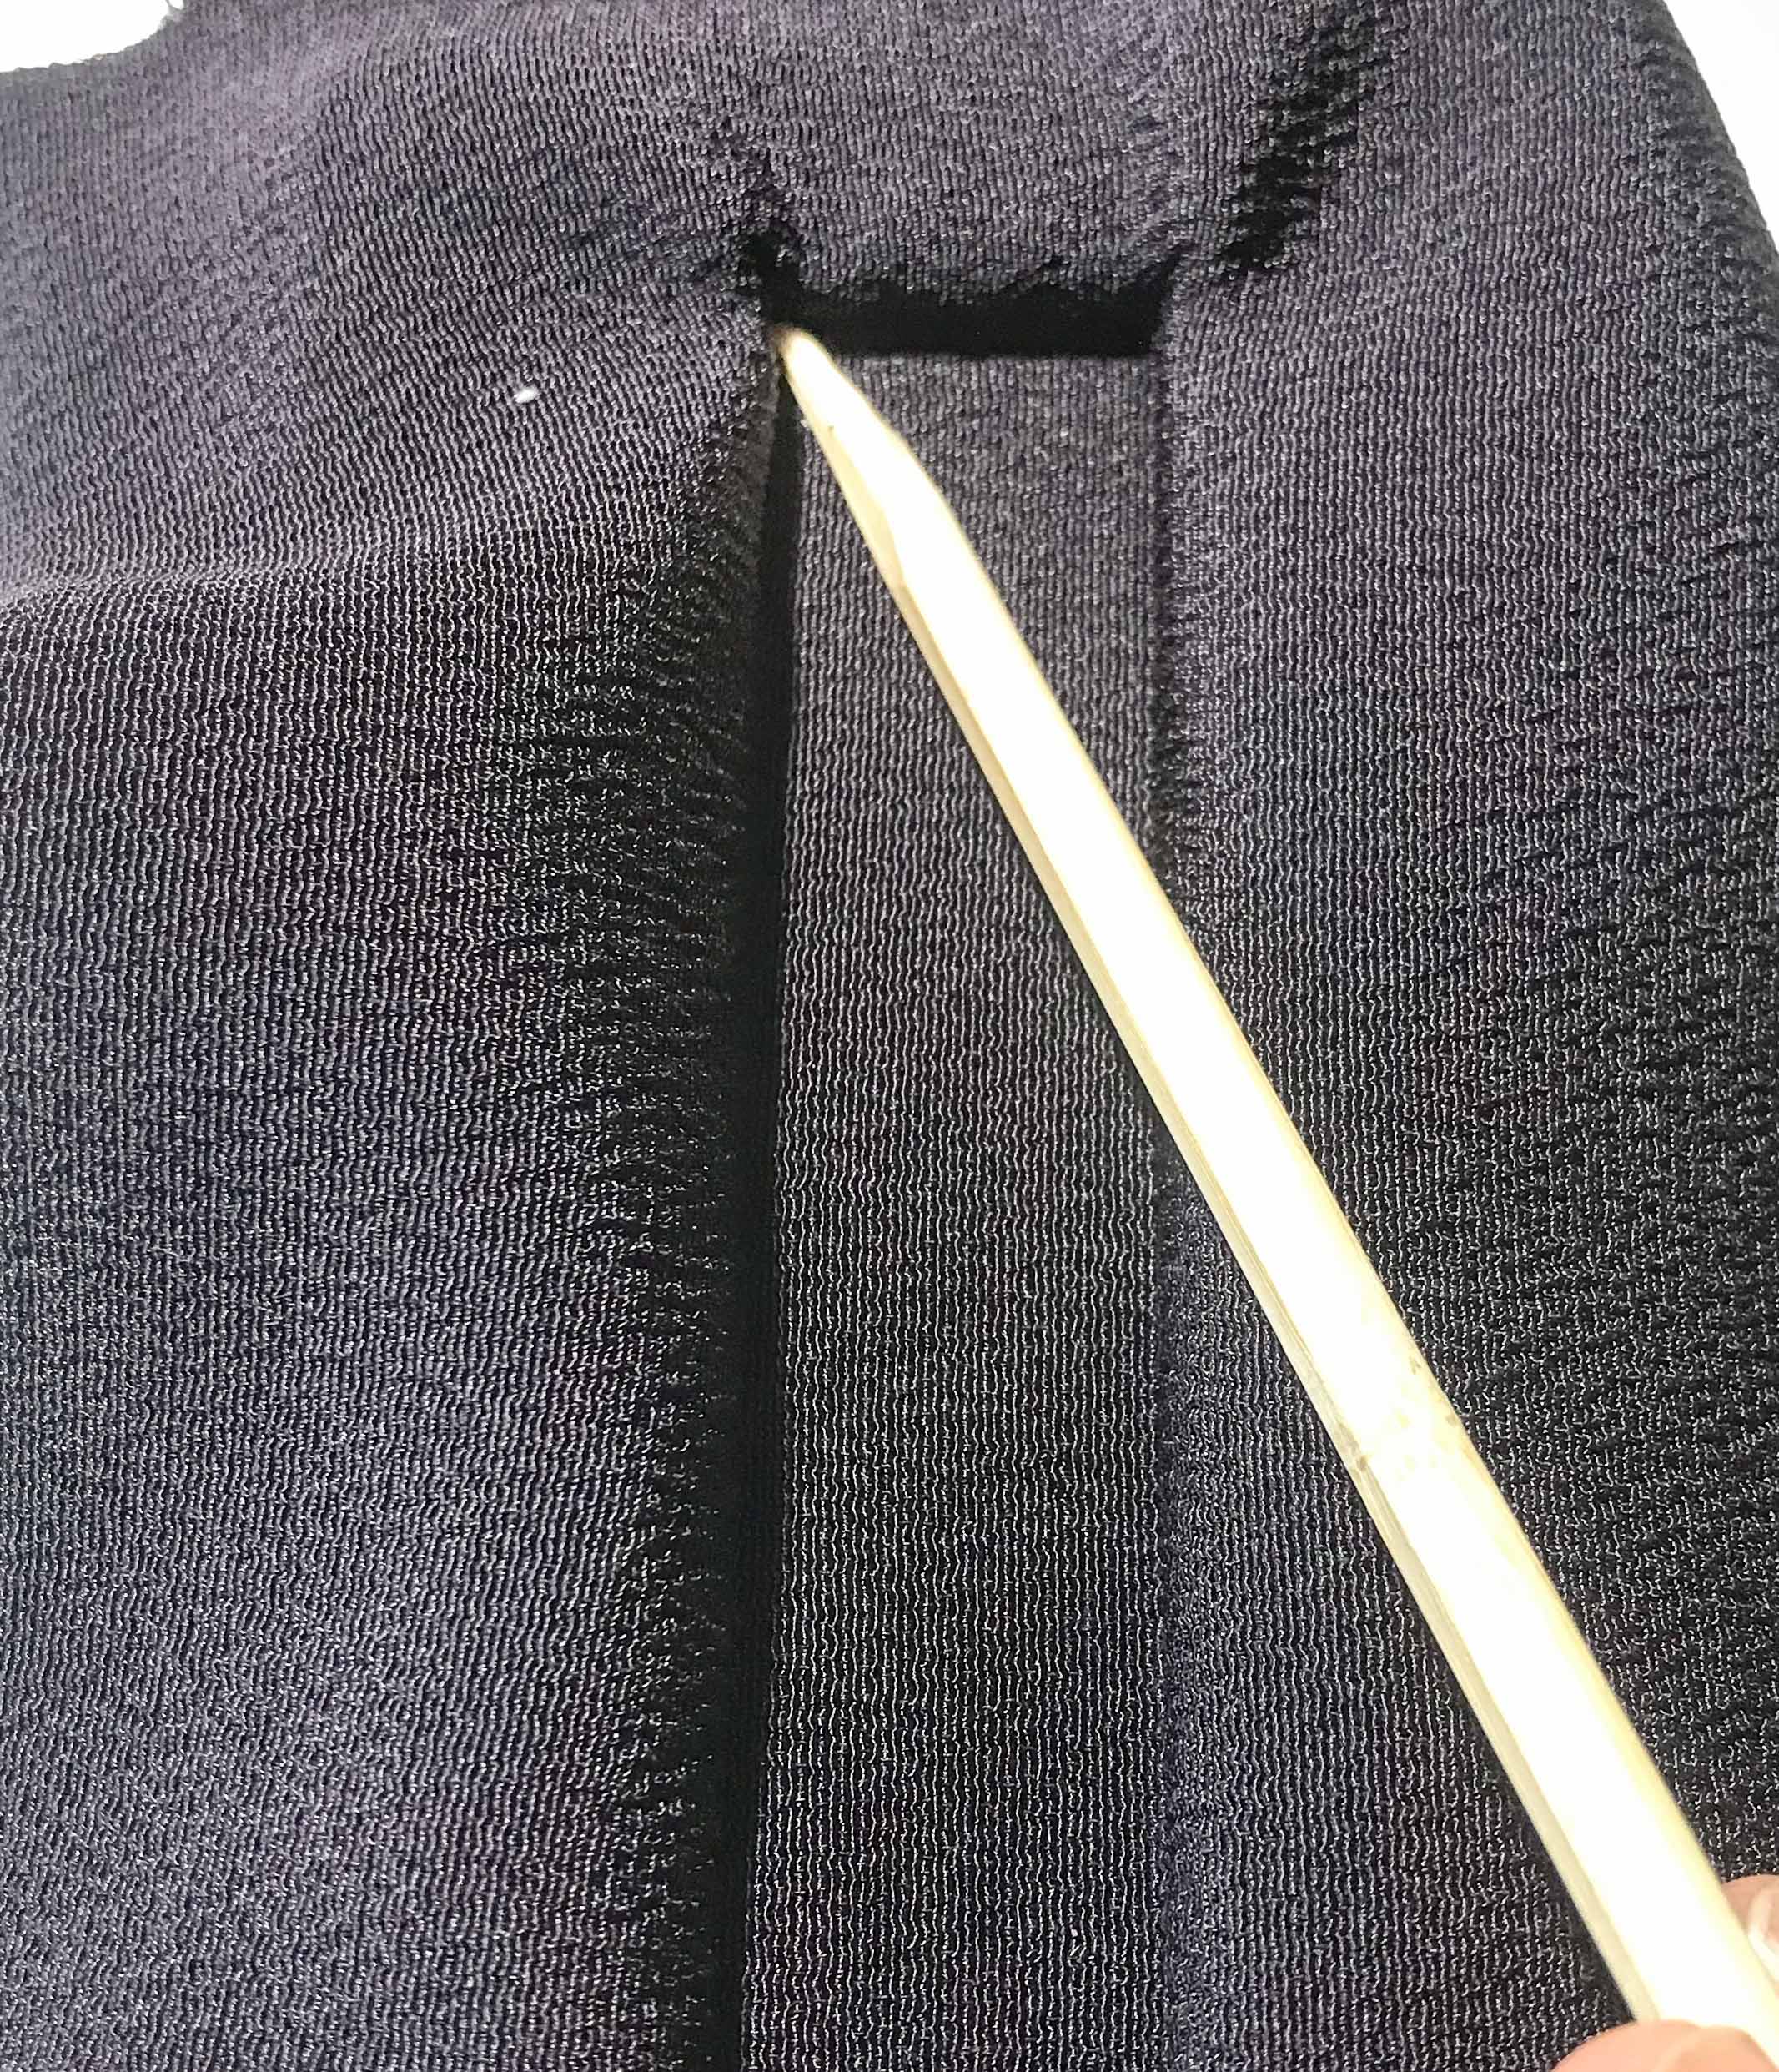
With very little force start to press down the silk on to the glue with your fingers and work yourself from the middle to the outside, very very very carefully. (Too much pressure and the glue will soak through the silk and make it look ugly and make you wanna cry, because you would have to rip it off, wash it and start again.) You might want to use some small pieces of would or some wooden chopsticks to work your way out in the corners (pic. 3 to 6). Only apply a bit more force after several minutes have past, and you are sure that the glue has dried.
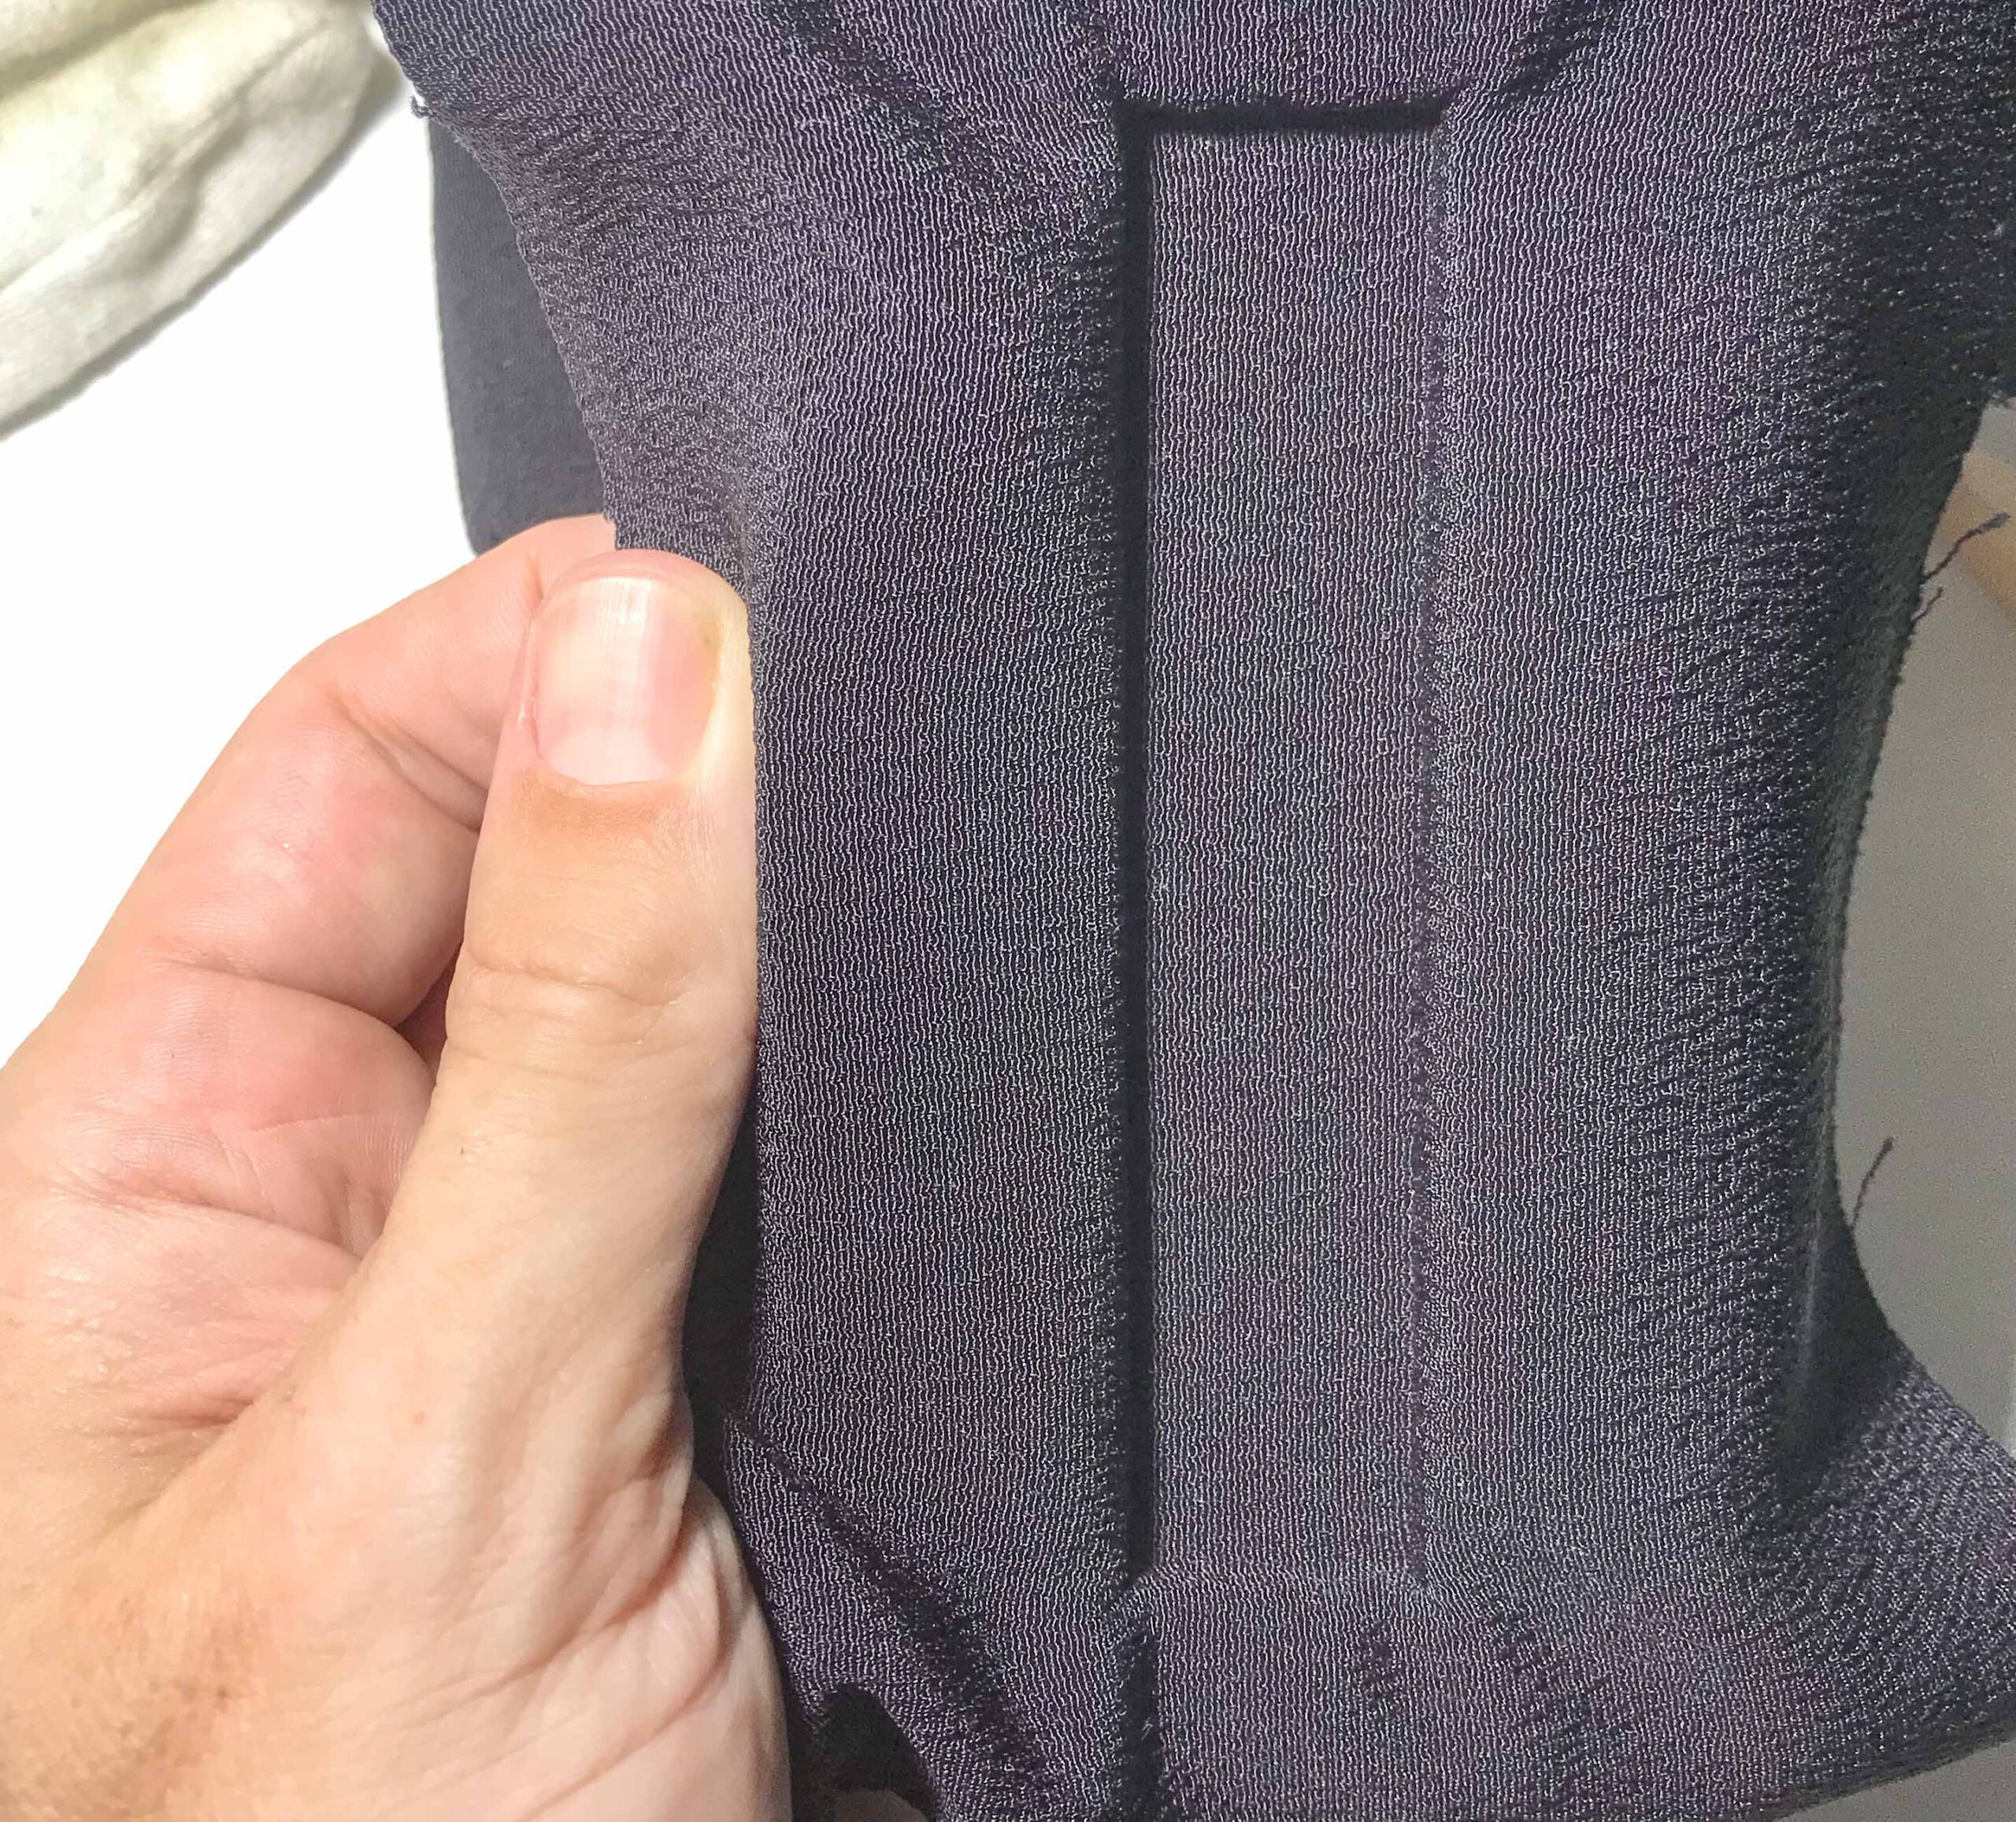
After about 20 to 30 minutes you can test if the silk has bonded firmly with the glue by pulling it around the rim of the Dai (pic. 7). If by any chance this will pull of the silk from the wood again, you can simply press it down again a bit longer with a wooden piece. (If by any chance you find that there is not enough glue under the silk left, you can very carefully lift up silk at this spot and use a sharpened stick to apply a little bit of glue there. Again you will have to wait for it to dry until you should press the silk onto it.)
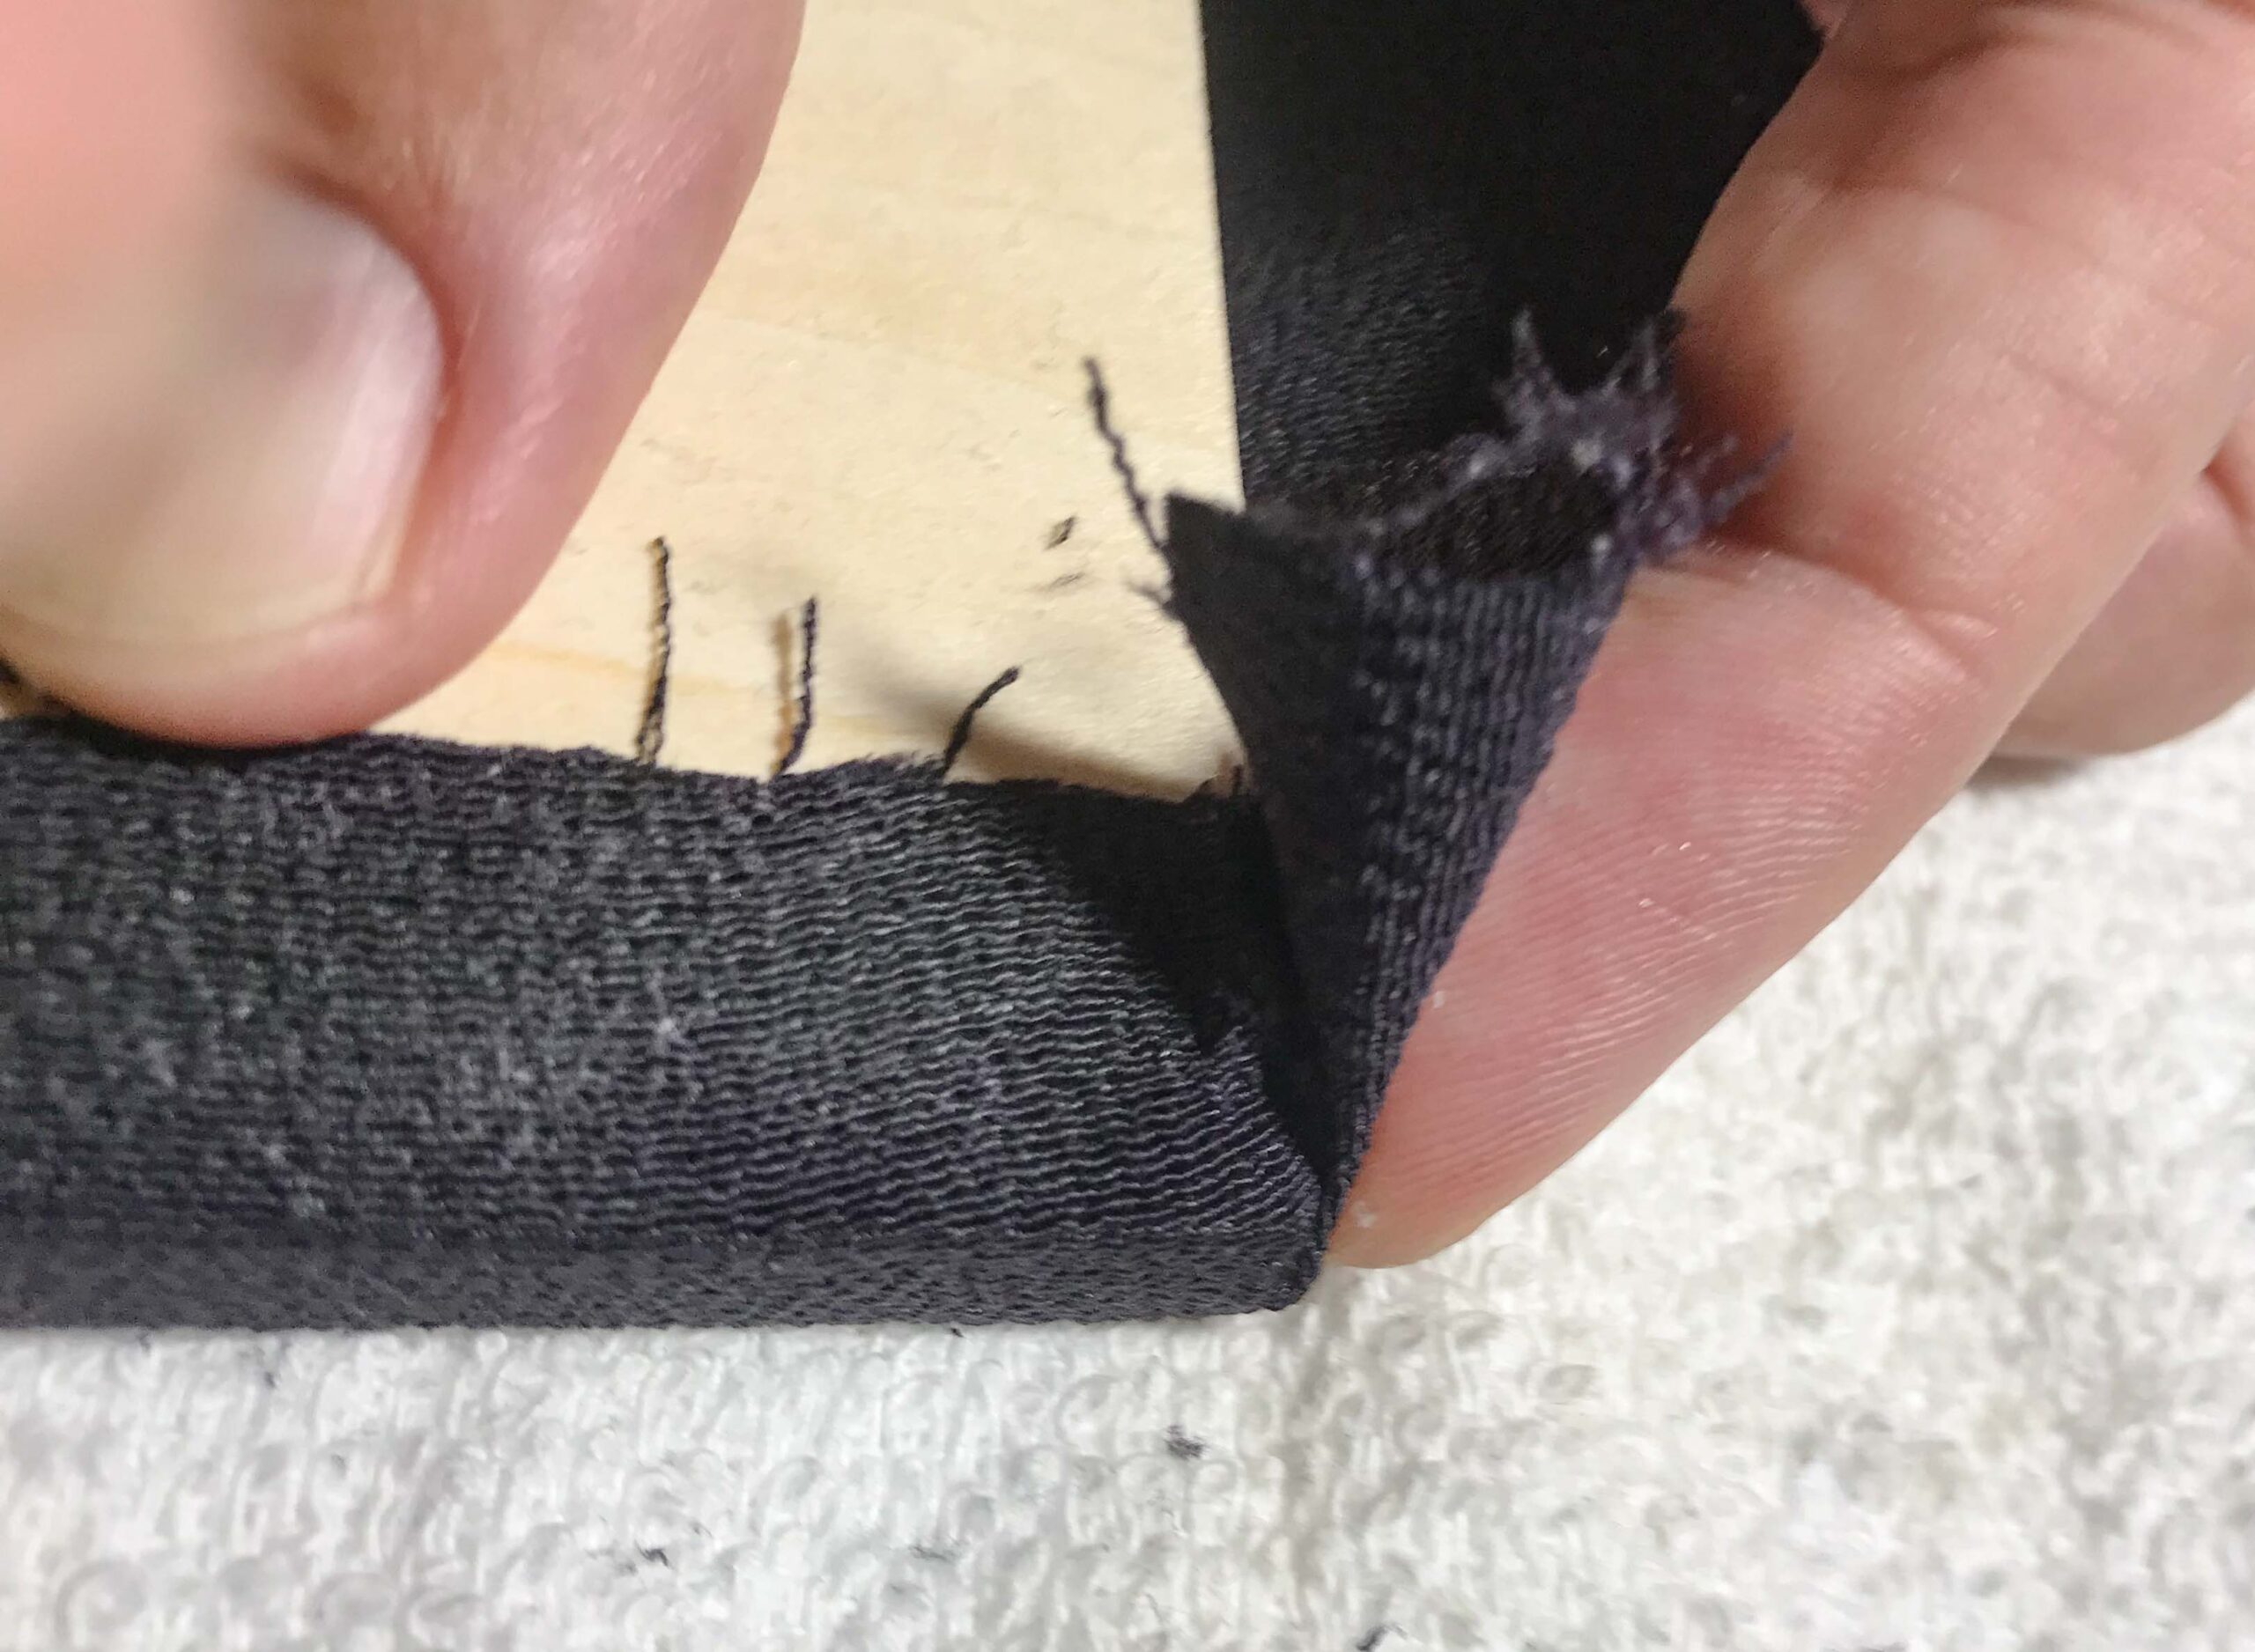
When the silk has bonded with the wood you can turn around the Dai and apply the glue on one longer side on the back (pic. 8).
Pull over the silk and press it onto the glue at the same time pulling it down at the ends (pic. 9). Pulling the silk will prevent any wrinkles to be left on the front side. After the silk has bonded repeat it on the other side. (You will get your hands dirty so avoid touching the front part of the Dai for now.)
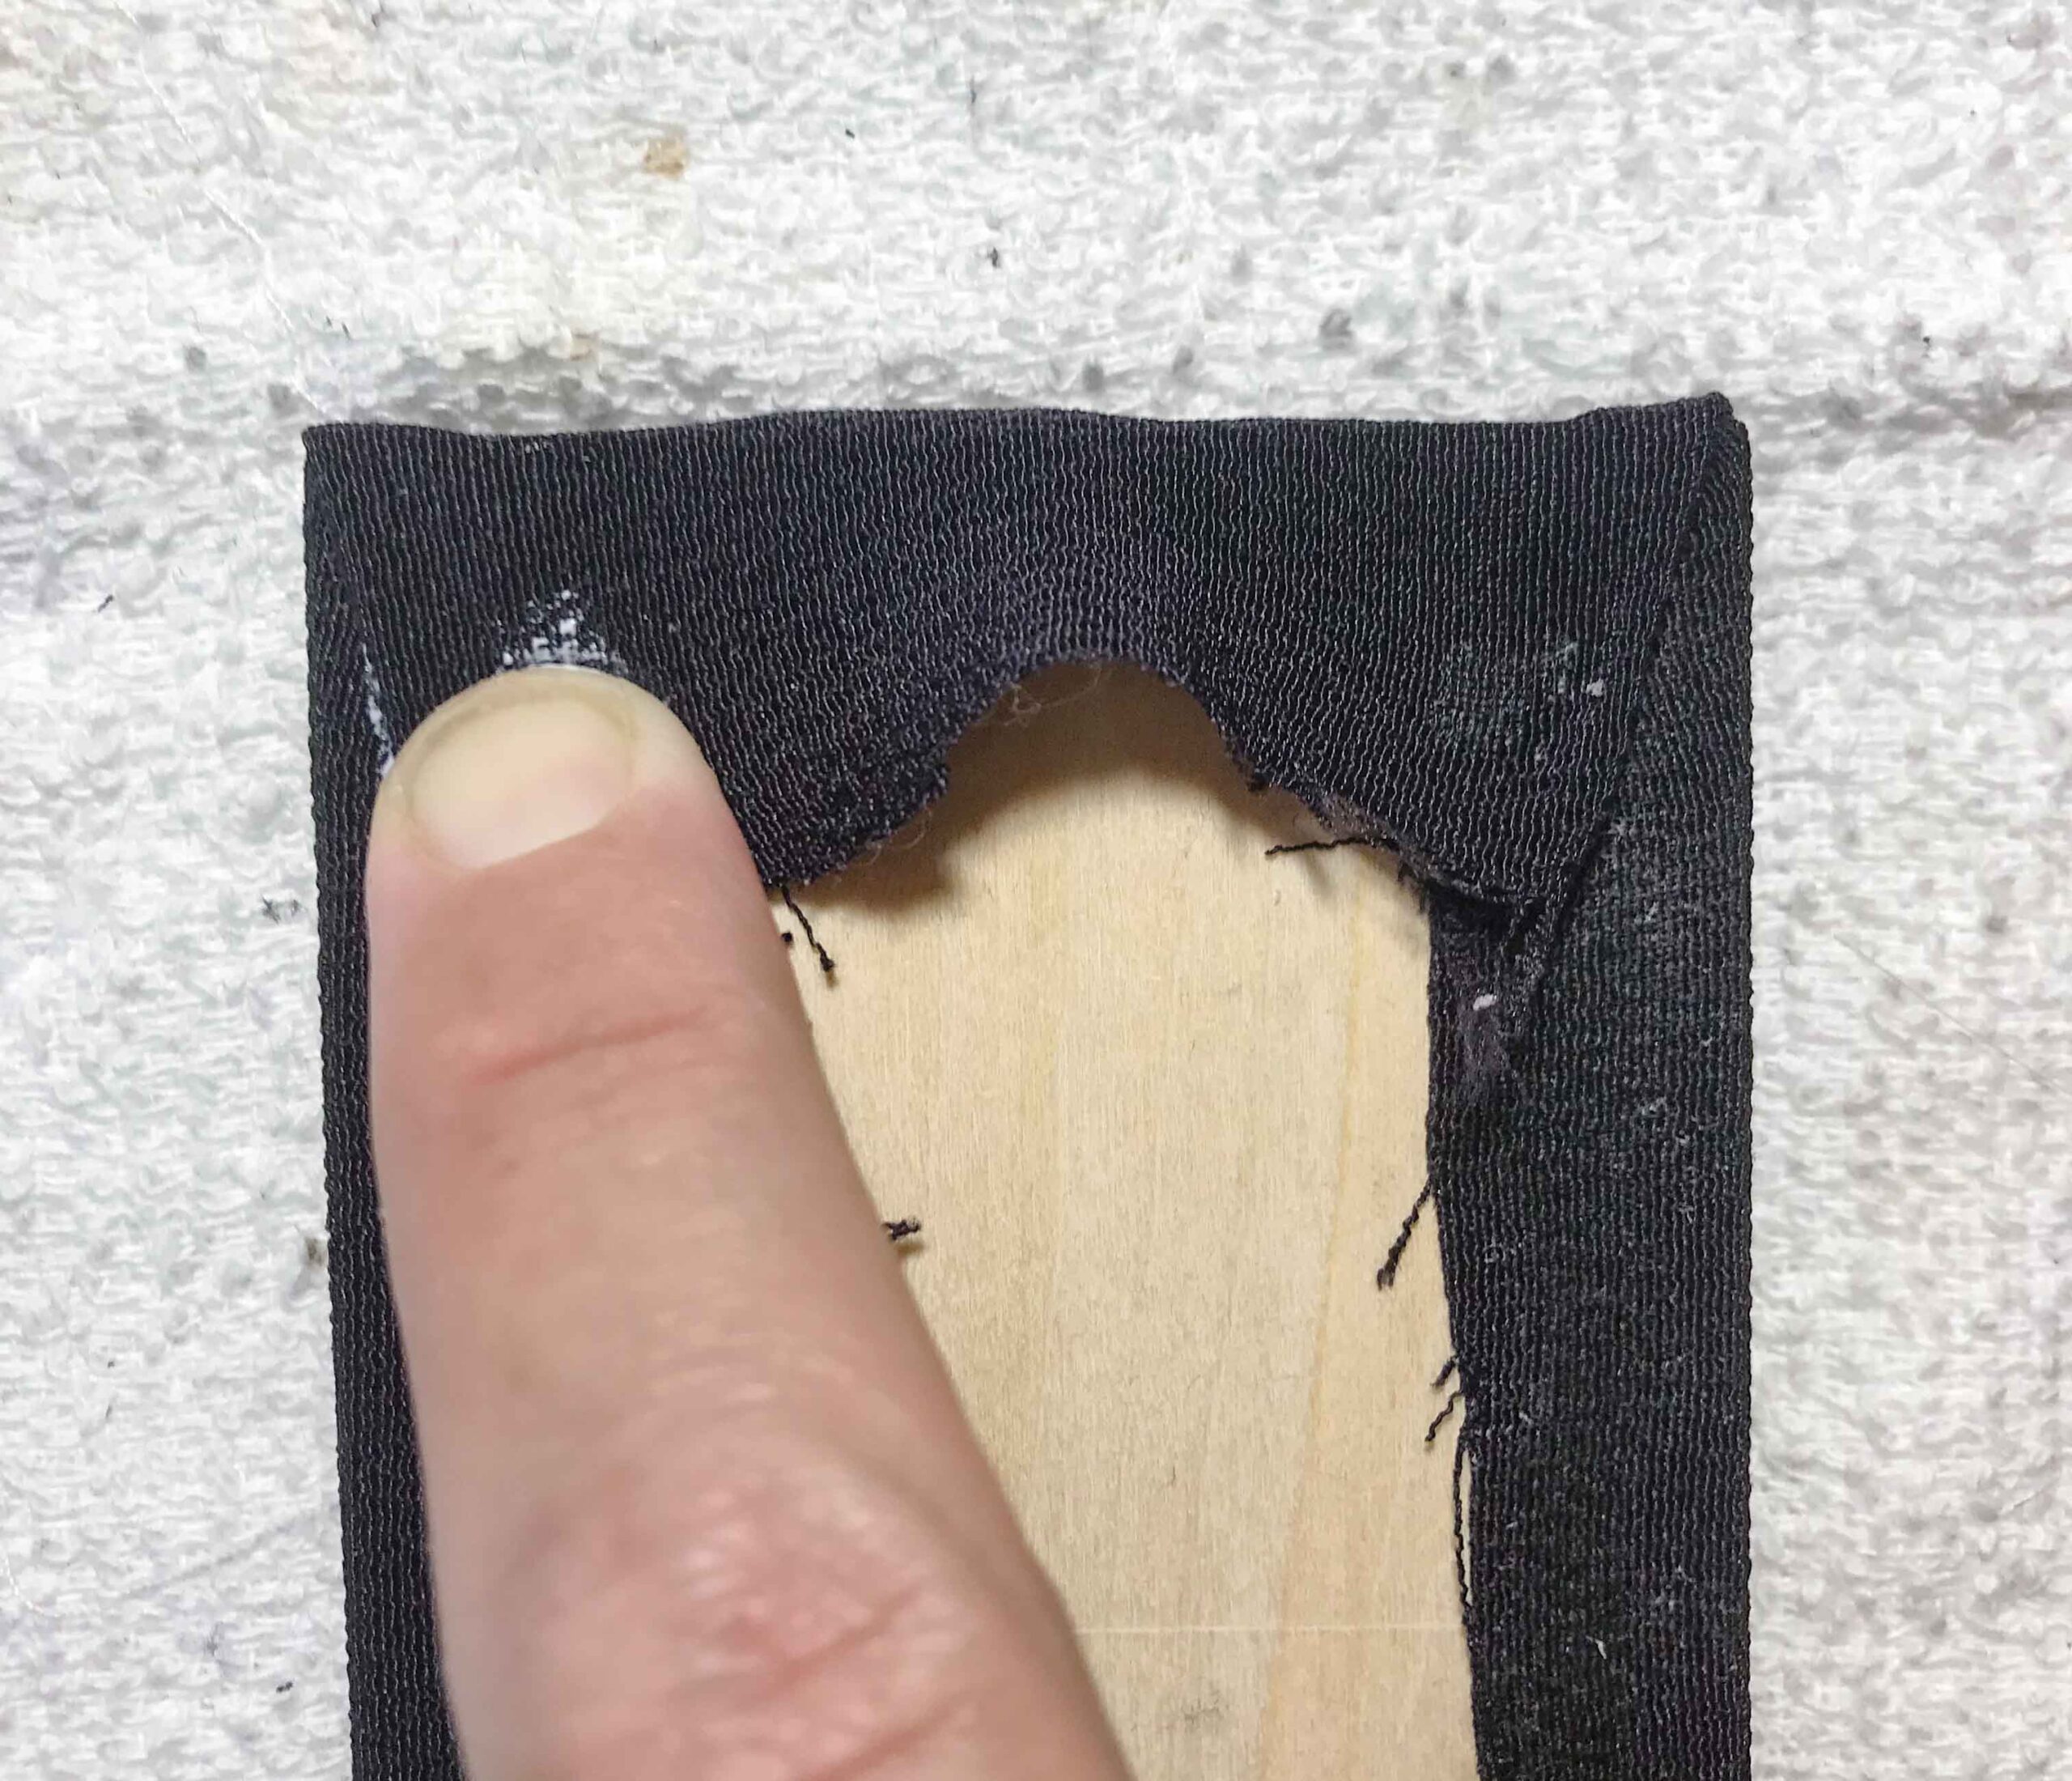
Cut away carefully the overstanding silk at the short ends.
Fold the overlapping silk inside and pull the silk over the short end. Glue the silk to the back by firmly pulling it down again. You should check the front of the Dai for any wrinkles at the edges of the Kozuka cut out. If there are any wrinkles left, pull the silk on the backside further.
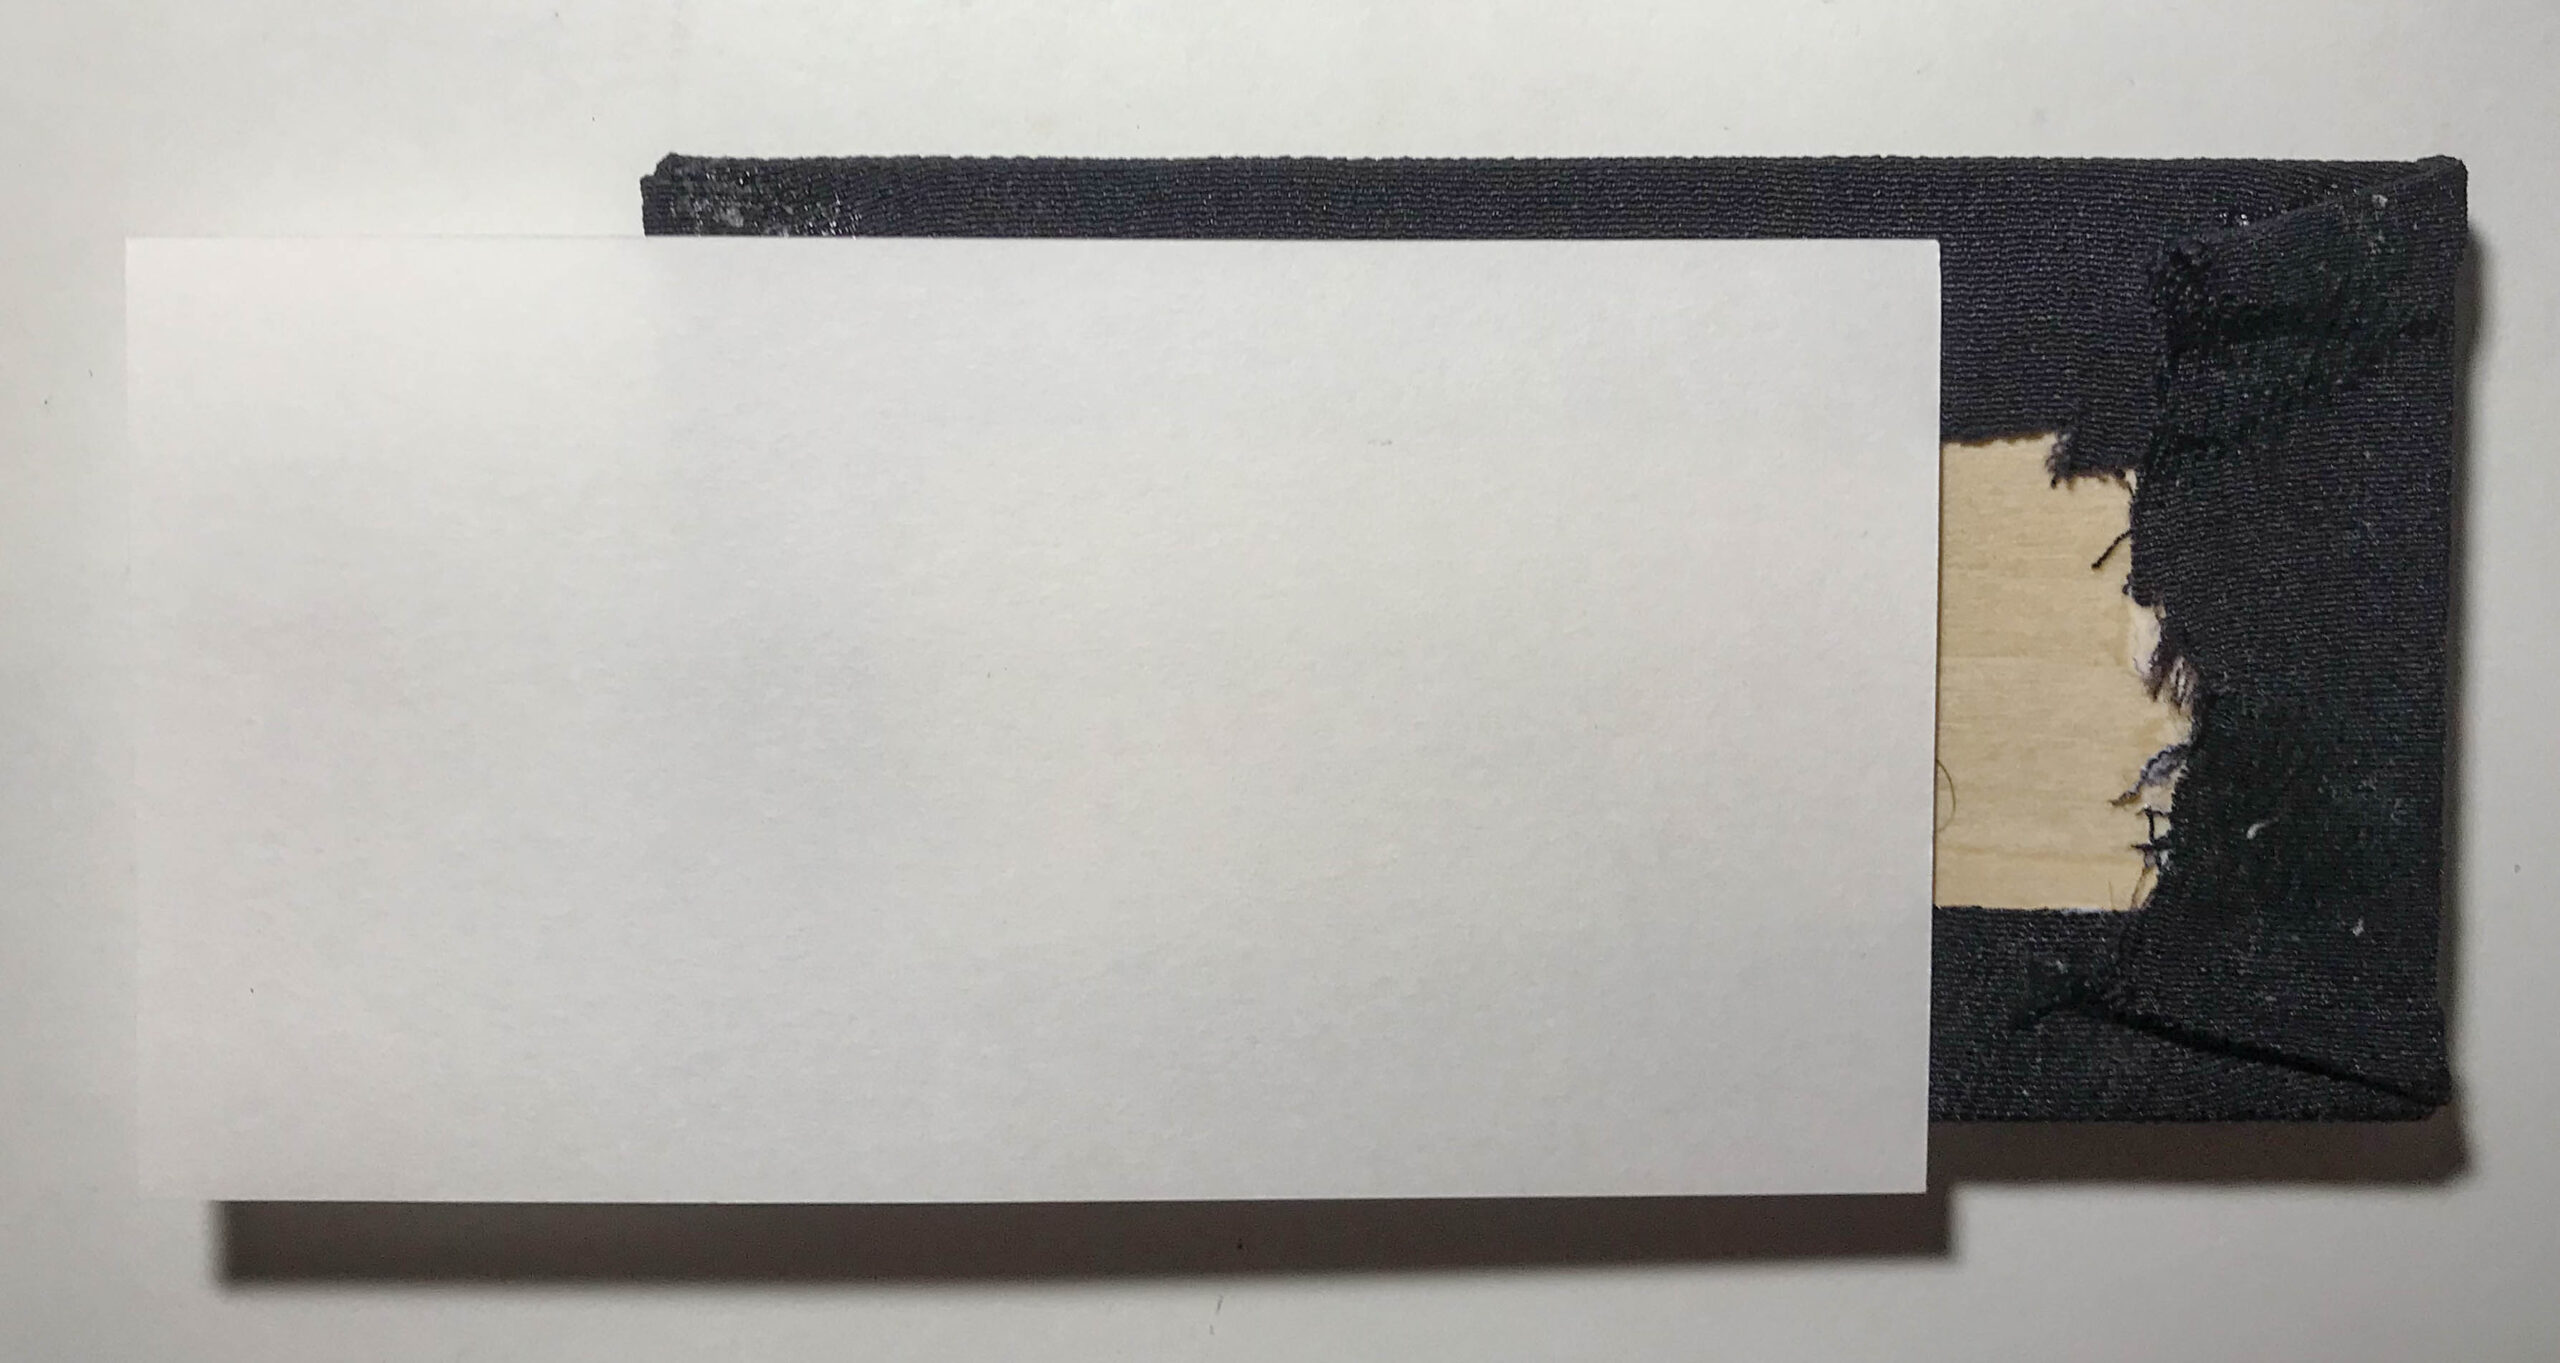
After the silk has bonded on the back side you would want to cover the back with a piece of Japanese paper.
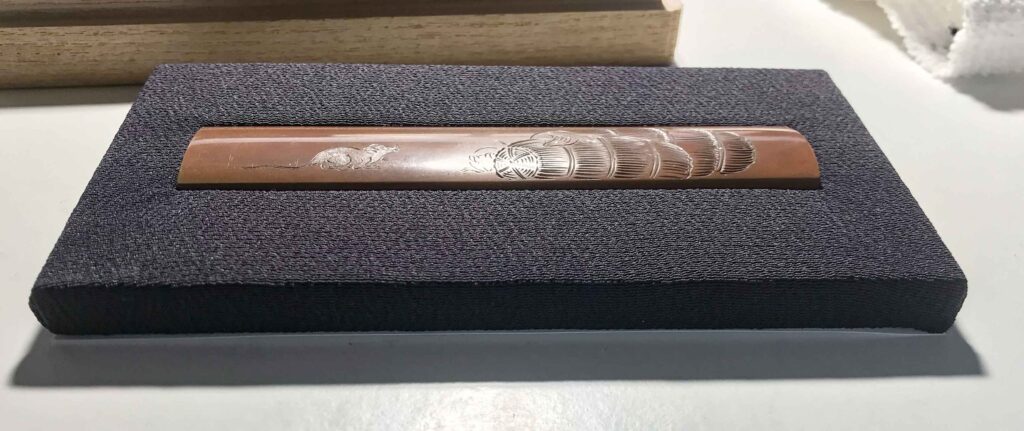
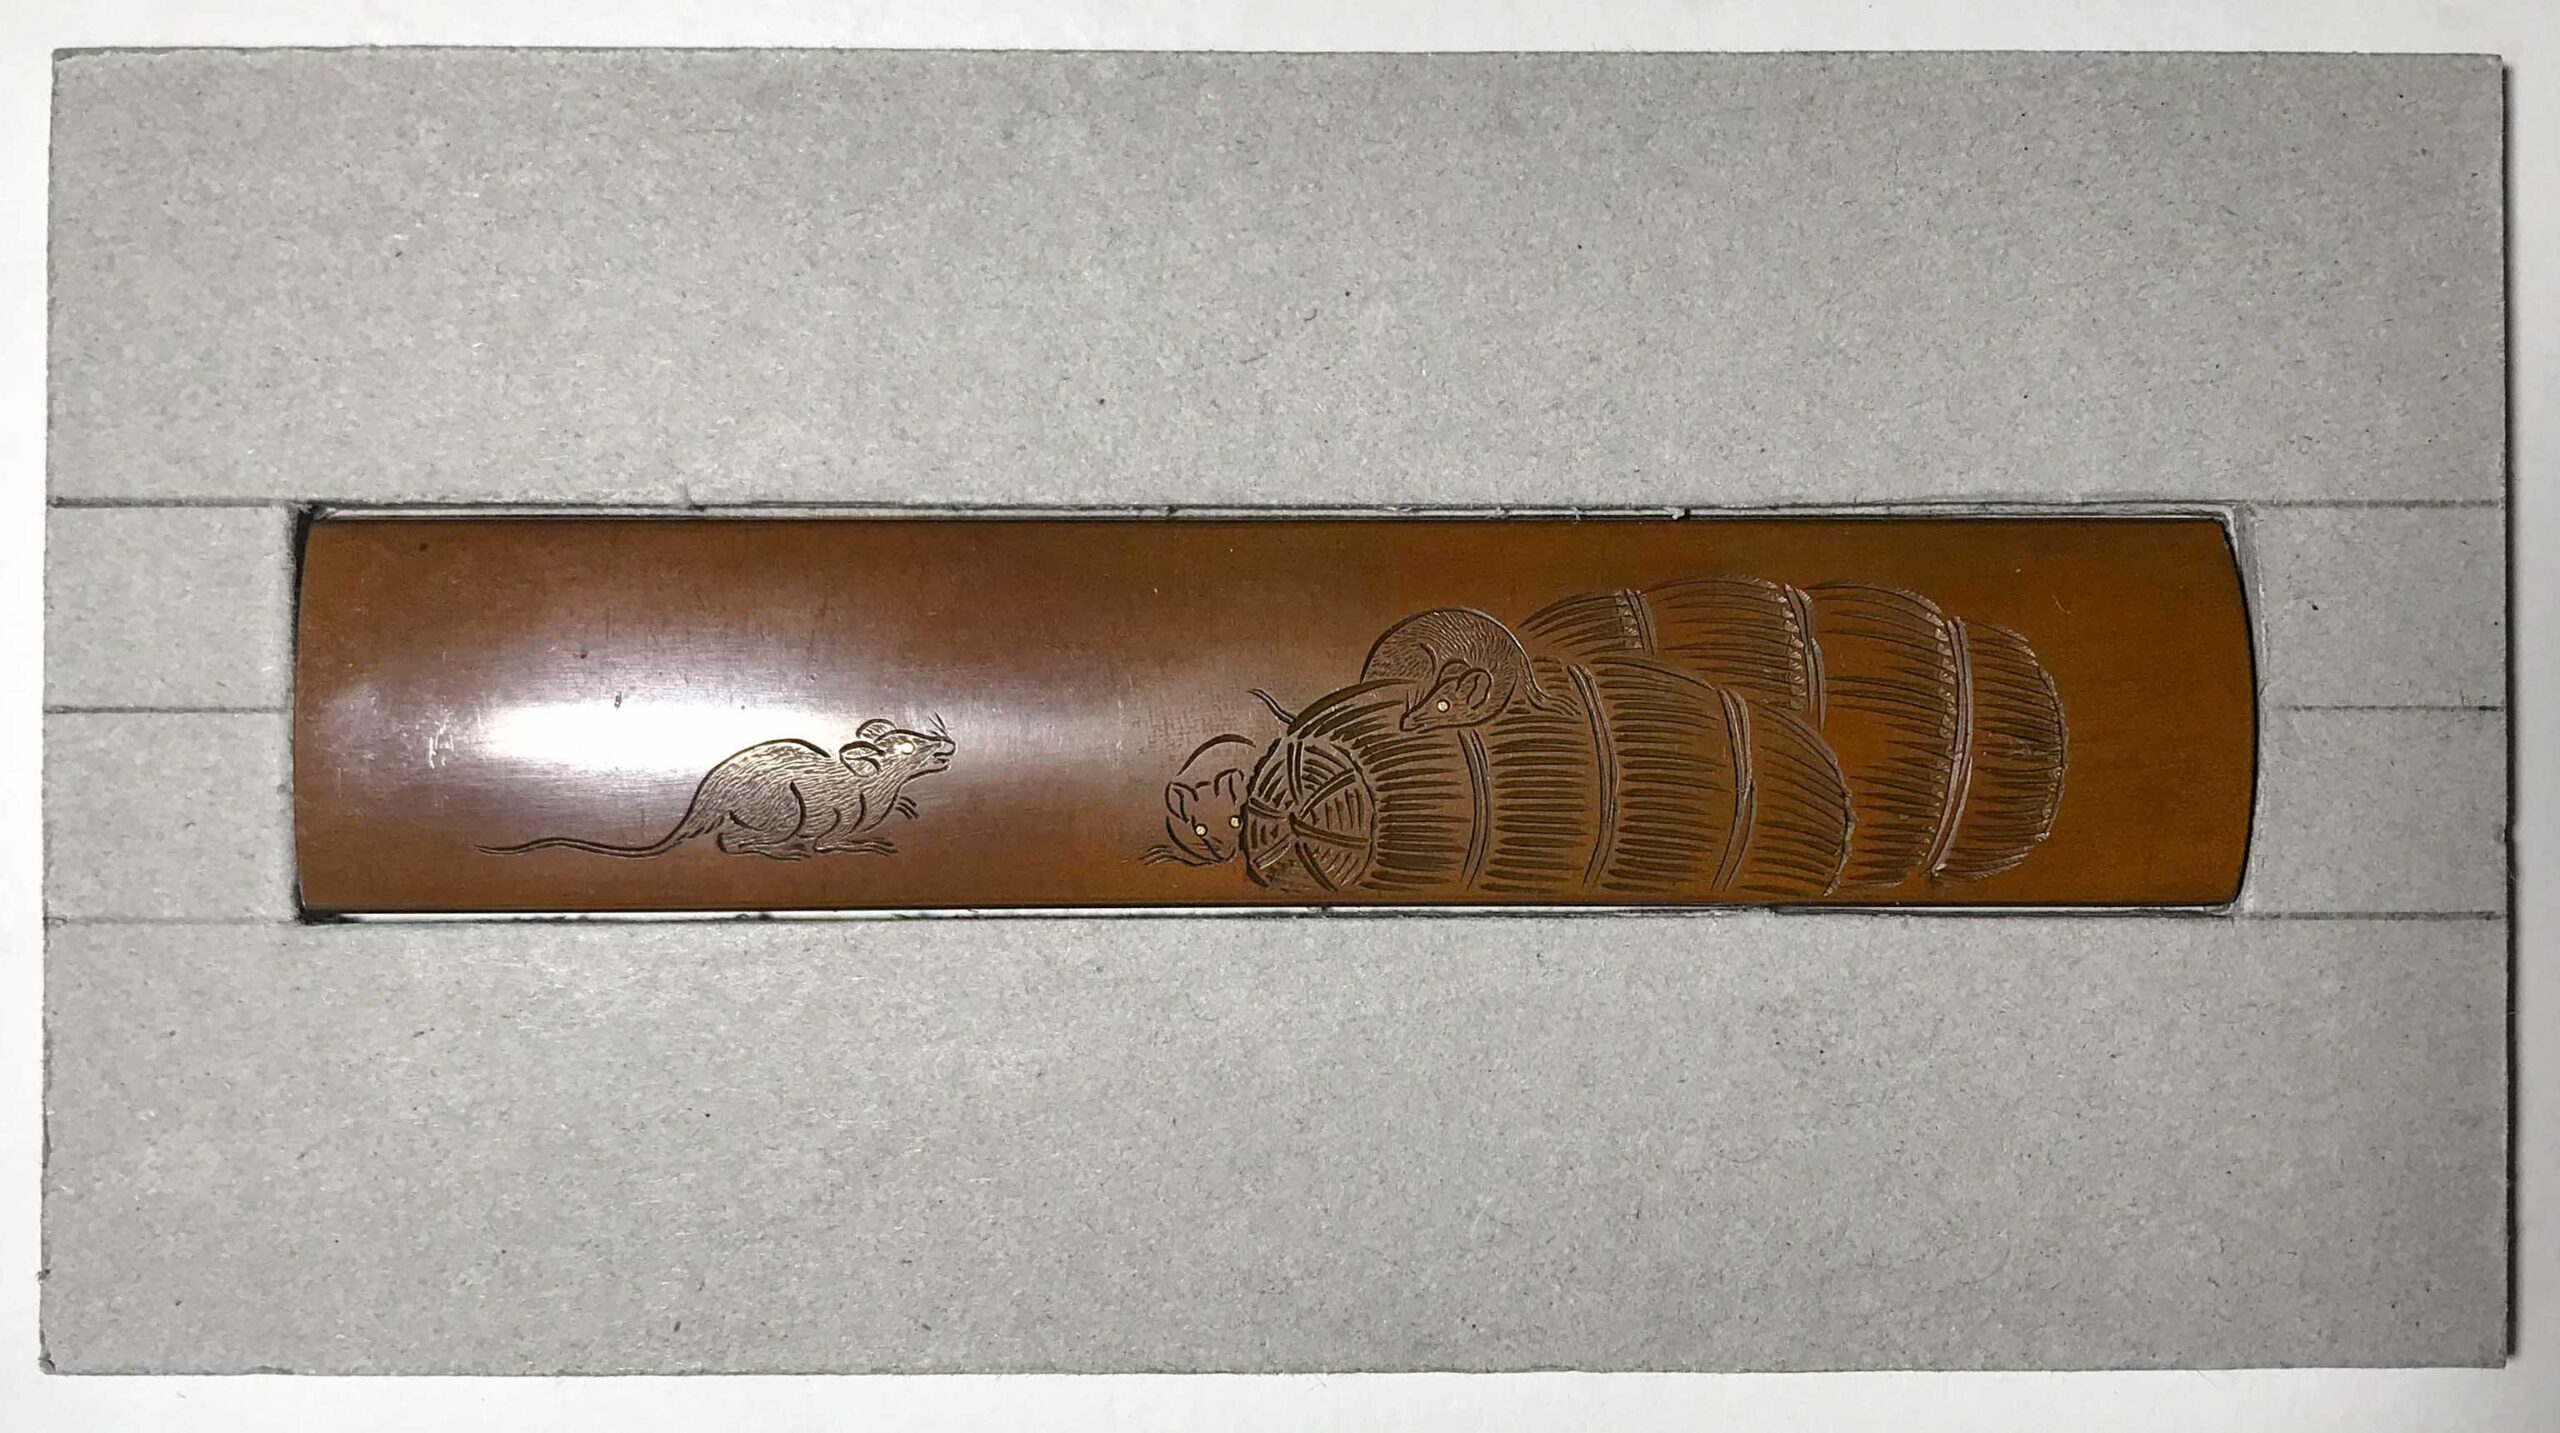
Now everything left to do is to turn around your new custom made Dai and have your Kozuka slip into the perfectly matching slot. Let it slowly slide into the box and enjoy the view!
Apply the silk parallel to the Dai
Press the silk gently down
Work slowly around the edges
Repeat carefully until the silk sticks to the ground
Use a pointed stick to push the silk into the edges
Use a pointed stick to push the silk into the edges
When the glue is dry pull down the silk carefully
Apply glue on the back horizontally
Pull and press down the silk at the edges
Avoid wrinkles on the front
Cut the silk like this
Fold in overlaying silk
Glue and pull the silk down
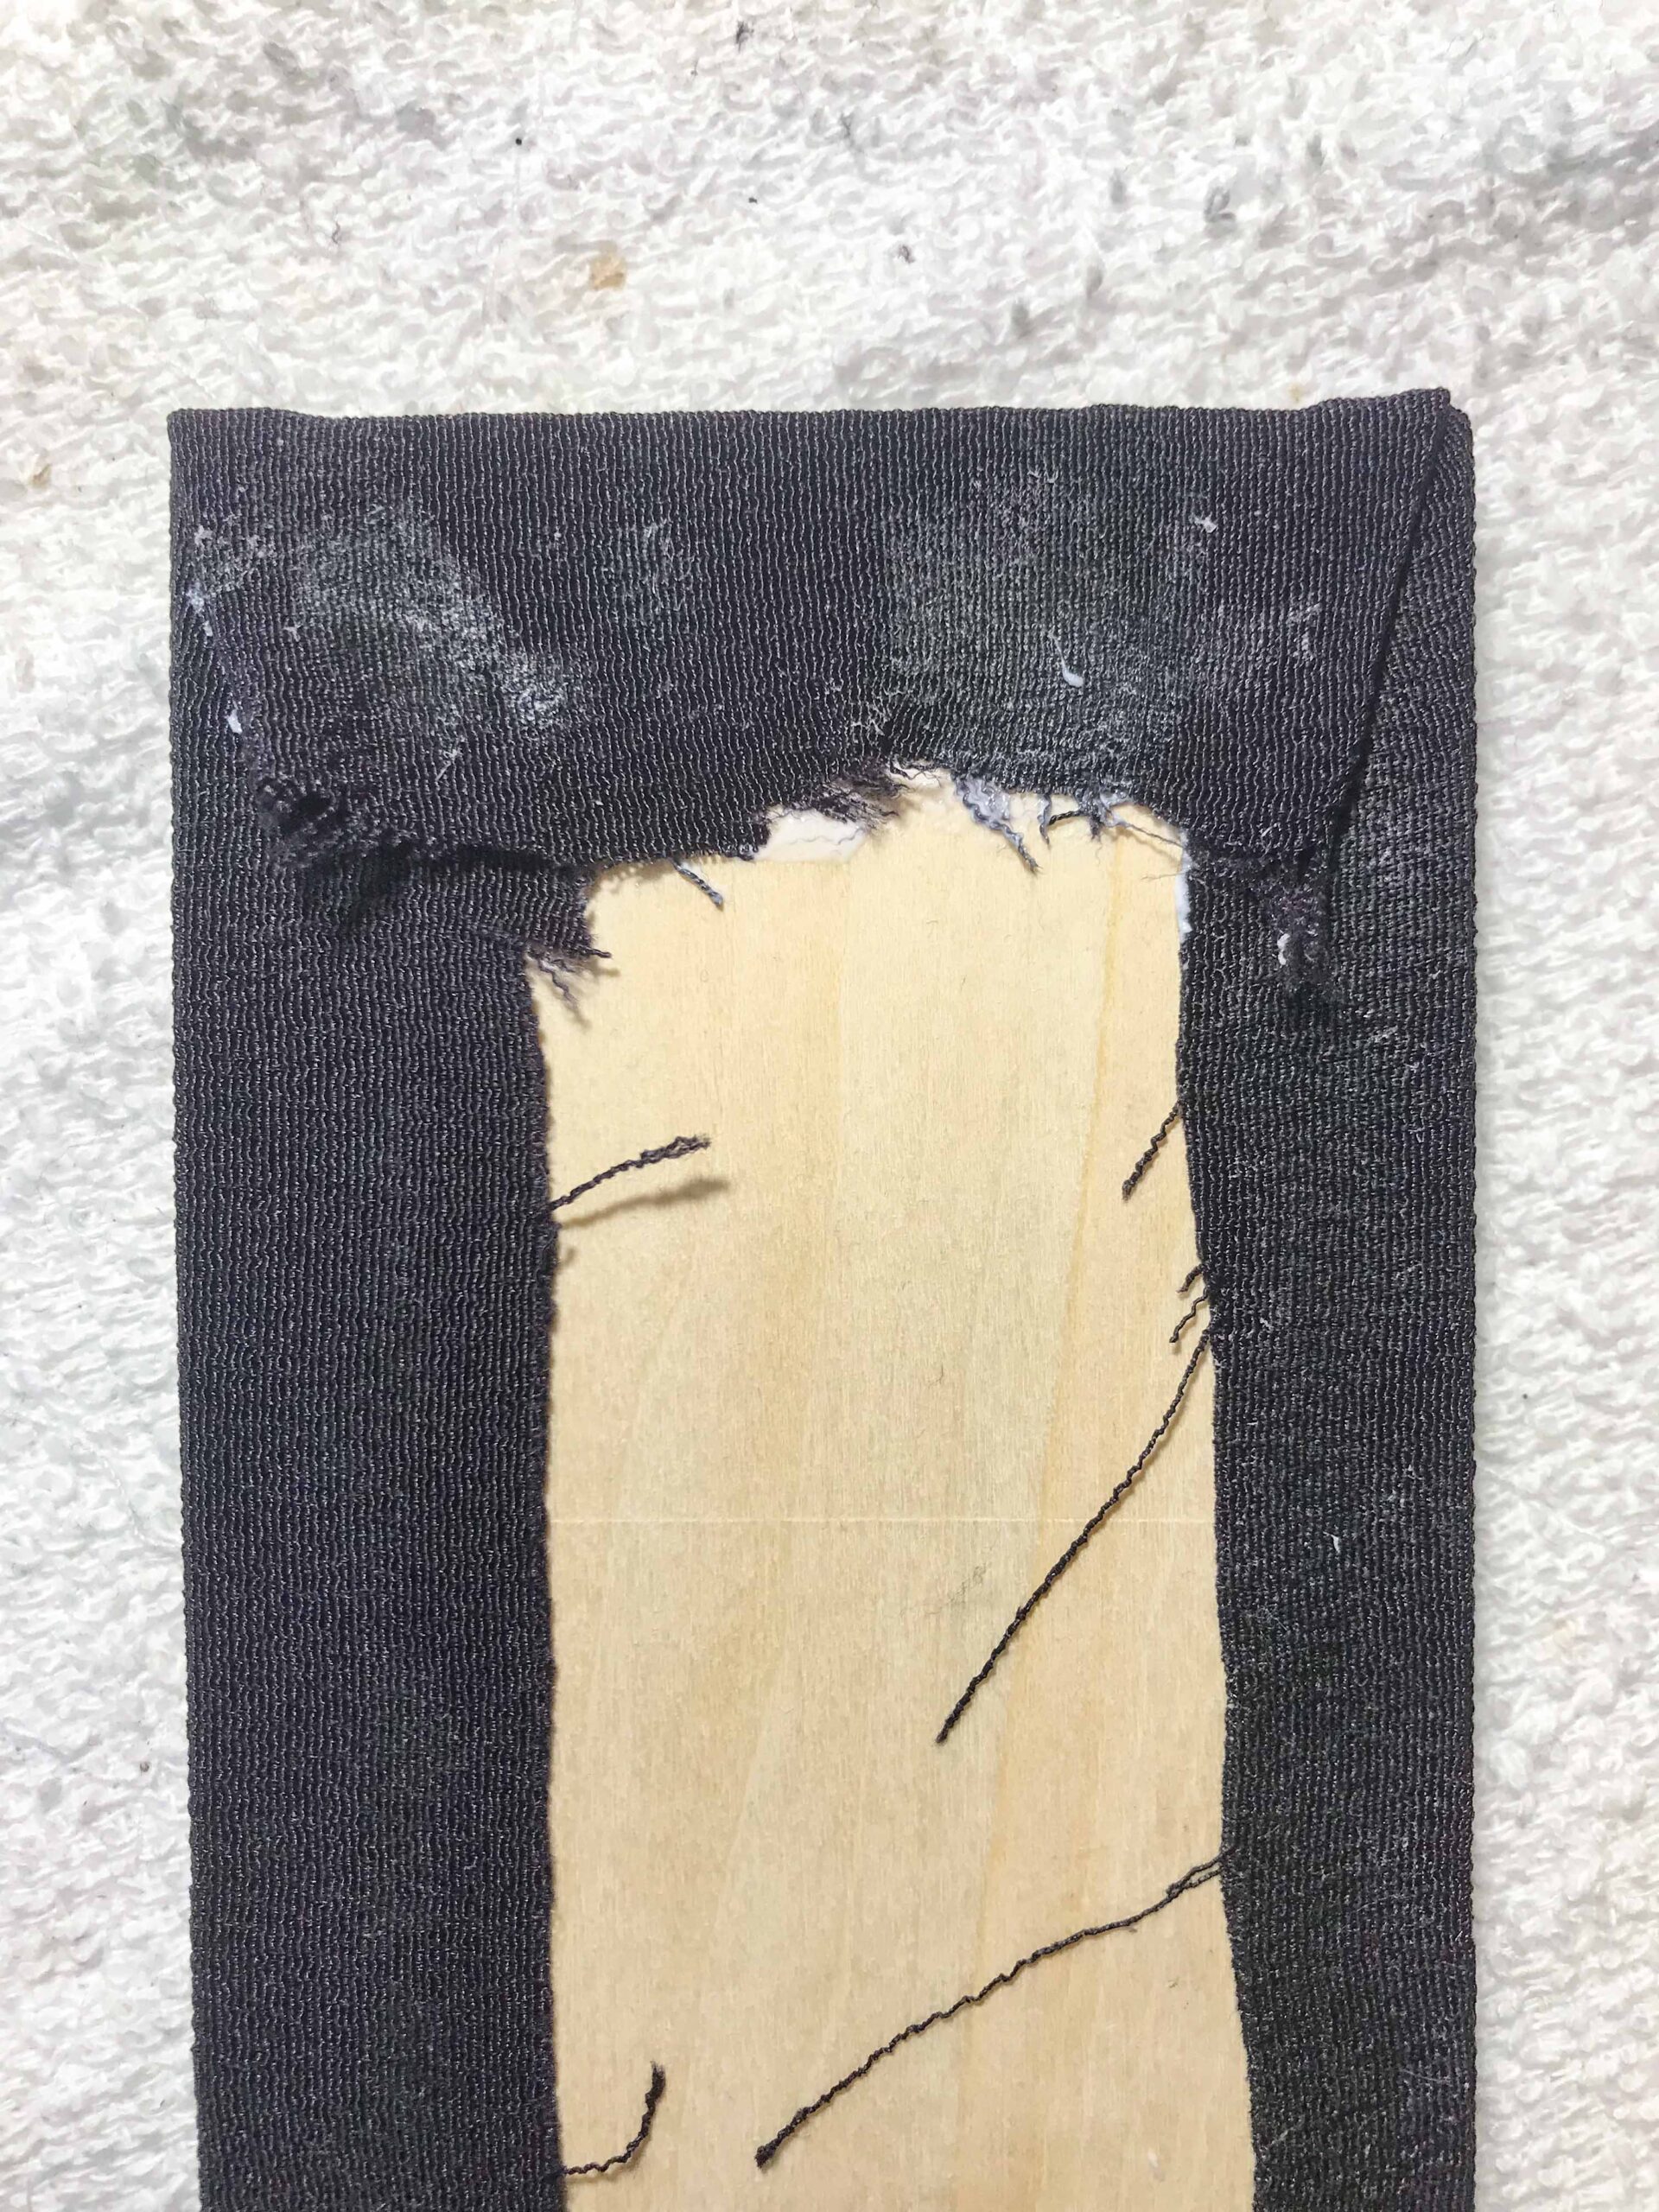
This is how it looks like if the glue soaks through
Cut a piece of Japanese paper
Apply the paper to the back
Congratulations!
You have build your first custom Dai. At the beginning the details of this process might be a bit overwhelming, but with time and practice it becomes quite a nice and relaxing activity.
If you like this content and want to learn more, please let us know. We are happy to support you with our experience.